| | | Baselining - 369 HBF - 860871 - Before the Upgrades |  |
| | |
| Author | Message |
|---|
Car-Nut
Admin

Posts : 3004
Join date : 2009-11-16
Age : 57
Location : E. Lancashire : UK
 |  Subject: Baselining - 369 HBF - 860871 - Before the Upgrades Subject: Baselining - 369 HBF - 860871 - Before the Upgrades  Thu Nov 19, 2009 7:26 am Thu Nov 19, 2009 7:26 am | |
| Please be warned the first 4 pages are very picture Heavy and may take a couple of minutes to download depending on your type of internet connection and speed you have at your location.
This topic is now LIVE and replies may now be left  Sat Jul 18 2009 Sat Jul 18 2009So finally I have my E at home all ready to be pampered, driven and admired. I acquired it with 7470 miles on the clock. Bit of History on the car in case I didn’t mention it, it’s a S1 3.8 FHC ( Simply The Best)  Carmen Red with Biscuit Interior In a previous life it was Opalescent Silver Blue. Its car no 860871 so it’s the 871st RHD FHC E Type produced after the prototype. It was restored in late 70s and finished 1980 I will get some pics up from the restoration. Any way a few quick  from this evening  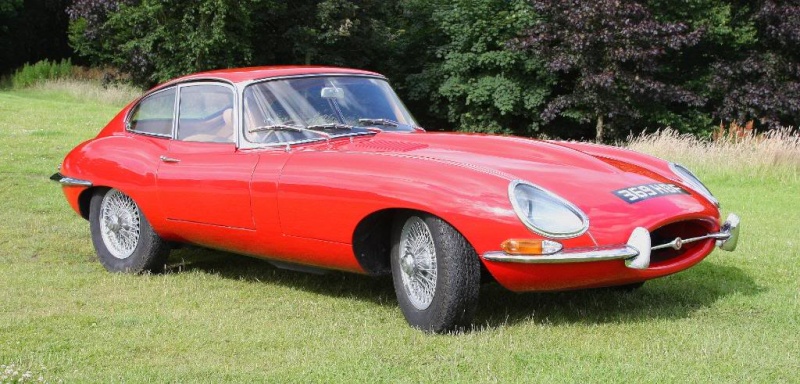 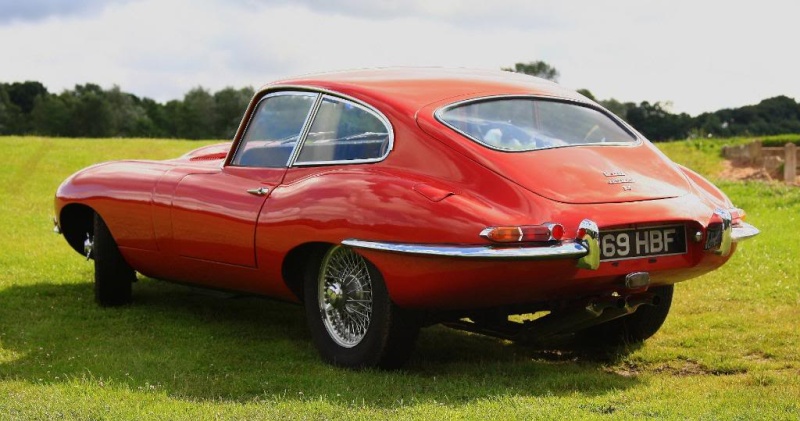 It was amazing I took these on some longish grass at the edge of a cricket ground near me and as I was setting up my tripod for my camera & this ethnic lad walked from his car in the car park past me and said "lovely car you have there Sir “Not often you get that from a 20 yr old lad in the street is it “ Last picture trying the garage (all hoovered) for size.... It may going in snuggly but this is where I have to work on it as well.   As you can see she fits in like a glove The front over rider is a bit of a mess on the left, I think it will be replaced or get the whole front chrome (bumper, over riders, grill piece) re-chromed Sun Jul 19 2009Well, there was one unhappy bunny in my house this morning Went to the car and the headlamps were on and it didn’t matter what I did the they wouldn’t turn off plus a flat battery... So opened the dash and had a look  It turned out that the horn fuse had been put next to the headlight fuse and not in its correct clip once the horn fuse was in the right place all was fine except a flat battery. Put the fuses right and the dash back and nearly ready to go. Charged the flat battery and all was fine. Why the battery was charging cleaned out my spare wheel well and checked what was it there:- 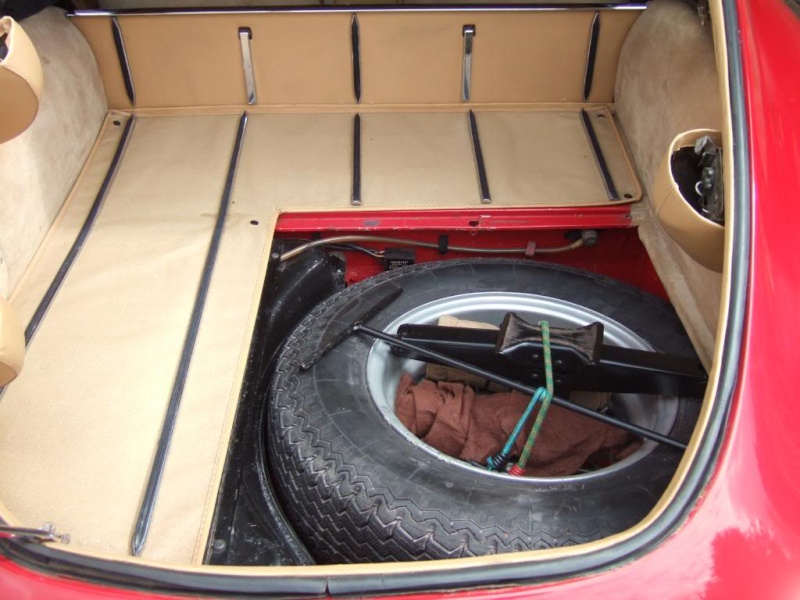 After a clean:-  My tool kit is not the vintage sort but more usefull  After going for a ride over to some family I thought Id have a go at greasing nipples and checking things out. 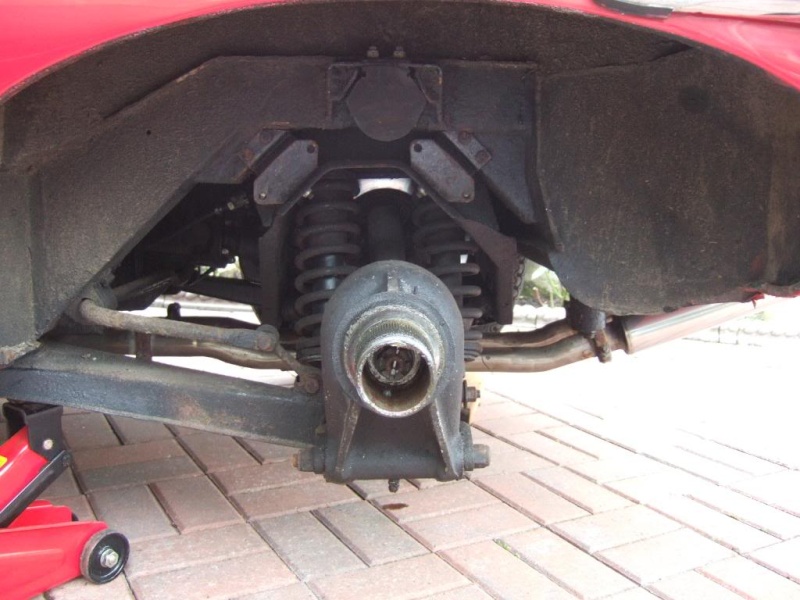 So, greased all the nipples things seemed fine. The rubber on the Radius arm looks a bit perished a job for the to do list Had a look at the discs and the they were completley flat they don’t look like they've been used I wonder whether the car has done 7.4K mile since restore like the bloke told me Gave the wheels a bit of a clean as they were a bit yucky didn’t waste to much time as they will be going the rubber does look old .... Need to look to see how to check age of tyres. Check this link, to check yours. Page 1 http://www.carbibles.com/tyre_bible.htmlBefore 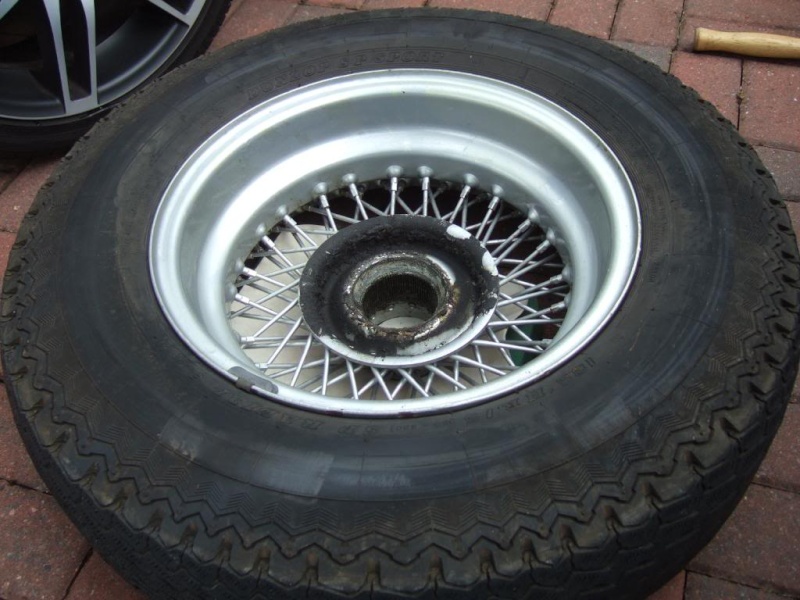 After  Did the other side  Also noticed the rubber in the radius arm needed replacing both sides 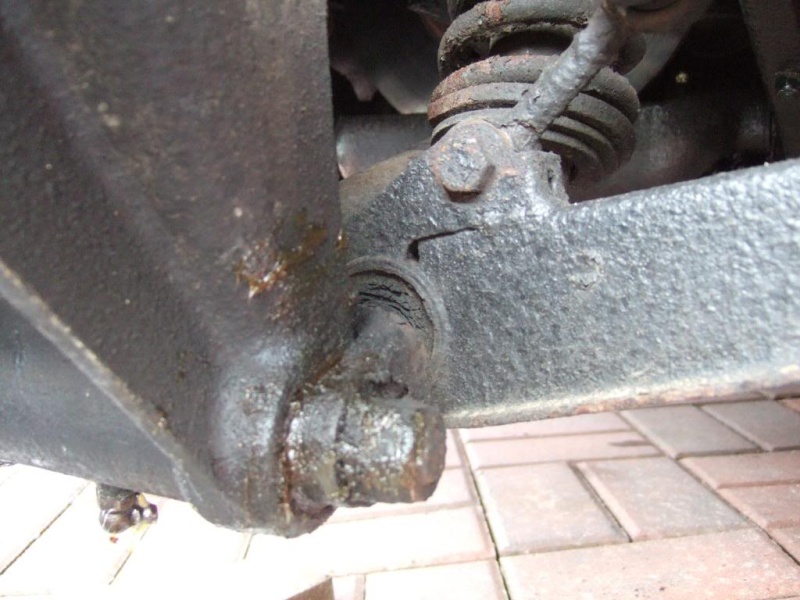 One thing I found, well I didn’t need to look far, was this little plaque under the bonnet on the engine. Nice little touch  Mon Jul 20, 2009 On searching on the MOT website to see if the car had any advisories it wasn’t MOT'd last year but was 2007. Between 2007 and 2009 the car did 45miles my test drive is included in that. Fluid changes are on my list the guy I bought it off did me an oil and filter change the Tuesday before I collected it and all the side window rubbers were changed. Saved me a tricky job. I have been noting all the exterior rubbers are perishing Rad drain is also on the list, I love the little drain taps Never used Water wetter before so did a bit of research in case anyones interested http://www.redlineoil.com/products_coolant.asp Plus a little demo video on the page Re the chrome I would like to keep the original parts and re chrome instead of buying copies that don’t fit, think I'll be making reference to Chris Rourkes project in the club magazine a bit I cant think why anyone would want to paint one of there over riders silver Id just leave it showing the rust. After a brake inspection - Front discs have a mm lip on them, but the rears are still flat like new. So obviously need a good bleed. Anyway my plan is tackle one job at a time and work through everything as time and money allows. Enjoying it in the meantime With the tyres looking very old and the brakes only half working  the these were my " Top Priority".
Last edited by Car-Nut on Wed Jun 29, 2011 5:44 am; edited 29 times in total | |
| | | | Car-Nut
Admin
Posts : 3004
Join date : 2009-11-16
Age : 57
Location : E. Lancashire : UK
| | Subject: Re: Baselining - 369 HBF - 860871 - Before the Upgrades Tue Nov 24, 2009 8:57 am | |
| Page 2Mon Jul 20, 2009I think I've just found my first big purchase my tyre code is Code was - DOT K AB1 130 I was going to upgrade to 205 profile tyres but so many people advised me not to as they would make the steering heavy I was advised these tyres could be from the 13th week 1970, 1980 or 1990. As the treads all had cracks between them they had to go quickly The car was rebuilt '78-80, I spoke to R N Uptons today and Dick had retired , the new owner remembered the car but couldn't supply a list of what was done he said the car was a good solid car. Also John Light who financed the restore was a multi millionaire so no expense was spared, which is good to hear still don't know when/ if the tyres were put on at restore though  As the tyres were very old peole said dont drive the car to Bawtry when getting them changed. I sorted a business meeting in North Yorkshire and would drop to South Yorkshire afterwards.  Wed Jul 22, 2009 Wed Jul 22, 2009I was also advised to check the flexible high pressure hoses so will check location in my Haynes manual (at this stage everything is new to me) then check them out. I have A Nother order coming out as my Cigar lighter was out of stock. Indicator seals are here ready to go on I will be checking the rear calipers fortunatly theres are an article on seized brakes in the car club magazine this month. Another new experience never bled brakes before.  Talking about the car club, will be getting my monies worth this year with my tyre discount. On to tyres in a minute. Think I will be getting one of these to Knock-off Spinner tools: http://knockoffspinnertool.com/home The amount my wheels are coming off its gonna make life easier Right. Tyres, I spoke to the man I have been referred to on many occasions yesterday. I dont mean to upset anyone here with Wider Wheels, Vredestein or anything else Im going to talk negative about. So, I ring Longstone yesterday and speak to Dougal, tell him the car Ive bought and that I wanted a set of Vredestein the guy nearly has a heart attack, what do you want to put those awfull tyres on your car for I explain future plans upgrading to chrome wires and wider wheels but didnt want to do it all at once so wanted cheap tyres then would keep these as spare\ winter driving wheels. He advised:- 1) Vredestein - Ugly tyre, tread pattern awful, terrible grip and he went on a bit more but I couldnt keep up with readable writting. 2) Wider Wheels - They are heavier will ruin the handling meant for cars with power steering, more tracking, pick up uneven parts of the road more,l et go more violently, re grip more violently. So I am now against that tyre and Im also going to keep the car on standrd width wheels. So I then asked for advice on which Tyres to fit:- 1) Dunlop SP Sport £159+ 2) Michelin XVS £219+ 3) Michelin XVP I thin k these were £5 cheaper Anyway, as we know these were the Supercar of 1961 In my eyes we havent bought these cars to do 30 around town and we havent bought them to thrash like boy racers but the rubber your car is shod with is very important as thats the only thing between you and the ground so there should be no compromise. Because if you brake and your tyres dont grip  I appreciate you also need your bakes to work properly - Guys Im working on it Needless to say I have chosen the XVS over the lower speed rating XVP. So £219 a corner tyre, £10 Michelin Tube, £3 Wheel Strap X 5 Free fitting and balancing and when I get my Chromes Free transfere on to them Plus a negotiated Discount August 18th will be an Expensive day But I believe worth it 5 new tyres with brilliant grip I was advised by a thread contributor " As far as tyre size is conerned, that is a very personal choice. All I can tell you is that my car had when I bought it ands test drove it, wider tyres . When I switched to standard tyres, me personnally it was like going from a "truck" like experience
(Ok,ok I am exagerating a bit here to a "gazelle" one).
It really is fun to drive and , for me, that is what it is all about.
You will not regret it, I am sure" I can only pass on advice given.  | |
| | | | Car-Nut
Admin
Posts : 3004
Join date : 2009-11-16
Age : 57
Location : E. Lancashire : UK
| | Subject: Re: Baselining - 369 HBF - 860871 - Before the Upgrades Tue Nov 24, 2009 9:37 am | |
| Page 3Jul 22, 2009Gear Knob Seem to having a bit of problem with my gear knob The one on the car is personalised to the guy who restored the cat he had one with a silver hallmark and the top piece with his initials engraved .... No problem really. But I want the correct one with numbers Ive order one of ebay and sent it back and now my one from SNG doesnt fit they only have a threaded piece in the knob which is 1\2" long and the thread at the top of the gear shaft is 1" long Is it ok to cut the shaft will the thread from the knob still screw on Dont want to mess it up  Knock off Spinner Tool Knock off Spinner Tool I know I've read a couple of you at least have this tool. Are they only available from SR manufacturing PO Box 477 Cotati CA. 94931 Sarto477@yahoo.com 707-481-6700 Gear Knob Solution"There is a chrome locking nut for the gear lever? It is about 1/2" long with a couple of flats - it goes on the lever first and then you screw the knob on. The nut allows you to lock the gear knob in the correct orientation and stops it moving with use. "Rubber Seals Replaced a seal today the one that was on the frame running round the shape of the body where the door closes on to. Took the old off loads of old dry messy glue, used white spirit to remove this still didnt come off that easily, what do you guys use  Not that its importand but when fetteling yesterday I notice where you release the boot the lever piece is fine but the cup shaped piece of metal it sits in was rusty SNG are saying these are unobtainable.... Any of you guys who've done a restore sourced one from anywhere else Ordered new pipes and clips ready for the fluid change. Big day next saturday for my car, my wifes doing a surgery so Ive got a whole day tinkering 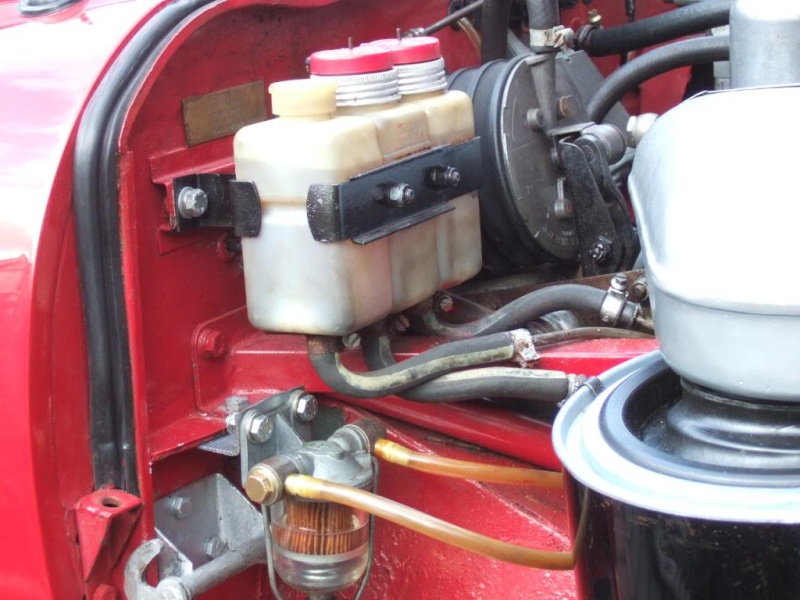 Some engine pics 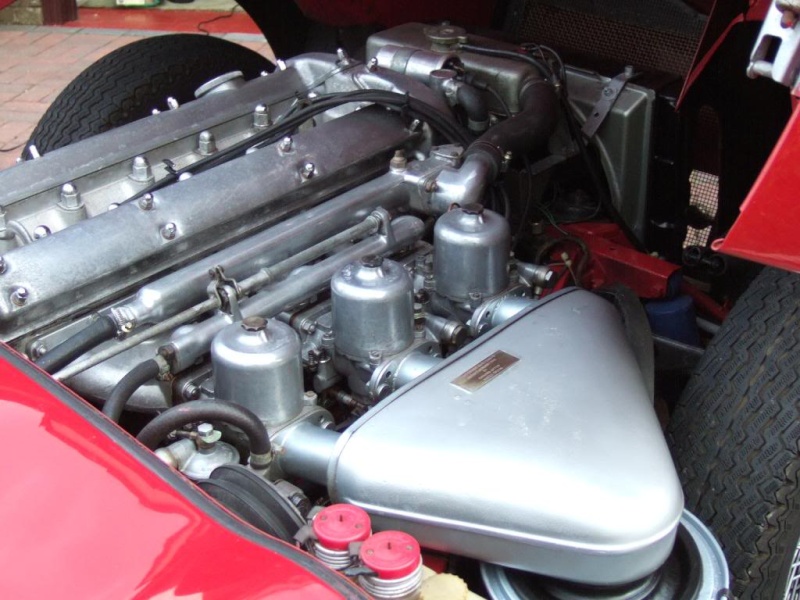 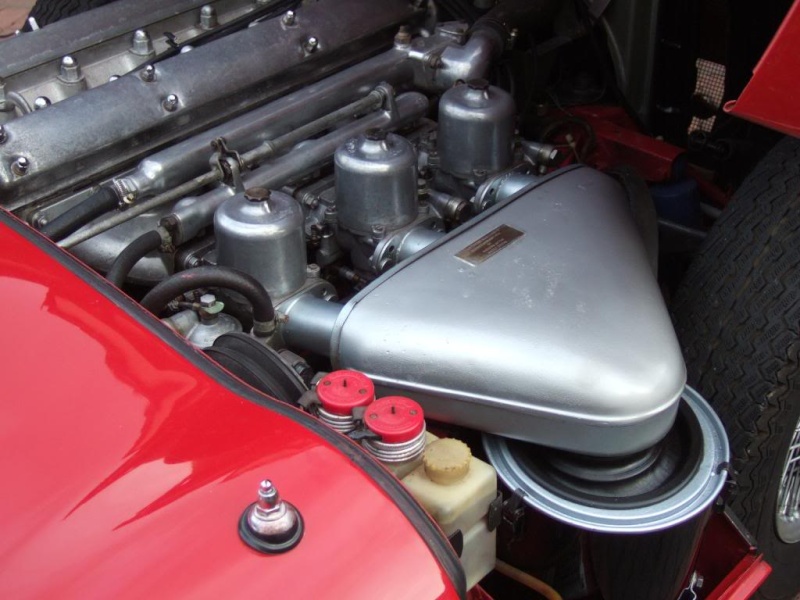 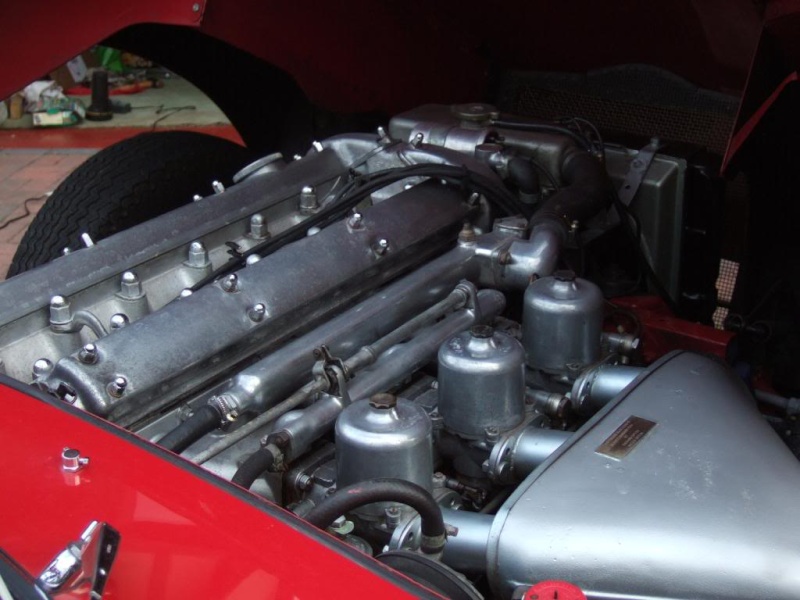 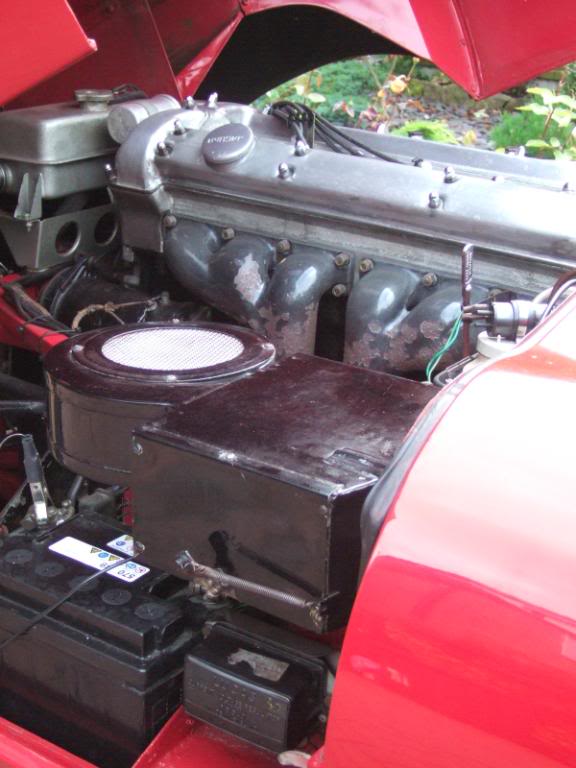   One of the tyre codes, must of been painted on the wheels, well look at my restore thread it was....  Hardley any paint off the manifold but not sure what mileage its done since restore the last owner told me the clock was 0000 but I dont think that looks like 7600miles of use. Rubber pipes look good in the engine one less thing to buy this year. Some comments after posting the engine " Those cam covers and SU pots will easily polish up with Solvol Autosolve and a bit of elbow grease - no need to bother with the wet and dry. You can take the dash pots off (one at a time, four screws) to make the job easier.
The manifolds usually last 3,000 miles before the finish starts to flake off , exacerbated by driving in the rain. Brake and water rushes over the bonnet, down the louvres and onto the hot manifold causuing the ceramic to crack. No one has come up with a satisfactory solution as far as I am aware. " Just going onto 3.8 & 4.2 differences - Christ its so much easier to take the bumpers off a 4.2. For the rear Ive got to take the fuel tank out to do one side (change seals) " Looking good, Clive. If it makes you feel better, my (early) 4.2 has the same arrangement with the rear bumpers, and getting the tank in and out is not an easy task.
Have you got a copy of 'Original E Type' by Phillip Porter? Worth getting a copy if you want to go original under the bonnet. For example, you need brass-top dampers in the SUs, and a glass washer bottle! And of course, the original tool kit, which for the 3.8, is a very neat box that fits inside the spare wheel...same as a Mk 2 Jag I think, so not hard to get hold of.
You're going to have a lot of fun over the coming months, especially with gits like me pointing out what's original and what's not!!"Lots of bits to be looking out for.... It looks like you guys will be helping me spend plenty of money over the first year "Only the very early cars used the tool box (and even that is under dispute!). I think you will find the tool roll would have been supplied with this car." | |
| | | | Car-Nut
Admin
Posts : 3004
Join date : 2009-11-16
Age : 57
Location : E. Lancashire : UK
| | Subject: Re: Baselining - 369 HBF - 860871 - Before the Upgrades Wed Nov 25, 2009 4:02 am | |
| Page 4Jul 24, 2009Coolant Question Ive been reading the haynes manual and the beige E Type Maintance Book and it says refill system (coolant) after flushing it with recommended mixture but nowhere does it quote the recommended mixture even on the back of the anti freeze Ive bought it says the same What is the correct mixture I did google the mix and it said 50 / 50 or even 60 -70% But looking in the Jaguar Maintance book it says capacity 18liters is that right 32 pts I know it's a big engine  AnswerI always use 50 / 50 Jul 26 2009 AnswerI always use 50 / 50 Jul 26 2009Well I did a bit of tinkering this afternoon. Car had been making a mess and I wanted to know why I mean a leak As I said near the beginning the guy I bought it off did an oil change in the week before I picked it up, it turns out he'd just done the filter bolt, finger tight, or it had worked loose Anyway I got the Air Filter box out and gave it a nice clean at the same time. As the age is unknown..  Air Filter Air FilterAs you can see I took the cover off and the rubber is perished so A Nother list has started .... Getting the rubber so may as well get a filter at the same time Anyway wipped the box out to get good access and tightened the oil filter bolt properly. While on the subject of oil filter I saw in the catalogue spin off oil filters like on modern cars they say there better Best part of £100 enough to make a grown man cry that  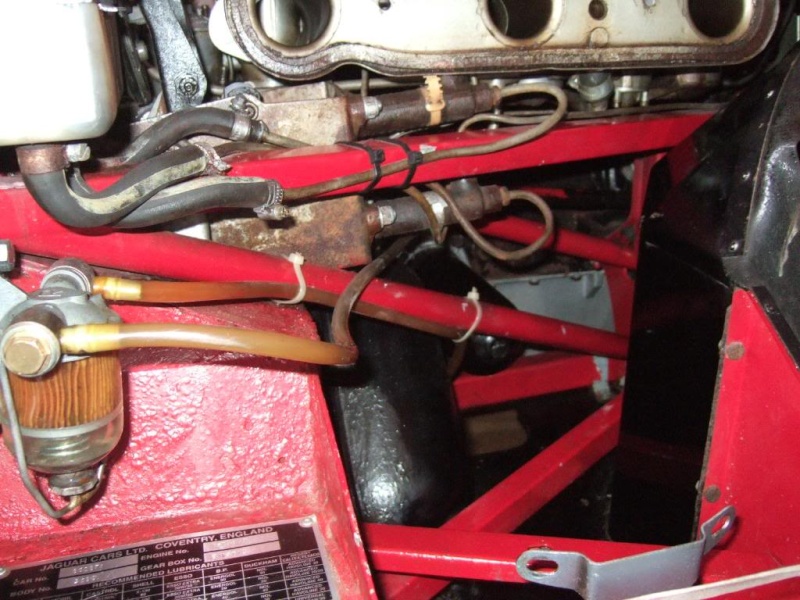 When I'd put it back together my Autosol caught my eye , anyway I gave it a quick poish no Genie came out the top to give me three wishes but it does look a lot better already  Last thing when I veiwed my car the guy lifted the bonnet and it stayed there I cant seem to make it do that is there a knack to it Heres a couple of pics from each side dont know if you can see anything wrong  Then the other side - that is the Horn there near the Rad (Wrong place).  Bonnet Spring SolutionBear in mind that the bonnet stay springs are tensioned when the bonnet is closed, i.e., 99.99% of the time. I'd replace the springs, but ensure that you mark the location of the brackets prior to their removal, and provide padding for the lower bonnet nose to rest on when they are removed.Mon Jul 27 Bonnet Spring SolutionBear in mind that the bonnet stay springs are tensioned when the bonnet is closed, i.e., 99.99% of the time. I'd replace the springs, but ensure that you mark the location of the brackets prior to their removal, and provide padding for the lower bonnet nose to rest on when they are removed.Mon Jul 27Tried to order some brass-top dampers today but there on back on from April Ordered some anyway so hopefully the SU pots will be shinney by the time they arrive Some recommended tools for fluid changesFor oil changes:http://www.uktools.com/mityvac-fluid-evacuator-plus-p-994.html And one of these (albeit the alloy version) for bleeding the brakes: http://www.uktools.com/mv6250-plastic-vacuumpressure-p-11357.html PS: I have never used either but was advised about them  | |
| | | | Car-Nut
Admin
Posts : 3004
Join date : 2009-11-16
Age : 57
Location : E. Lancashire : UK
| | Subject: Re: Baselining - 369 HBF - 860871 - Before the Upgrades Wed Nov 25, 2009 4:35 am | |
| Page 5
Jul 27, 2009Ive got my brass topped dampers on order from £11.69 - no rush for them just a cosmetic improvement, not a must have Name that part In the fixedhead coupe behind the drivers seat is a leaver you pull out to open the tailgate - that sits in like a chrome cup which is screwed to the car, anyone know what its called (the chrome cup)no one knows what I mean when I speak to the suppliers Still couldnt sort the bonnet to stay open tonight Gave everything a good grease and tighten up but no joy, my mop is still in employment Hopefully the 4 x £5 springs will sort it or its to new brackets at just over a £55 a side Part Question - AnswerWith respect to the tail gate "opener" behind the drivers seat, I believe the right word they use is chrome "escutcheon". Try that one, I believe they will understand you. It is however not always on stock.Jul 28, 2009Springs etc arrived today... So I sourced some Steel metal pins on Tinternet and hopefully they'll be here for the wkd Air Filter After tightening the Oil Filter and checking my Air Filter whilst doing this I realised More Parts needed replacing. So off with the Air Intake Assembly and the Air filter casing and changed the Air Filter - just slightly dirty looks like it been on since the restore..... 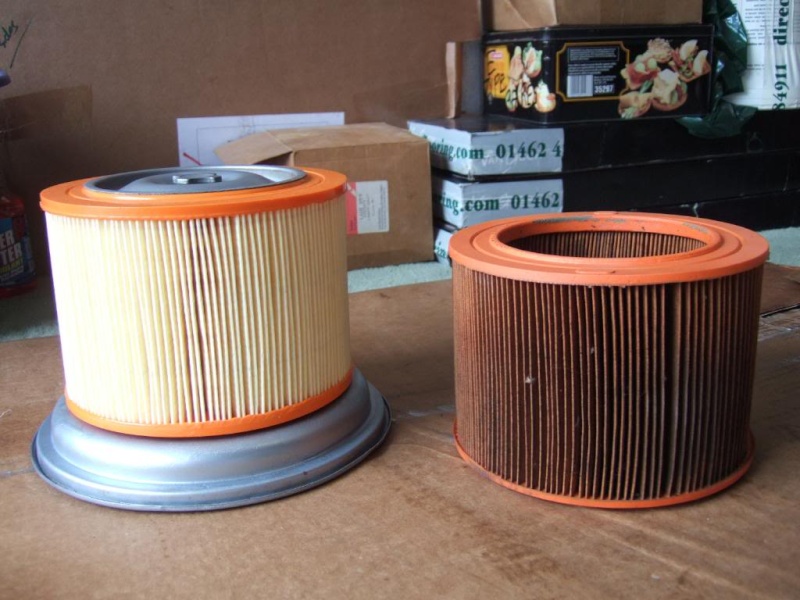 Then swapped out the perished Seal  Finally got my correct Gear Knob on as well sitting on the new collar Hopefully my Cigar Lighter should be here Friday and my dash will be sorted  AdviceDo not want to worry you Clive but having witnessed the state of the air filter seal please be circumspect over all rubber parts on the car. They make look OK but ..... AdviceDo not want to worry you Clive but having witnessed the state of the air filter seal please be circumspect over all rubber parts on the car. They make look OK but .....
I know you are focusing on brakes and tyres as a priority but the next step may be to change the cooling system hoses? Go for the cotton reinforced rubber ones (not Kevlar).Old MOTsLooking through old MOTs this car was driven very little, between 7209miles on MOT '98 - 2000 -2yrs -7 miles. 00 - 02 -2 busy years 70 miles .When I got it 7470. Ive done nearly 200miles in 2wks I bet the car doesnt know whats hit it  Wed Jul 29, 2009 Wed Jul 29, 2009Not much done today... Did the 3K lubrication service and swapped out the perished wiper blades. Hope to flush the coolant system out tommorow, and with a bit of luck if my steel split pins arrive swop the bonnet springs out  Jul 30, 2009SU Carburetter Question Jul 30, 2009SU Carburetter Question Whilst doing the 3K Lubrication Service one of the items to oil was Carburetter linkage. In the Haynes Manual (My New Bible) On P86 Fig 3.13 Exploded veiw of the HD8 Carburetter What are they relating to as this part is it the parts numbered 49 & 50 | |
| | | | Car-Nut
Admin
Posts : 3004
Join date : 2009-11-16
Age : 57
Location : E. Lancashire : UK
| | Subject: Re: Baselining - 369 HBF - 860871 - Before the Upgrades Wed Nov 25, 2009 7:59 am | |
| Page 6
Jul 30, 2009Lubrication ServiceIts amazing what a difference that little service has made locks are so much easier to lock, petrol flap nice and smooth I could go on but you know what I mean. I've always put my cars in to be maintained before I will certainly have ago in the future just send it in for the larger jobs, really enjoying the hands on stuff. So it was a sunny afternoon in E. Lancashire so out I went to do some jobs First of all my wierd bonnet, I have worked on my car on the flat in the garage and pointing up on the drive and the bonnet has never stayed up I opened it up pointing down on the drive and it felt different whilst opening it, armed with the mop ready to prop it and it didnt need it Anyway checked out the 2 drain taps (I had given them a good squirt of WD40 at lunchtime) neither were gonna open, no wonder with one of them the tap was broken off. So I loosened them and dropped the car off the block paving drive on to the road. Put the hose in place.  Started the car, heater on hot and took the taps out, I think theyve seen better days and will be replaced  One thing I was happy about was blue antifreeze came out when emptying and flushing as the taps wouldnt open I was expecting some silt So I flushed it all through with the car running for about 10mins till everything was clear  Turned off re plugged, mixed the coolant plus some Water Wetter all filled no leaks happy NB. Wipe all paintwork that antifreeze comes into contact with. I cant imagine how many times Ive paid a garage to do this job , I never will again Next Ive bought some bits to smarten up the back end  Firstly Ive got the seals for the rear lights, light to body, and lamp to light gaskets these looked none existent from the top  Lens moved  Lamp moved  As youd expect I gave it all a good clean put it back together, new bulbs and replaced both seals.  Started to get hungry next, so a gentle test to get all the coolant round the engine before I finnished, well thats my excuse... More goodies to fit tommorow After posting the rear veiw of the car I was advised Low priority - but the rear number plate is the wrong size - it should cover the entire vertical space (including the black rubber plugs - 21" x 7" plate with 3.5" characters | |
| | | | Car-Nut
Admin
Posts : 3004
Join date : 2009-11-16
Age : 57
Location : E. Lancashire : UK
| | Subject: Re: Baselining - 369 HBF - 860871 - Before the Upgrades Wed Nov 25, 2009 8:35 am | |
| Page 7
Jul 31, 2009
Front Number PlatesI bet theres a knack to putting those front stick plates on ReplyYes - you use 'green' window cleaner. Spray on the adhesive side and bonnet and you can slide it around to your satisfaction. Pat dry with a paper towel. As the cleaner evaporates (overnight) the plate sticks firm.But getting the old one off is just a slow process being very carefull it doesnt pull paint with it  Nah - you use your wife's hair dryer. Just play it over the plate until it gets warm or leave the car in the sun for half an hour and gently peel off. Don't try removing it when it is cold though or it will test the quality of your paint job! Nah - you use your wife's hair dryer. Just play it over the plate until it gets warm or leave the car in the sun for half an hour and gently peel off. Don't try removing it when it is cold though or it will test the quality of your paint job!Right did have plans to do a couple of jobs today but ended up on something different completely I was going to grease the nipple on the propeller half shaft UJ and drop the gearbox oil so in the passengers door carpet out seat bottom out, and carpet up on the gearbox cowl   Then seat frame out - No Clive youre not a racing Driver 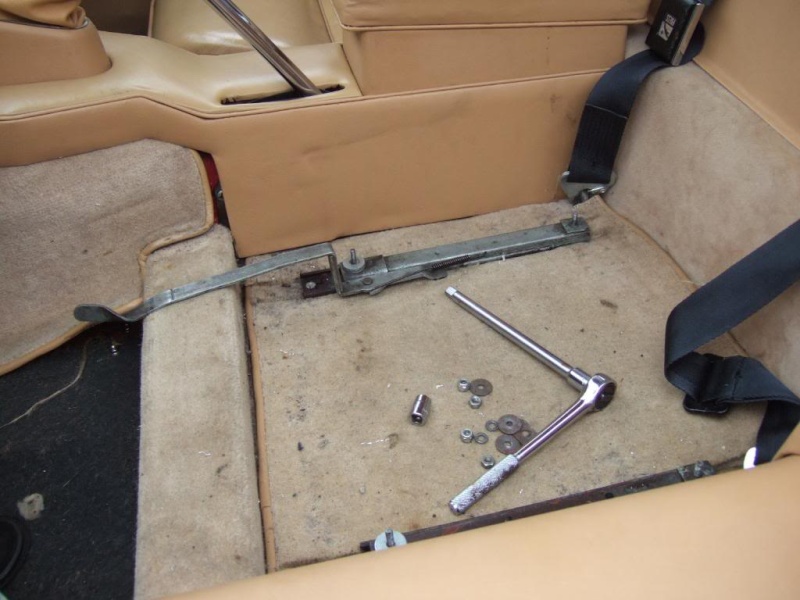 What the heck carpet out, seems like moths have been having a when the cars been stored Looks like new carpets will be a thing for next year... before they go back in I will clean them with Meguiars Carpet cleaner 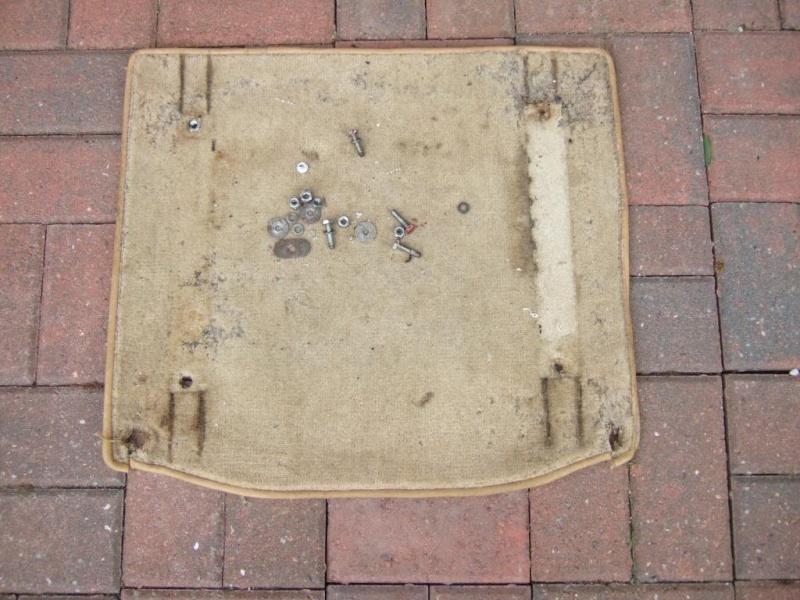 Anyway in the right hole first supposedly theres a nipple in there... Where 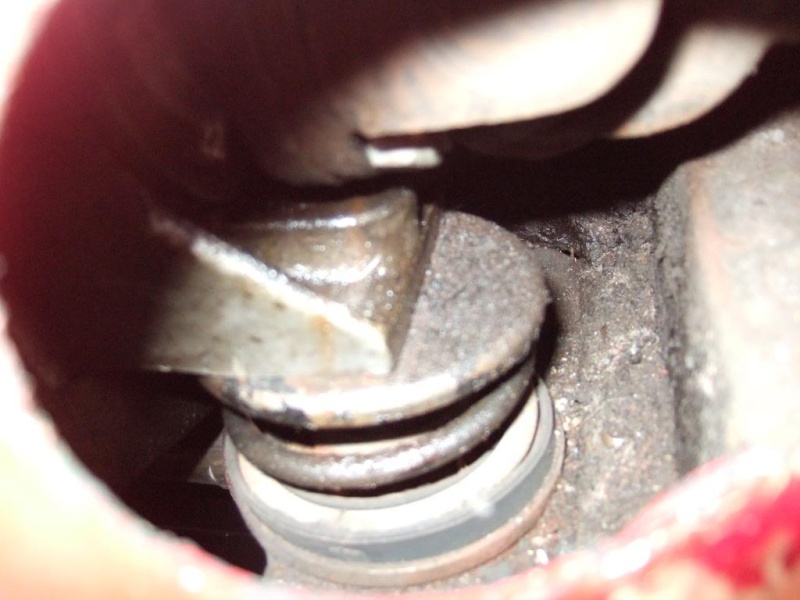 I couldnt feel one for love nor money but it was very dry in there as in not lubricated , not the wet dry if you know what I mean. Anyway got a dollop of the prescribed grease and put it round the dry joint. Will check underneath for the nipple tommorow I know the rear one is accesible underneath. I had checked thes rubber grommets earlier in the week and ordered new 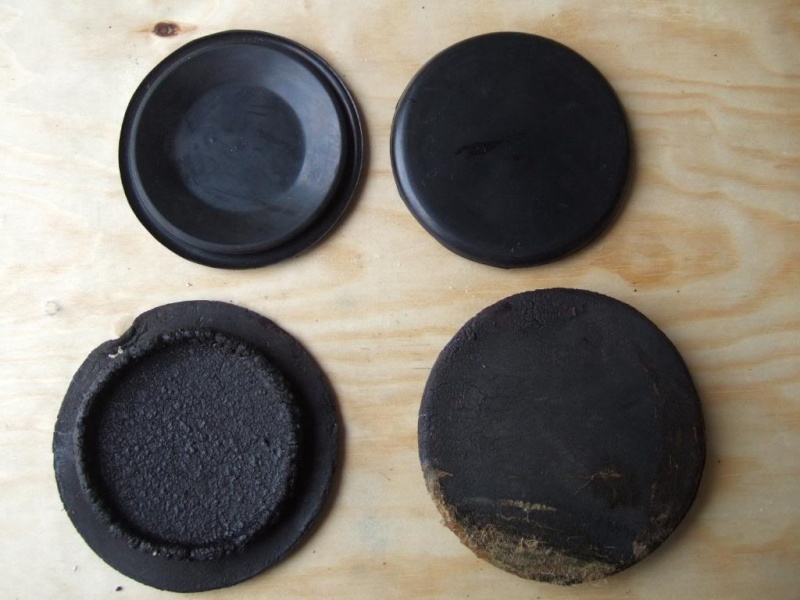 Any way seeing all the dirty biscuit interior was bugging me so I got on to cleaning that. 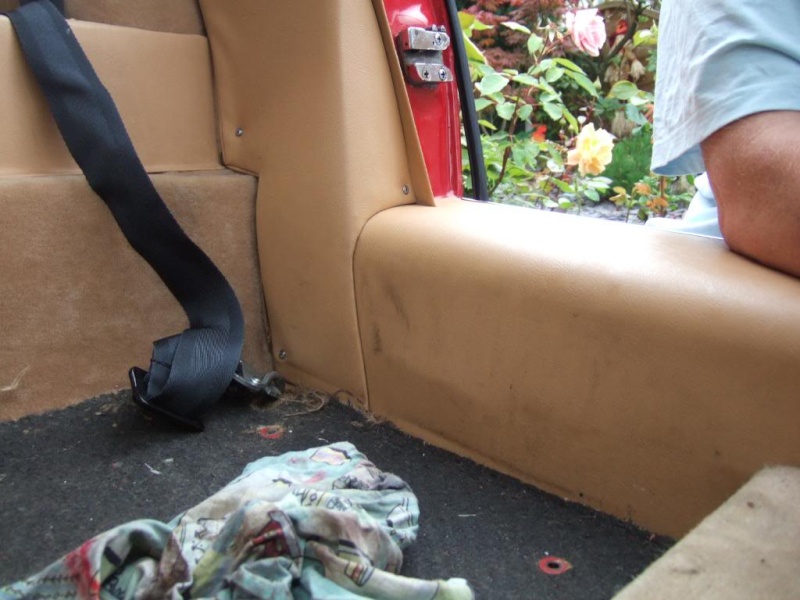 Bit of Liquid Leather Cleaner (LLC) as I had no Bilberry APC so I cleaned all the biscuit door seal and anything else in sight with toothbrush and LLC 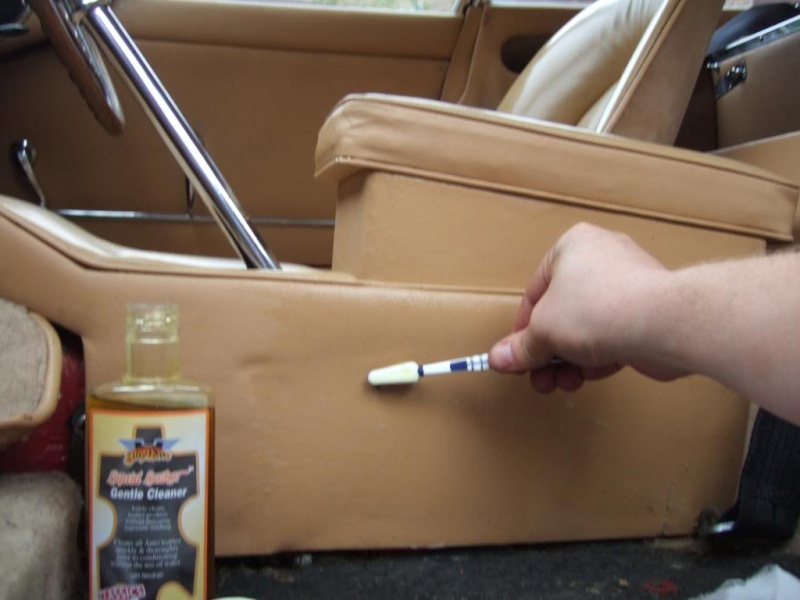 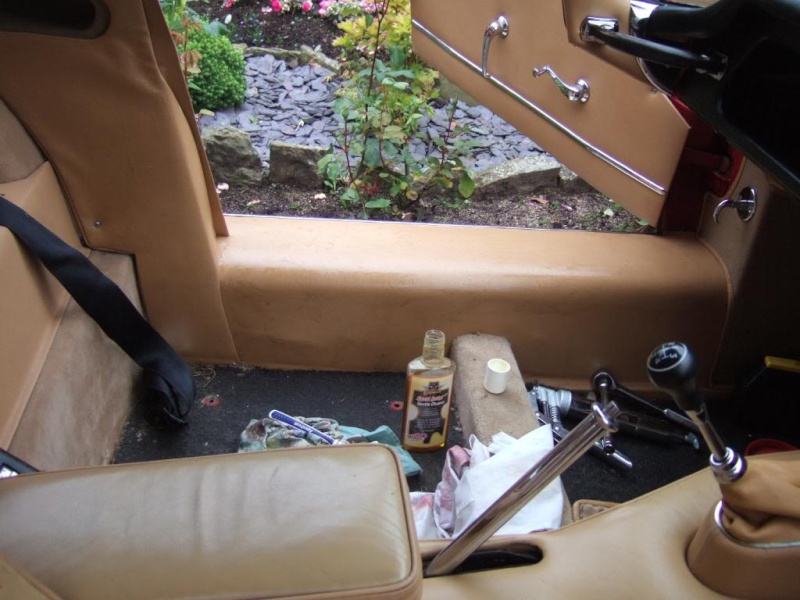 Why everythings out I have marinated the runners overnight in oil - not literally  Then I went in the garage and looked at the base It was calling out clean me  Partly done  Base done main seat left to do After done with LLC I did with LL Coditioner 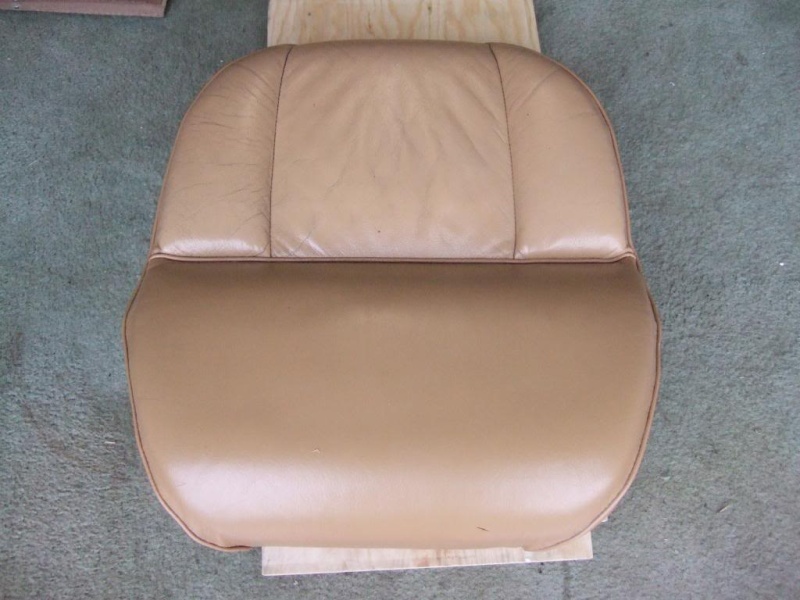 After the cockpit pictures I was advised The material under the seat bases should be hardura not carpet (carpet fluff ruins the runners). Check out this site (click on diagram) so you know what has been done correctly: http://www.jaguar-trim.co.uk/html/jaguar/e_fixed_38.htm | |
| | | | Car-Nut
Admin
Posts : 3004
Join date : 2009-11-16
Age : 57
Location : E. Lancashire : UK
| | Subject: Re: Baselining - 369 HBF - 860871 - Before the Upgrades Thu Nov 26, 2009 8:27 am | |
| Page 8
Aug 01, 2009Started with changing the gearbox oil today I undid the bolt in the hole on the right hand side on the passengers side of the gearbox cowl. Took the bolt out and out oooozed mayonnaise looking stuff. Quickly plugged while I got underneath and got the gearbox sump plug out out.. Swarf anyone.... 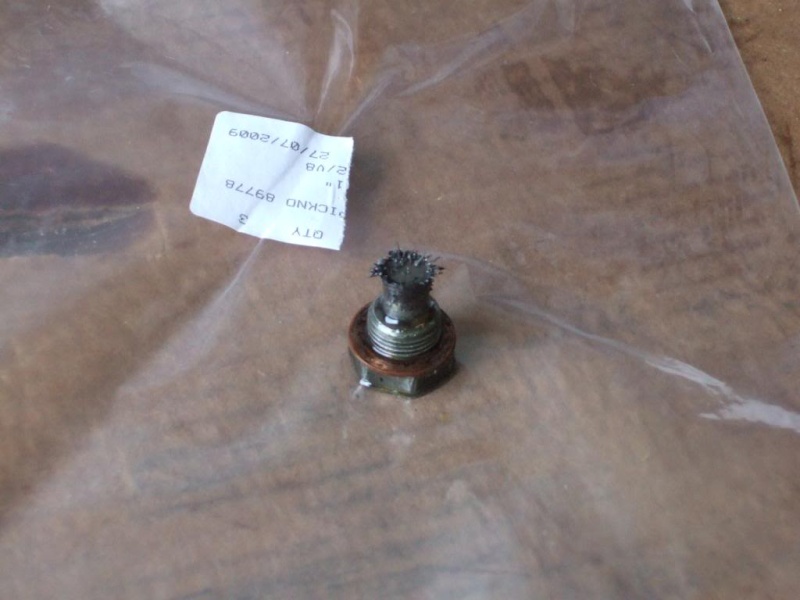 What drained out  Like all these jobs Im doing Ive never done them before and whilst the gunge was draining out I looked at the whole and realized I bought some pipe to fit in there for filling it back up So I cleaned my oil funnel got a length of hose and pinched one my wifes cooking funnels trying to make a little device to fill up the gearbox.  Anyway got the 1.4ish Litres in and sealed it all up new grommet in Sat in the car and tried the gears WOW It felt like a new gear box. Well Happy Next front wheels off to finish greasing my Nipples 5 each side if I remember correctly. No problems finding them One thing for sure EVERY Rubber & Bush will be changed this Winter Check this picture out, not looked up what it is yet but its nearly disintegrated Dont know why but seems someone wanted to paint eveything Red under this car So annoying 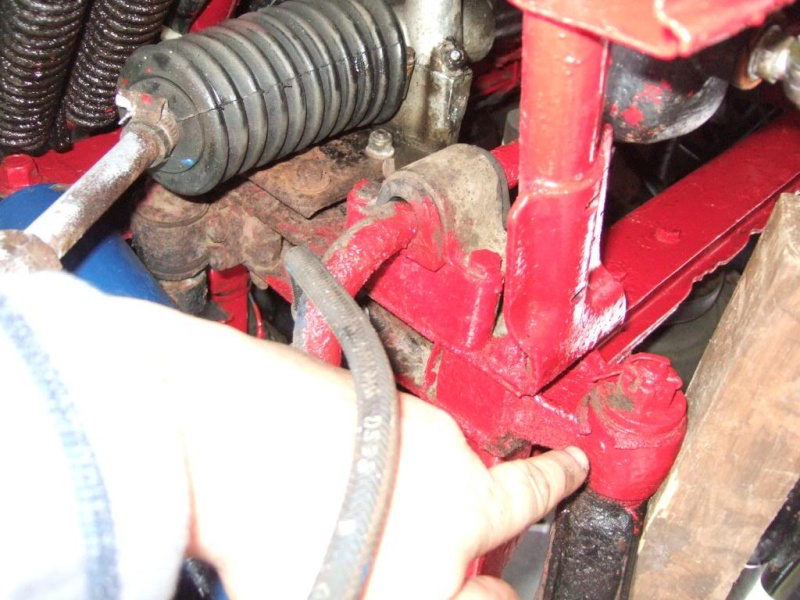 Also this dodgy guard keeps looking at me and say replace me I take it, its a radiator gaurd of some sort  After all the nipples were greased I then got my mate and we bled the front brakes again more mayonaise looking stuff not so thick but it wasnt plesant I couldnt make out why we were bleeding the front and the rear bottle was going down, obviously they were round the wrong way Swapped them round and new hose on the front bottle with jubilee clips, finished them off and put it all back together. Now for the part of the day, yep you guessed the test drive I live very near the A59 which goes through to Harrogate so took it for a blast down there. Everytime I drive this car after doing something to it, its like driving a different car, the gearbox is so smooth (except 2nd in 1st but thats the way it is) and the car now nose dives when braking I cant wait to get the rears done now I want to change the rear axle fluid ASAP as I expect that will be like the Gearbox oil But for some reason I have ordered a 1l short I still also have a squeak whislt driving but goes when braking Its the cup the lever sits in to open the tailgate This rubber seal is also going to have to come off as theres glue everywhere 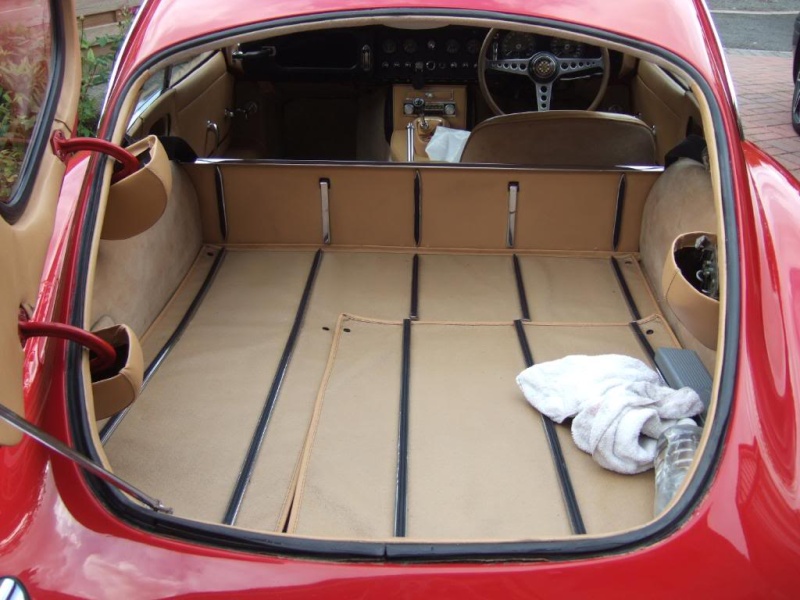 Whats the best thing to move old glue After putting her back together there was some oily prints on the bodywork so I gave her clean and then a polish with some Meguiars Paint Cleaner   Questions - Answered Questions - Answered
Glad to see that it is becoming an obsession! For glue removal, probably the safest method is petrol ( in very small quantities) ,as most other solvents run the risk of attacking the paintwork.
-------
The ratty looking shield under the radiator prevents the air coming through the nose from circumventing the radiator, and thus aids cooling and is more important than it looks
--------
For glue removal you can buy a special solvent sold by Bostik and 3M which will not harm the paint (although try it on a hidden bit first!).--------
Finally don't forget to use either special LSD rear axle fluid or the Jaguar special additive when refilling the diff: http://tinyurl.com/mh6a5p or http://tinyurl.com/n7tlcpSo we still have the Unamed part - tailgate lever - cup 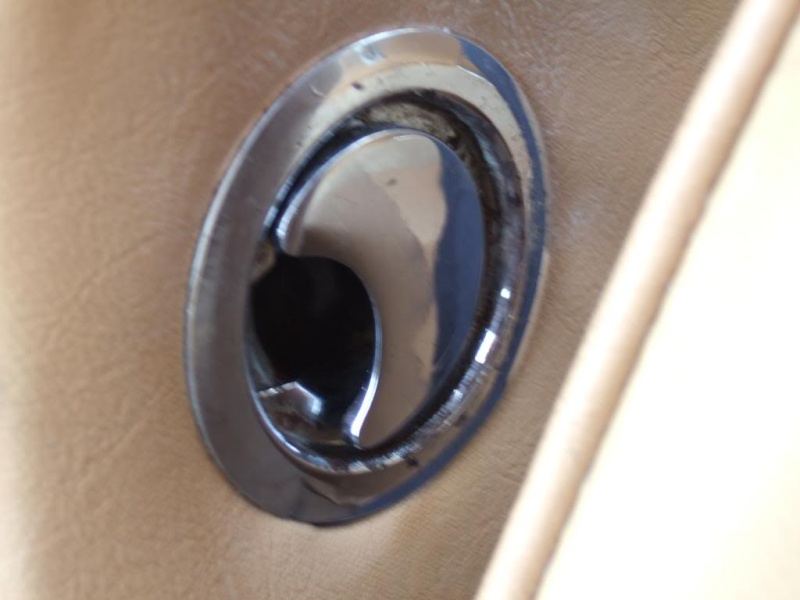 Persihed rubbers OS 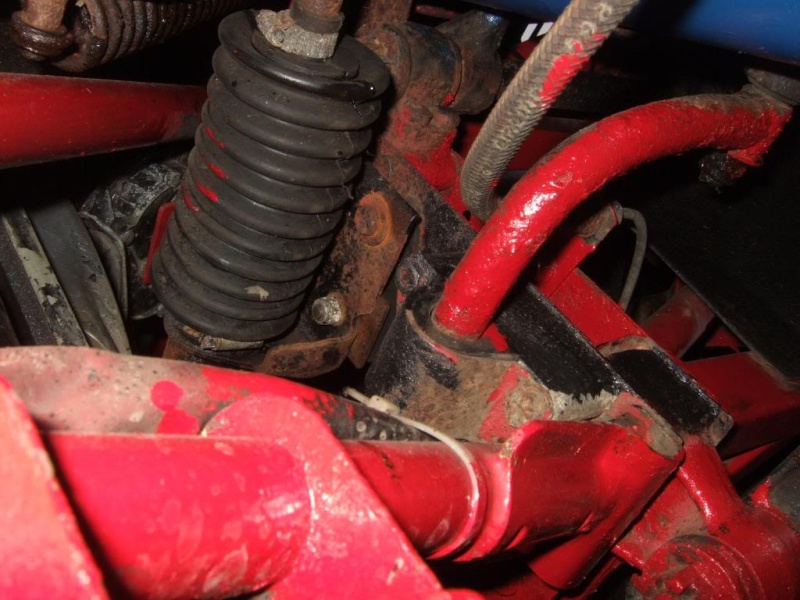 Persihed rubbers NS - why was this damper painted blue 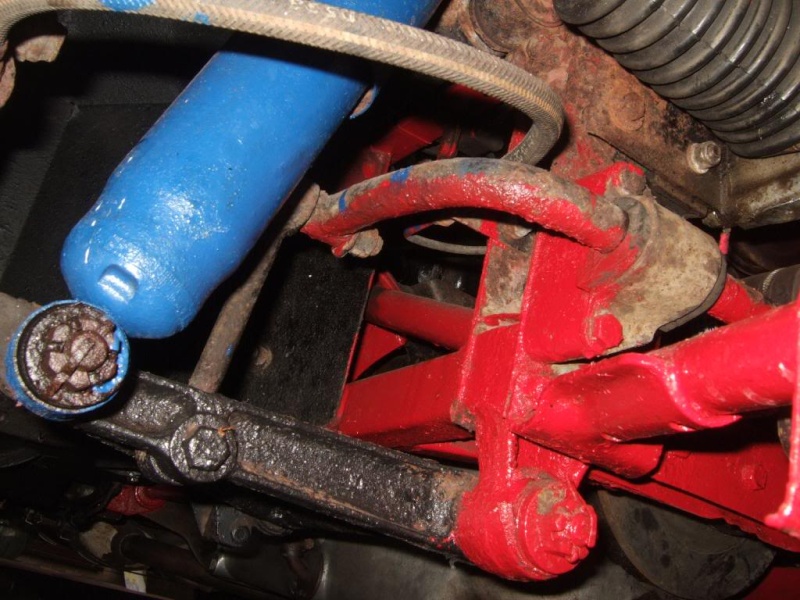 Obviously couldnt get the same angle as the wheela are now back on See what tomorrow brings After a load of parts are ordered Mystery partEscutcheon, in R.H. quarter panel, around release mechanism" - part # BD20900Aug 03, 2009There is 1\2" between the steering Column switch cover and the dash but after undoing the relevant bolts it wont go up So here are the pics So heres the gap I have between the column switch cover - which Id like to loose  Now Ive undone the nut and bolt below it  Now its at the top should be able to push the column up I also un-did the nuts and bolts here in the pics bleow not sure what there called but the rubbers are goosed 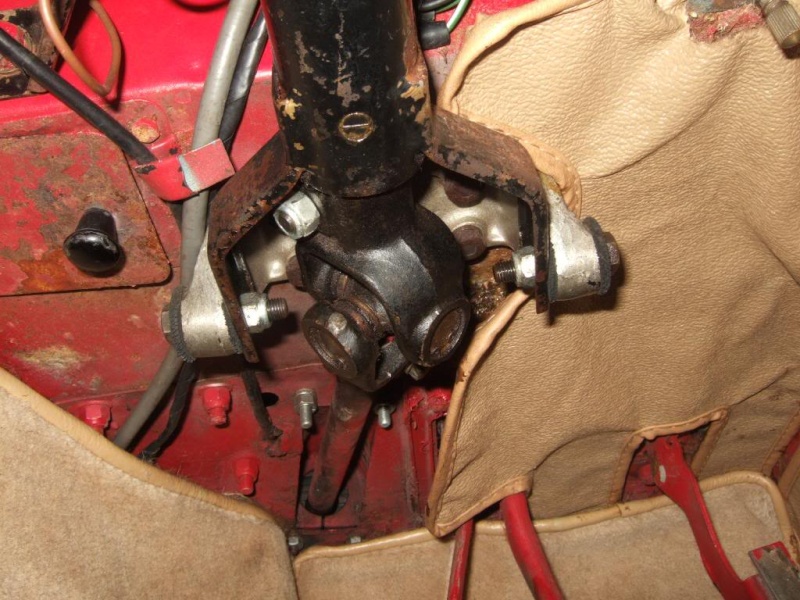 Also, that Hardura should it go right across with a hole for the trap door 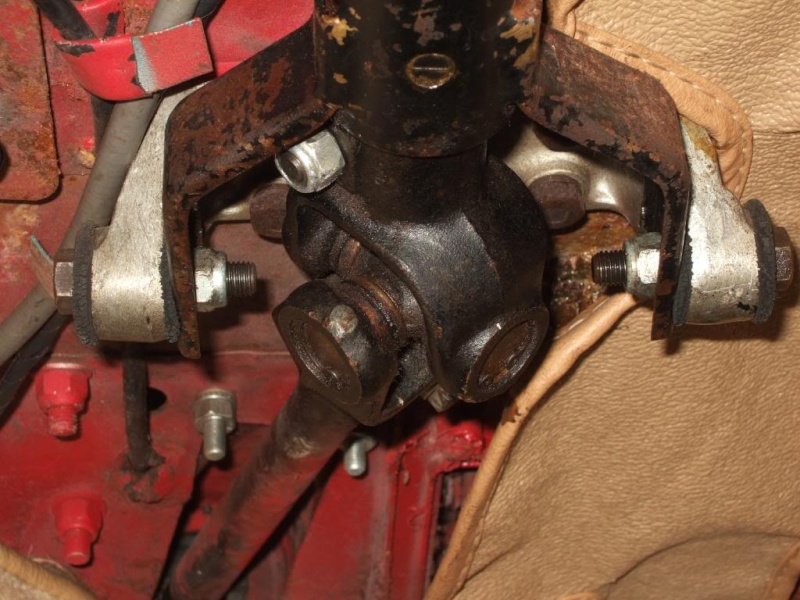 I may gain some more space when I change the carpet under the runners for Hardura it wont be much but grab a few 1\8" of inch here and there and hopefully it should do it. I would like to keep the correct S. Wheel really do not want to down size AdviceI have something to help you when you are going to refill you diff, really handy because room is a premium in there !!
Here is the web site in UK for it : http://www.lasertools.org.uk/ under minipump Hardura Under SeatsHardura odered £40.58 + VAT + Del the Pair for anyone else after some | |
| | | | Car-Nut
Admin
Posts : 3004
Join date : 2009-11-16
Age : 57
Location : E. Lancashire : UK
| | Subject: Re: Baselining - 369 HBF - 860871 - Before the Upgrades Fri Nov 27, 2009 7:22 am | |
| Page 9
Aug 03, 2009I sourced the part Escutcheon, in R.H. quarter panel, around release mechanism" - part # BD20900 £19.22 +vat Advise Steering ColumnNo, it is at the top of its travel. You need only to adjust that single bolt in the slot not the other bolts. When you get around to checking the steering column worth having a look at the two u/j's, top and bottom. The originals were sealed but the grease dries out because of their location making the steering heavy. Modern replacements have a grease nipple. You could leave out the spacers/washers between the seat, runners and floor which will give you more room.
Aug 04, 2009InteriorNow, back to the car with my hardura winging its way to me Ive been busy cleaning the seat base done so the chair itself was next, came up well I thought  Then I striped out all the vinyl round the sides its all out now and cleaned ready to go back in  Not sure what that pocket in the side is for But its filthy and needs a good clean 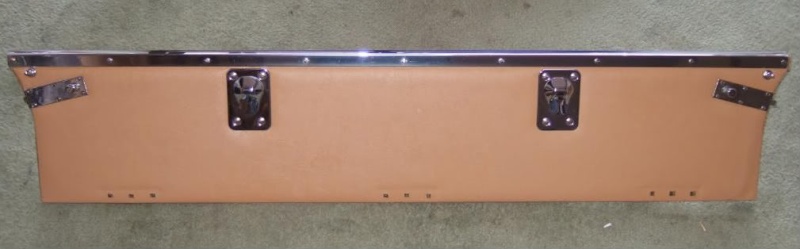 Dont know if the person who screwed the screws in this was in a rush to get home but the screws were sticking through  Aug 06, 2009Changing Rear Light Seals Aug 06, 2009Changing Rear Light Seals2 dys to post today Yesterdays I wasnt going bother posting as it was just the other side rear lamp and didnt want to bore you.  Anyway after taking the lamp from the body and seeing what looked like gasket sealant I thought I do a few pics  I got it off with paint renovator but Im sure theres an easier way Came up lovely replaced both the gaskets and the bulbs and back together job done   Today, deliveries came in from all over the world First of all today changed my pedals out 47 yr old worn and perished pedals  New pedals apparently they dont do an accelerator pedal  Next new "Escutcheon, in R.H. quarter panel, around release mechanism" - part # BD20900  Just need a CWW on each corner to match it now Then the bushes  Ive swapped the 2 stumpy ones out and replaced all the nuts and bolts with nice new SS ones. Not sure what the large thin seal is for? I will look it up Any way job done.  Now, "Name that Hose" Was in my box a bits that came with the car I know the hose on the left is the one off the rad at the top OS do you recognize the others 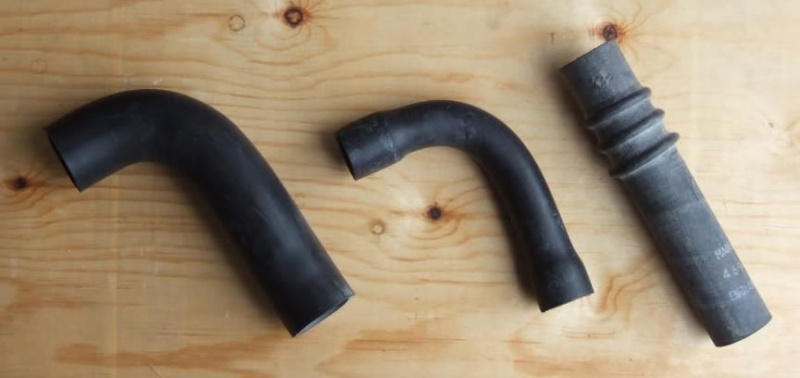 Hose Answers Hose AnswersI am in the process of fitting a new set of hoses for my 1962 3.8. The hose on the right is also used leading to the expansion tank, and was the one I used. The one on the left, I believe is for the same purpose - Mike Wilkinson told me that both variants are normally included in the kit. The right angled hose fits to the water pump, is joined by a metal right angled joining piece, and there is then a further lower hose that connects to the bottom of the radiator. I have just purchased the metal tube which links the two hoses, from SC Parts and it arrived today. They said it was original Jag stock, hence the price - £31.09 plus shipping and VAT. The pipe I had was very thick and was fouling the radiator shroud. | |
| | | | Car-Nut
Admin
Posts : 3004
Join date : 2009-11-16
Age : 57
Location : E. Lancashire : UK
| | Subject: Re: Baselining - 369 HBF - 860871 - Before the Upgrades Sat Nov 28, 2009 10:09 pm | |
| | |
| | | | Car-Nut
Admin
Posts : 3004
Join date : 2009-11-16
Age : 57
Location : E. Lancashire : UK
| | Subject: Re: Baselining - 369 HBF - 860871 - Before the Upgrades Sat Nov 28, 2009 10:51 pm | |
| P11
Aug 08, 2009
Rear Axle Drain Plug Removal Advice"Clive, without wishing to be a Jonah, on both of mine I had to take off the tie plate ( it's not as bad a job as you think) and this gave sufficiently improved access to use a large spanner (I think I used a stillson wrench) . If this doesn't work, then remove the rear cover of the diff with the plug in situ and use some heat on it when it will usually come out reasonably easily"Ive got 2 new sets of of axle stands coming this week so will wait till they arrive and Ive ordered the new drain \ filler plugs then attempt again.. Its difficult to soak it with anything as it drips straight off My wife has started complaining she has become an
"E Type Widow" Think I best get her a present to butter her up Aug 09, 2009I'll remove the tie plate first see how I get on, if not and I need more room, then that is what I'll have to do next I may as well order new Exhaust Flange Gaskets which sit on top the Down Pipe assembly in case I have to go that far Heres the offending drain Plug that I dont want to damage anymore  I did get that scabby Duct shield replaced yesterday  Anyone tell the difference 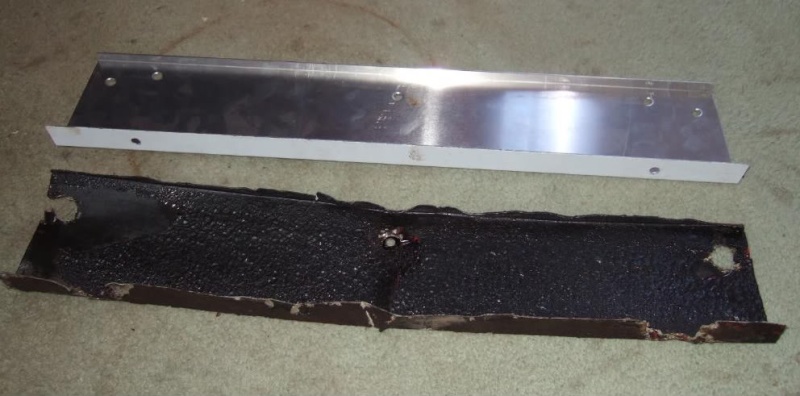 Now fitted but one fitting bracket short on the back 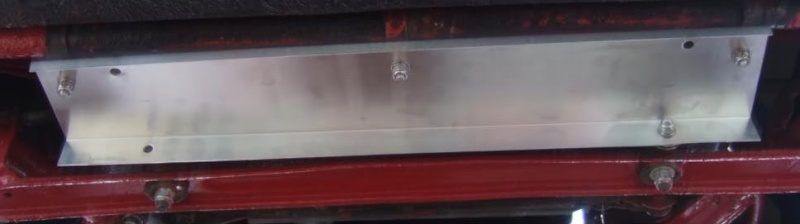 Aug 12, 2009Brake Fluid Reservoirs Aug 12, 2009Brake Fluid ReservoirsOn another note I have  in 2 different places that the brake reservoirs go in different orders one says back on the right the other the front on the right I whipped one of the plugs out this afternoon, poor car looks like theyve been in since the restore in 1980. Its alright these millionaires having these cars built but then they never drive or maintain them I cant be doing with people who have nice cars and they end up being Garage Queens, or Trailer Queens to take to shows. If youre gonna have one look after it properly and use it Right now Ive had my rant, I'll carry on Well see for your self, I took the pic on a white piece of paper  The gap was 0.55mm I deffinately wont be cleaning and regapping these  New plugs and while Im at it some of those Moroso Blue Max spiral wound H T leads Here starts the upgrades - Had it less than month and the upgrades are starting so much for getting the engine \car baselined first Next Not an upgrade but I have a feeling big expense your esitmates in cost and man hours for the job appreciated so nobody tries to scam me After reading about gaskets I have had a good look Looks like the Head Gasket on the LH or Exhaust Manifold side is weeping not a lot but I dont want to be doing ***mph and the thing blows happened to me about 3mths on my last daily hack Anyway here are some pics what do you think guys:-  Its nothing major, but its there  First Of all I thought it was down to the oil filter being loose but after closer inspection I only get a few drops in the drip tray under the car. Im not topping up a pint week or anything silly like that. 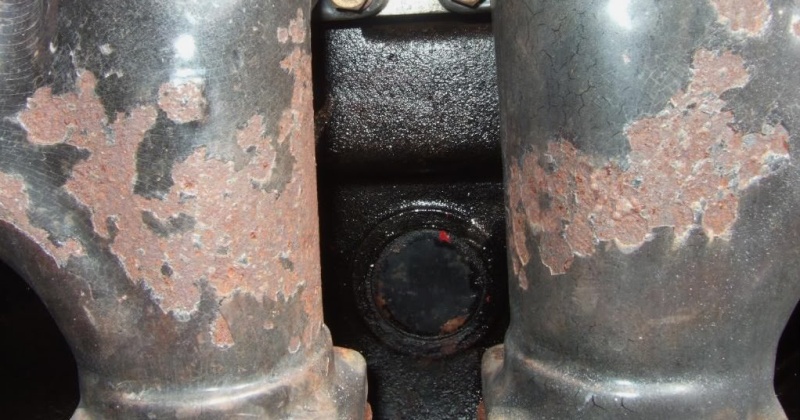 Im not trying to create a concourse engine bay but I dont want to pay dearly for the sake of nipping it in the bud  As usual everyones advice from experience is greatfully received AdviceI cannot see any evidence of head gasket leakage there. What you are showing, I think, is the typical widespread dissemination of oil leaking from the cam covers, breather etc. Another very popular leak area is the copper tubing feeding oil to the camshafts at the rear of the engine. First step I suggest is to wash the engine down thoroughly with a degreasant and see where streaks reappear. If you really want to be thorough, you then lightly dust the engine with powdered chalk which shows up leaks unmistakably | |
| | | | Car-Nut
Admin
Posts : 3004
Join date : 2009-11-16
Age : 57
Location : E. Lancashire : UK
| | Subject: Re: Baselining - 369 HBF - 860871 - Before the Upgrades Sun Nov 29, 2009 12:45 am | |
| Page 12
Aug 12, 2009
Head GasketI may be being over cautious as recently bitten I am happier to hear that as Im sure is my bank balance AdviceI think the old adage "If its not leaking oil - it must be empty" applies to XK engines. If there is no evidence of any major oil leak. The first you will know about it will be spots on the floor and I don't think gaskets deteriorate with age - heat and vibration possibly. The only oil leak to worry about is the rear crank seal failing because that means engine out. The others are managable."Aug 13, 2009Quick call to Carl @ Rob Berre Racing today.... I now have the site link I can see its gonna be costly Ordered a couple of bits today They didnt have the NGK BP5ES So Ive got the NGK BP6ES -apparently these are a bit harder and go in the race cars they also use the NGK BP7ES -so if youre engines tuned They are also making up a set of the the Moroso Leads While surfing around the site saw some Goodridge Braided Hoses Yes please, still doing the brakes hope to get the rears done saturday morning, I've also got new bottles to swap out. Could someone answer my bottle question further up the page please undelined till it gets answered Cam Cover Advice " Cam covers are very sensitive to surface preparation during gasket replacement. Most have been pried loose with a screwdriver at some point and this leaves dings in the alloy. Ensure that all old gasket material is removed and apply a very thin coat of blue Hylomar to both surfaces. I also like to apply a small blob in each corner of the rear cam bearing cap, just enough to get a little to squeeze out when the cover nuts are torqued. Always use fresh copper washers, and don't ever believe that over-torquing the nuts will prevent or stop leakage. At best this will increase the leaks; at worst it cracks the cam cover.
The oil-feed line to the cams can also be a source of frustration. I've seen several that had small cracks adjacent to the banjo fittings. When installing the line, always use fresh copper washers and be very gentle when tightening the banjo bolts in the head. I once had one of these strip while reinstalling a freshly rebuilt engine, and had to pull the head and install Helicoil thread inserts. Any Jaguar cylinder head in my garage gets Helicoils while still on the bench now.
Another area prone to slow leakage is the junction between the block, head and timing cover. With two pieces of alloy bolted to that big chunk of cast iron, the head gasket in this area has its work cut out just due to differing rates of thermal expansion. I apply a very light coating of Copper Coat (from a rattle can) to the head gasket in this area and it seems to work. Again, surface preparation seems to be key here. Trim away any portion of the timing cover gasket that might protrude above the surface. Needless to say, the timing cover must be attached if the block requires surfacing. The four studs at the front of the head require 5/16" copper washers, but I've seen several XK engines with steel flat washers here and these will always leak.
The rear main's turd seal is the only one that is not manageable, but most leakage here is due to age or improper installation. The front main will benefit from the installation of the latest-and-greatest Teflon/silicone seal developed during XJ-6 production, but read the directions regarding installation. I once installed these without benefit of instruction and left a nice trail up the street and into my garage." Brake Routine Maintance Advice I have read about Hylomar in this thread :- http://www.jag-lovers.org/xk-lovers/library/head_gaskets.html I have now found the leak please see pics below So after a bit of fettling and polishing this evening I was just gonna lock up and I thought "No" I'll go for a drive on parking up I gave it a rev before turning off and checked under the bonnet and there was my leak Well heres the offending gasket..... 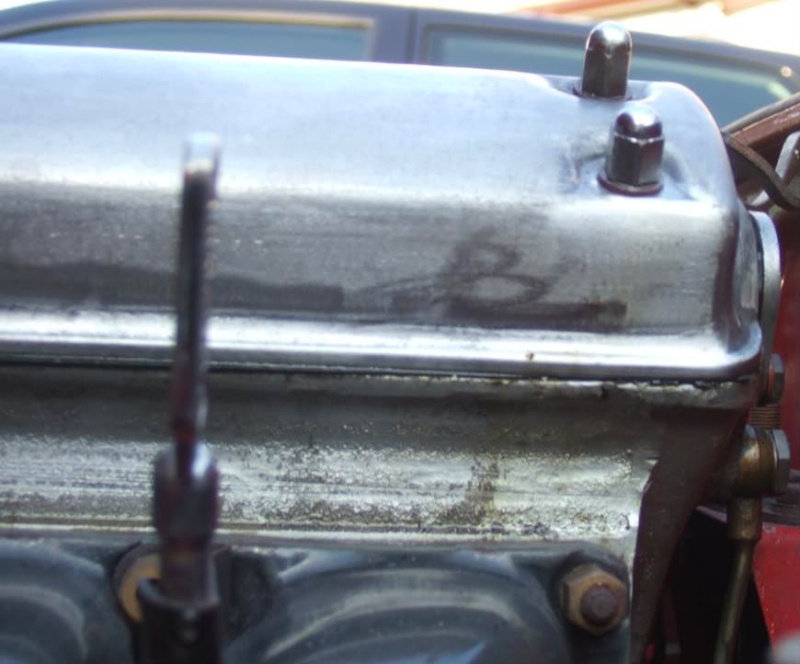 The oil in the engine has only done 200 ish miles so very clean so hard to see in pics 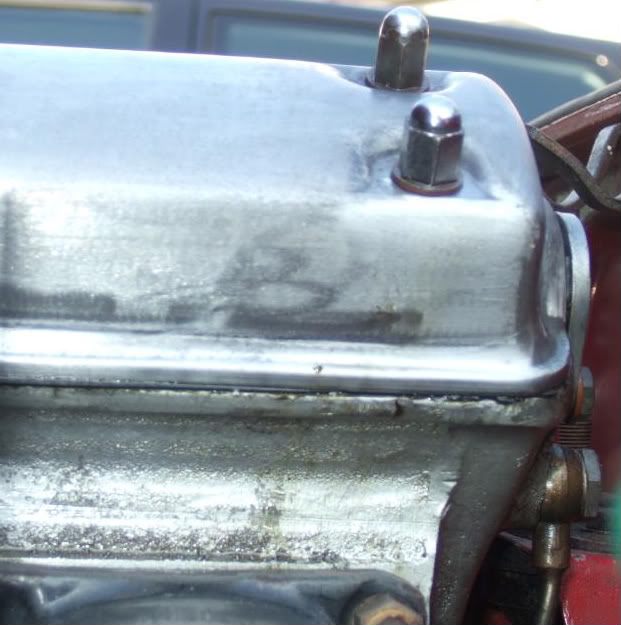 When I saw this I see another perished gasket \rubber Heater case to Dash Seal - C17308  Is there any value on scrap rubber Im getting a good collection Oil leak AdviceHave you tried torquing down the cam cover nuts Maybe a quarter turn on each and you might also want to take a torque wrench to the cylinder head bolts as they may not have been done after the engine was rebuilt and run-in. Ditto the oil feed lines. Basically do a 'spanner check' right around the car (i.e. take a spanner to every visible nut/bolt and tighten) - you will be amazed what you find.Air Duct Seal"The air duct seal behind the heater is actually a quite thick plastic sandwich,widely available - I bought one from Hutson's last week for about £3.50 - and will make a big difference to your comfort as it will prevent hot air from underbonnet being introduced to your interior whether you like it or not " | |
| | | | Car-Nut
Admin
Posts : 3004
Join date : 2009-11-16
Age : 57
Location : E. Lancashire : UK
| | Subject: Re: Baselining - 369 HBF - 860871 - Before the Upgrades Sun Nov 29, 2009 3:35 am | |
| Page 13
Aug 14, 2009
New Pugs & LeadsSo parts arrived today within 12hrs of ordering from RBR Whipped out the old plugs  Next in with the NGK BP6ES (Not 5ES) http://www.carshopinc.com/popup_image.php/pID/40845?osCsid=231fff26503b3c8d46ffc7744b09731d Then carefully removed the old perished leads and replaced with these beauties http://www.moroso.com/articles/articledisplay3.asp?article=AboutSpiralCore.html They come with the special holder to keep them in place had to remove old clamps and re torque the head bolts up (scrounged a tourque wrench off my neighbour but one) Heres the finished item polished the carb pots by hand yesterday there starting to look better  Start her up afterwards, she had never struggled starting but with this lot in place it just felt and sounded sooooo much better A nice cheap upgrade, I know I was gonna baseline the car first, but...... More good news as well I sorted the oil leak round by the manifold camshaft cover -back two nuts 1\2 a turn each and the rest 1\4 a turn and "Bobs your Uncle" Thanks for everyones input on that issue Aug 16, 2009Engine is looking better for the polished pots and the leads being nicely draped over the cam cover. I did spend time on the rear axle drain plug Saturday morning but I think it's gonna have to be an exhaust off job. All fixtures look ok so that's gonna be a fun job while all that's off is it possible to get to the rear brake bleed screws or did I read you have to drop the rear axle If so I think that may be out of my depth Re the bushes which I came on to answer about p9 3rd pic up of mine the thick black bushes what's the correct way to remove and get bushes in like this Rear Brake Bleed Advice
"Ahh, the rear brake bleed screws! You can actually reach these from below but expect skinned knuckles. The 'fix' is to attach extension pipes so they drop below the axle and are easy to get to. If you are going to remove the exhaust system it is a good time to bleed the brakes as there is more room to work. You would only need to drop the rear axle if the calipers need to come off (double in situ but a pain) or new rear discs are required.
As for the bushes I would suggest some WD40 first, support the bracket in a vice and use a suitably sized hex socket as a drift to hammer them out. Reverse is the same but use only soapy water (remove all traces of WD40) and drift them in." "For easier access, remove the front (rear) shocks (I do this - I did consider extending the bleeders but as I don't intend bleeding my rear brakes every 6 months decided against). Still a good mod though.""Dave Rawle did a modification as seen here: http://davesetype.co.uk/etype08.htm
Does your car have a removable interior panel over the rear axle to make access easier? If so follow Dave's example"I took the hardura out the first wkd but didnt know what the panel was for  On removing I found a part of the last owners "Wellington Boot" no joking   Ive not looked in the book yet but I get the impression it should be some gasket or rubber seal more rubber Heres a picture it is litterally point and shoot  I'll give the paintwork a good clean and polish and wax but my hands wont fit through any of those holes to be able to do any work Next I got the spare out ready for its journey tomorrow. I must say Im absolutly gutted as its brand new with the rubber hairy bits still on if you know what I mean, obviously never been used and not cracked and perished like the other 4.  I couldnt quite put my finger on it  but car looked strange today  The black shadow underneath is my pit 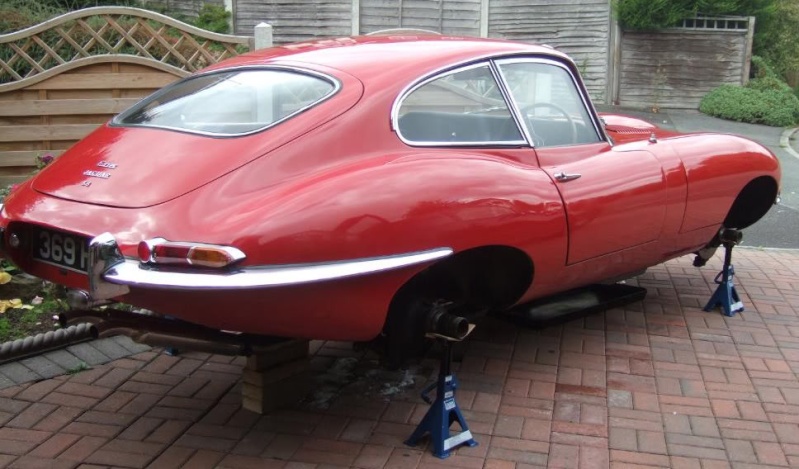 Also in the pic my new Axle Stands Used my new spinner tool once they were loosened off 10\10 brilliant get one if you havent got one  Daily hack loaded off ready for the Journey  So while the wheels were off thought Id do a few .......... Back end of my prop shaft couldnt see a grease nipple brake hose this is being swapped out for a goodridge braided hose Plus part of my Falcon exhaust 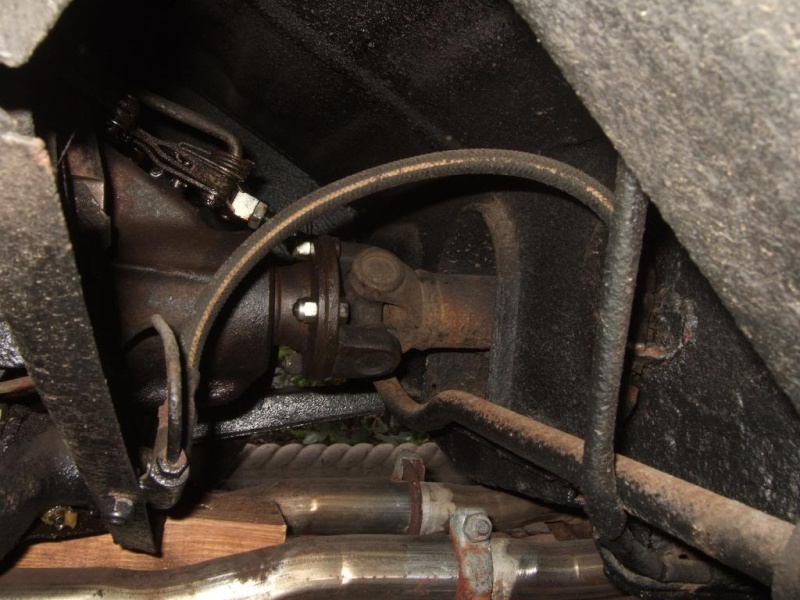 Rusty springs Obviously originals as the colour of the car before the respray, which took place between '62 and '78 it was already Re Sale red at the time of the start of the restrore  The famous nipple, I will get a on this -without a rubber bung on  Picture from further out  The other side 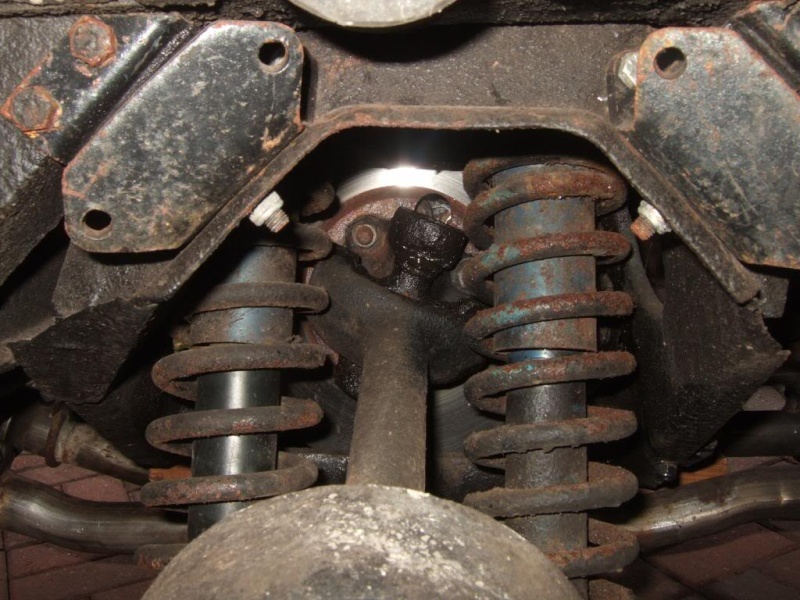 Advice"Picture number 8. Is that the fuel line I see that could be rubbing up against the ARB? If so, not a good idea and needs moving " Advice"Picture number 8. Is that the fuel line I see that could be rubbing up against the ARB? If so, not a good idea and needs moving "
"Re the inner tube used on your rear access plate; I don't think they are available so I would reuse what was there providing it isn't perished. It is only there to stop water/dust coming inside the car and that rubber will do the job.
On your universal joints, you might find a grub screw where the nipple should be - it is the same thread as a grease nipple so can easily be swapped out. If your propshaft UJs do need replacing - back end or engine & gearbox out I'm afraid.""The original Girling shocks were metallic dark blue but the springs would have been black so I guess the whole lot has been painted at some time with Opalescent Silver Blue. Could there have been a prior restoration or repair? Rust on the springs will not be a problem in the short term and as the car is sitting level I would leave them alone.
The holes in the bodywork are for adjusting the handbrake and making the fitting of new caliper pads easier. It should also allow you to see if the rear calipers are working properly." | |
| | | | Car-Nut
Admin
Posts : 3004
Join date : 2009-11-16
Age : 57
Location : E. Lancashire : UK
| | Subject: Re: Baselining - 369 HBF - 860871 - Before the Upgrades Sun Nov 29, 2009 4:32 am | |
| P14
Nut & Bolt Advice"The E-Type uses standard nut and bolt sizes appropriate to the decade it was made. So all nuts/bolts are UNF except where they are threaded into alloy where UNC is used. You may find some BSF, though unlikely. Most electrical parts use BA threads and nuts. Brakes and oil pressure fittings are BSP (British Standard Pipe) as used by plumbers. All are generally available. First stop for UNF/UNC/BSF/BSP and BA is Namrick: http://www.namrick.co.uk/ Great site with lots of information.
The SC Parts Catalogue has 5 pages of tables detailing all the UNF, UNC, BSF bolts nuts and washers, studs, split pins, clevis pins, panhead, countersunk screws and hose clips. Unfortunately they use their own part numbers rather than Jaguar ones. Well worth getting hold of a copy of their catalogue as it is probably better than the Jaguar spares manual."_____ Good call on the thread sizes. I'm always amazed at people's reactions over here when I tell them that the E-Type, and other post-1955 British iron, actually uses USS/UNF fasteners and not that other metric stuff.
I think I mentioned it once before, but I'll bring it up again. The British pipe-thread system typically has one more thread per inch that does its U.S. counterpart. Unfortunately, this means that our NPT (National Pipe, Tapered) with its 27 threads per inch, will sort of fit into a hole tapped for 1/8" British Pipe, straight or tapered. Those of you who have repatriated cars may encounter U.S. fittings forced into places they shouldn't be, usually when aftermarket oil-pressure gauges are fitted. Just something to keep an eye out for._____ Aug 18, 2009Just realized had my car a month today New TyresWent to Longstones today for my Tyres.  Bit different to your normal tyre garage. I arrived mid afternoon and Dougal and his team were having a lunch off the boot of his car a bottle of Corbiere and a nice ripe foot wide brie spilling everywhere with crusty bread I was told to get stuck in, but couldnt drink as I had a 100mile drive afterwards While I was there Dougal was working on his Frazer Nash race car he started it up while still working on it and flames out the exhaust and a right noise... So after a good chat with the lads, while one was working on my wheels they loaded up my car Then for the bad news to depart with my earned cash Now my XVS tyres are sat ready to go back on when I have completed a list of jobs which I'll do better with the "E" on stands. While I was there Dougal showed me some Borrani's I feel a set of these may be gracing my car next year they look awseome Aug 19, 2009Anyway, my tyre codes are better now:- Were 140 Now 2309 | |
| | | | Car-Nut
Admin
Posts : 3004
Join date : 2009-11-16
Age : 57
Location : E. Lancashire : UK
| | Subject: Re: Baselining - 369 HBF - 860871 - Before the Upgrades Sun Nov 29, 2009 9:30 pm | |
| P 15
Aug 19, 2009Yesterday evening I was cleaning out the boot trying to get ready to put the spare back in, did all the carpet etc took out the wood over the petrol tank.... Went to put it back in today and realized as its stripped out it would be easy to change the rubbers on the bumpers (oh no its not) not on the 3.8 A negative over the 4.2, removing bumpers is harder, but then how often do you do it Ive started on the easy side 3 bolts to remove only and a quick wiggle  This bumper only had an inch of rubber underneath I will trim completely when putting back on 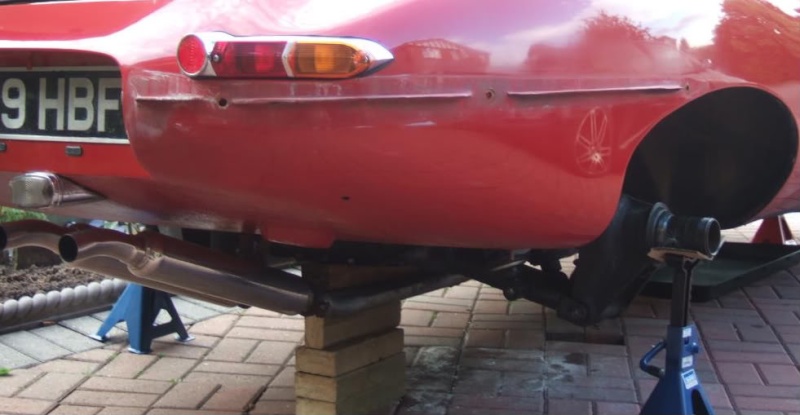 Bit mucky under there.... 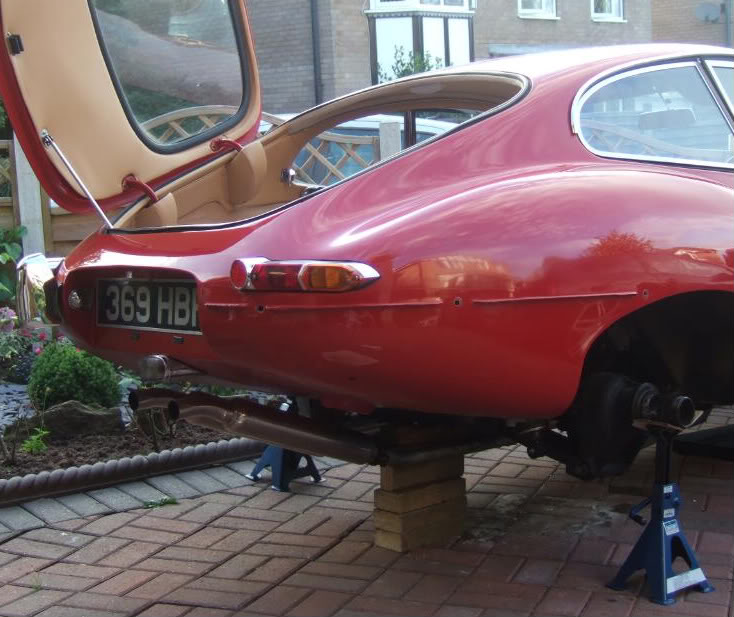 Soon scrubbed up  On cleaning under the seam noticed some flaking paint so cleaned it up and got some Krust on it, I have a tin of the car paint mixed came with car so will repaint before attaching bumper, luckily this will be out of site I found some slack fuel pipe at the front and have pulled it through just need a fastening to get it secured in place so it doesnt rub on the ARB as noticed. Going to place a rubber order tomorrow. To do all the ARB and drop link rubbers and refurbish the ARBs and Drop links gonna strip them down and respray them black as there covered in paint.... But they dont look good CommentDoing E-Type maintenance on a brick drive--I'm impressed! Looks like a good, clean car underneath as well. Thu Aug 20, 2009Well its easier than struggling around a single garage The car came from a house with a garage 4 wide and 2 deep at one end so he could drive his car in with his race car attached in the days he raced. Then off the garage he had a little workshop which used to be the gardners room In a month or so I will have no choice when the weather changes it will deffinatly have to be in the garage Handy TipDrainage is something Jaguar never really got right in some areas. The door drains benefit from frequent cleaning, as does the boot area under the spare wheel. The foam doughnut between the tank and floor is a notorious moisture trap. If you can get your hands on Chris Harvey's book, "E-Type--End of an Era," there are a lot of little suggestions to prevent or delay the dreaded tin worms in its pages. | |
| | | | Car-Nut
Admin
Posts : 3004
Join date : 2009-11-16
Age : 57
Location : E. Lancashire : UK
| | Subject: Re: Baselining - 369 HBF - 860871 - Before the Upgrades Tue Dec 01, 2009 3:02 am | |
| P16
Aug 24, 2009
Bleeding Rear Brakes (Literally) AdviceFor easier access, remove the front (rear) shocksTo do this and put the shock back in place would I need a spring compressor to get it back in place  Dont want to take it off then find I dont have the right gear to get it back together as I only have a limited toolkit AdviceNo, the rear shocks/springs can be removed as a unit - upper and lower bolt. Only need a spring compressor if you are changing either.Aug 25, 2009Before anyone says "RTFM" I have Right, I thought Id move one of these shocks to bleed these rear brakes did the clutch yesterday and changed the bottle and pipe etc Today I thought I do the rear brakes before the wheels went back on. Everyone says the unit Damper\Spring unit can be removed Anyway I thought Id remove the the lower nut and slide it off and and put it back on just to check to see how easy it was Now this is where I have a problem So Im trying to remove the front rear unit 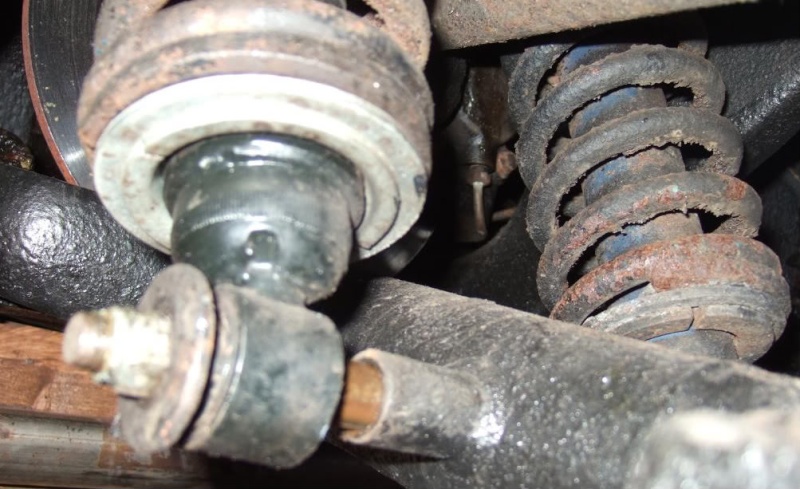 After undoing the nut I knocked the shaft back and I thought Id just see how easy it is to put back through before taking off the front rear bottom As you can see when trying to knock the shaft through it knocks out the bush I tried put some support under in a couple of places but bare in mind the cars on axle stands at the moment. How do I get the shaft back through 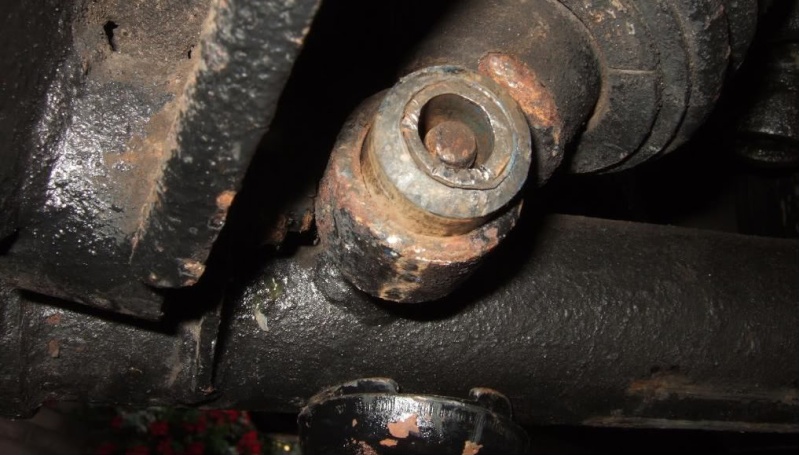 AdviceYou need to use a rubber mallet to knock the shocker back. Hit it on the bottom of the spring and it should slide along the shaft. AdviceYou need to use a rubber mallet to knock the shocker back. Hit it on the bottom of the spring and it should slide along the shaft.
To refit, you just have to line it up and tap it through. Don't remove both shockers at onceI have tried that and it knocks the shaft out the other side when I knock it back in it knocks the bush out on the front back shock Did this a couple off times then thought Id post... Would it make a difference if I put my wheels back on, on all but this corner but removed the axle stand so the shock can expand would the shaft slide through easily then Advice"did the clutch yesterday and changed the bottle and pipe etc"
Please tell me you kept the old bottle - they have a filter at the bottom, new one's do not, so don't throw the old one away just yet (aka ever).
As to your other problem the damper unit can be removed but you need to take off both nuts at the same time so the unit comes off in parallel. Putting the wheels back on will have no effect. As to why the shaft is moving. Hmmm. I have got the old one after getting the brown fluid out I did see the filter in the bottom but didnt know how to get it out or if it was deffinately required, looks like I'll be rebleeding and fitting it Aug 26, 2009Got the little filter out nice mucky brownish colour Whats the best thing to rinse it in a shallow tub of Brake fluid or petrol I would of thought BF but like to check AdviceNever use petrol on hydraulic parts ( the rubber bits swell).
Meths is the best cleaner---- Proprietary brake cleaner is worth having on the shelf: http://tinyurl.com/mprtbp ---- Some WD40 is needed on the bolt and bushings. If you have to remove the damper you need to drift the bolt through the wishbone, so one damper is free and then detach at the top. The wishbone should be 'supported' but not under compression with an axle stand. Are you sure you can't reach the bleed nipples without removing the damper | |
| | | | Car-Nut
Admin
Posts : 3004
Join date : 2009-11-16
Age : 57
Location : E. Lancashire : UK
| | Subject: Re: Baselining - 369 HBF - 860871 - Before the Upgrades Tue Dec 01, 2009 3:43 am | |
| P17I will get some WD40 ASAP. As for the compression, I think I will put all the wheels back on and support the wishbone. To release the compression a bit. I can reach the nut but its that hard to turn (29yrs of corrosion) I need more space I have WD40 it a couple of times. So I need the unit out for access. I have a couple of choices:- Get it back together and let someone do it over winter Or complete the mission even though Im currently wishing Id never starting do it I dont like to be beaten. Also if I do it and get the brakes bled I will be a gluten for punishment in the winter and take all 4 units off and rebush the units. Aug 27, 2009 Ok, today started badly in fact I panicd big time that will have to do I thought I best sort out this spindle in the wishbone sliding back and forth so I decided to put the on its new rubber I put the front wheels on and was removing the front central axle stand when the hole car slid forward You get my message I can laugh now but it wasn funny then.  It was sat on its arse with the rear axle nearly on the floor luckily I had stacked thick wood under itso it wasnt quite down.... Anyway I ran to my neighbour borrowed another trolly jack and his son hired him for the afternoon for a £10 and we got the car jacked up and back on its wheels it may sound easy said in a sentence but there was a lot of jacking and blocking etc Finally it was back on all 4 the only damage visable was the left hand wishbone grease nipple had snapped off but it will screw back in and and I'll put a bit of liquid metal round it and a bit of black paint So after all 4 wheels were on I rolled it off the drive and gave it good warm up then reversed it back as that shock still isnt on tightened up. So we got ready to work again, bricks in front of the other 3 wheels etc  After a bit of jacking we got it so the spindle ran through no probs, I was hoping to lift the damper unit up and work underneath but no joy with my big hands. 29yr old bolts at the top didnt want to play, they broke 2 Draper sockets  The other side even harder to get to  We drifted the bush back in with a G Clamp 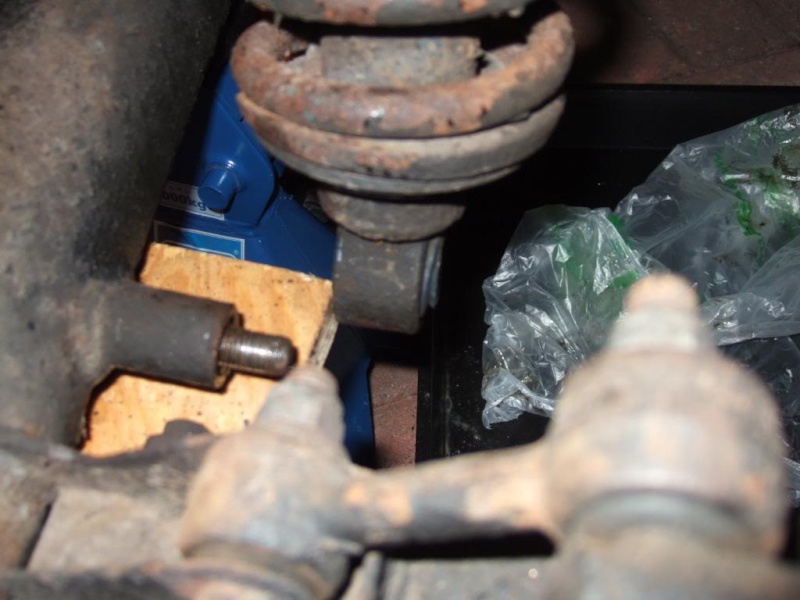 Finally got a bit of leverage and the unit was out considering the age the rubbers are in good condition, unlike the unit itself  Right now let the cat see the rabbit  Well the bleed niiple turned out to be another 11mm to small and 12mm to big and nothing imperial would do it in the end I taped the 11mm on with a hammer and we were connected ready for lift off  So after pumping a while tightening and loosening as you should nothing seemed to come through It seemed the pipe had emptied and now the bottle wasnt going down, I didnt want to do this but I thought there was a blockage at the bottom of the bottle so took it off very carefully, full. Plenty of cloth and glass jar at the ready Not good practice though 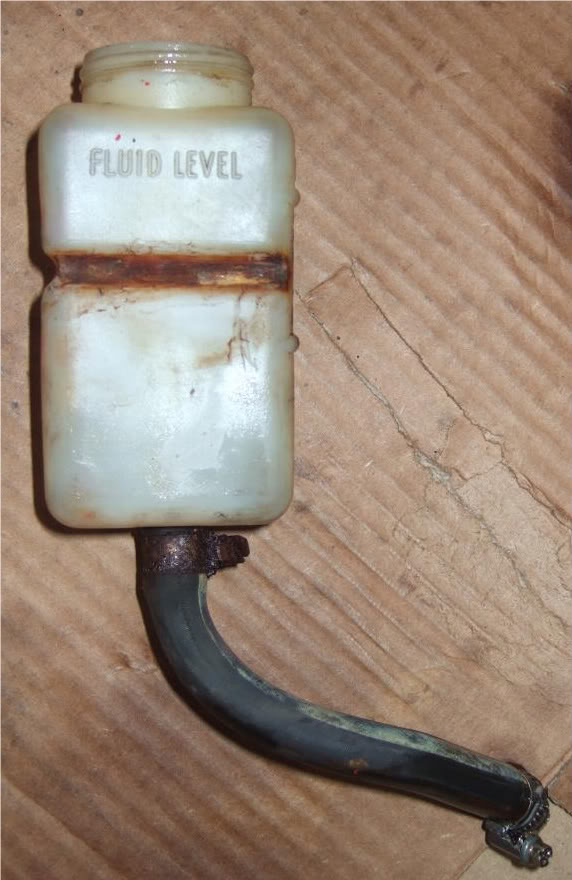 Nice top Jubilee clip Connected it all up and new bottle pipes jubilees and filter in place did a couple of pumps and ithe bottle is going down. Must of been a blockage in the old filter, perhaps thats why my brakes have been bad AdviceI would recommend you buy an easibleed - brilliant for single handed brake and clutch fluid bleeding---- Clive, are you planning on getting the braking system overhauled? By the looks of things under there, nothing has been looked at for a long time, and those callipers (and the master cylinder) could probably use a good dose of seeing to. It’s always the first area I get right on any old car, having had a brake failure on a car that was stood for a while…it hurts.
It’s very easy and cheap to do yourself by just replacing the pistons and seals, but I figure that with a braking system that’s coming up for 50 years old, it really justifies being done professionally. I can recommend Classicar Automotive in Cheshire, who have rebuilt all my masters, slaves, callipers and servos on Jags, Healeys and Lotus. They strip the units down completely, including splitting the callipers, then de-rust, finely check the bores or re-sleeve, re-plate all the components and re-build with stainless steel pistons. Most importantly, they pressure test the finished item and check for correct operation, something that’s very difficult to do at home.
It’s probably the most important part of the car, and must be worth making an urgent priority.---- If you want to upgrade the brakes I suggest you buy a set of Zeus front calipers and send the originals off to be restored and fit them to the rear in place of the puny ones. On the other hand you might want to check the cost of Zeus rear calipers to see if repair is worth the time and money. The E-Type's braking shortcomings are down to the calipers rather than the servo, as many think. Talking about the filters in the clutch and brake bottles, you did retrieve the metal spigots which push into the plastic outlets from the old bottles didn't you? It may seem obvious but many people have been known to fit new bottles without these (or the filters which fit on them) and damage the bottle when tightening the hose clamp. I think new spigots are unobtainable as are the filters but I could be wrong.Aug 28, 2009Im not aufey with some parts names but if you mean this little chap on the left yes  The one is in the rear bottle on the right and the clutch I'll beed again, remove bootle, stretch plastic nipple (not to much mind) with phillips screwdriver then in she goes Anyway this is how the new bottles and pipes look at present  So from left to right Clutch, Front then Rear Ive got the new front bottle which I 'll change as I have to bleed them to put the Goodridge braided hoses on CommentYes Clive that's the metal bit I was talking about. The filter 'sack' appears to be just a push fit on to the metal bit and frequently becomes detatched, as mine were, inside the bottle. It's then easy to leave the metal piece in the old bottle if one is not aware | |
| | | | Car-Nut
Admin
Posts : 3004
Join date : 2009-11-16
Age : 57
Location : E. Lancashire : UK
| | Subject: Re: Baselining - 369 HBF - 860871 - Before the Upgrades Wed Dec 02, 2009 3:24 am | |
| P18
Aug 28, 2009
Goodridge Braided Hose's & Anti Roll Bar (ARB) BushesTonight I bled the brake fluid again (filled it up forgetting I was doing this last night) before undoing the old central brake hose. A nice swollen old hose  Then on with my Goodridge Braided Hose   Pumped the fluid back through (make sure theres no air bubbles in the fluid) nipped up the nipple Job, jobbed Got the damper unit back in and put on new nyloc nuts where needed As the torsion bar was wide open like a ...... making easy access I thought I'd change some bushes as they were on my shelf  Again fiited, amazing the difference a couple of new small parts make plus shock unit scrubbed up ok 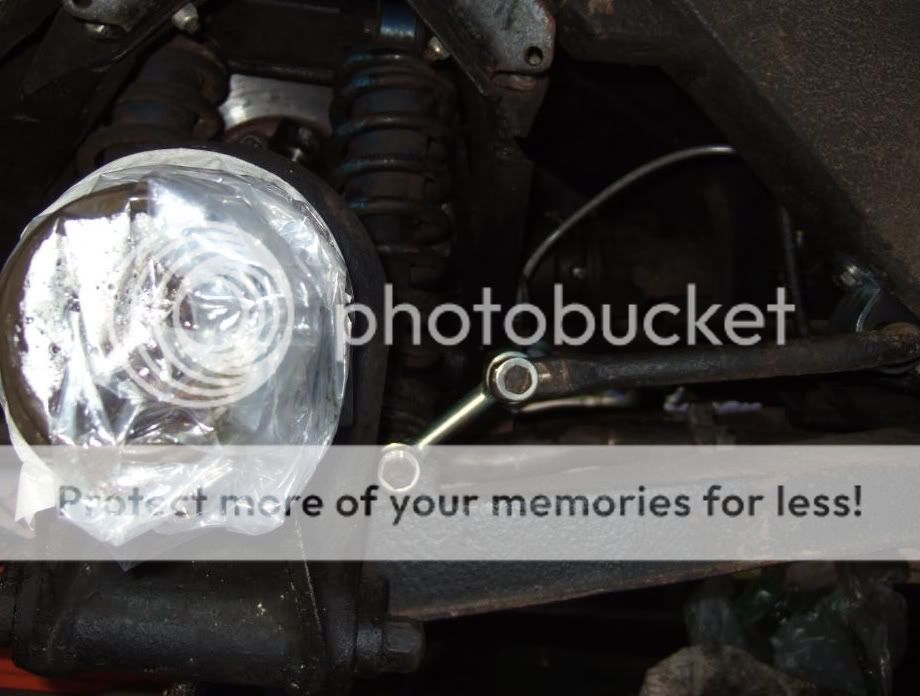 So tomorrow the other halfs doing a shift so I plan to:- Bleed the otherside - removing the shock what fun Fit the front Goodridge Braided Hoses Sort out that bottle (swap it out) If I still have time get there rear axle nut off. Now off for  Advice & Tips Advice & Tips
Polyurethane bushes are firmer than rubber ones but cause the suspension to creak and groan due to their non self-lubricating nature. Some suppliers provide a sachet of suitable lubricant to apply which should solve the problem, at least temporarily. My car creaks in dry weather but running in the rain gets rid of the noises. I have tried silicone spray on the bushes but the effect is temporary. I have asked CMC to investigate whilst they have the car - I will report back. Personally I would stick with rubber unless you plan to track day the car.
Spax, Boge, Gaz and Koni all supply suitable dampers at varying cost points. Some make a big play about the "adjustable" feature but you will more than likely be paying a premium for a gadget you will never, ever, use. Koni's need to be removed from the car to adjust ...............
Remember that job Clive Just about everyone leaves them at the factory settings so what's the point? The Spax ones have a 'clicker' adjuster you can set whilst they are on the car but the clickers are prone to failure, and then you are stuffed. If you really feel your suspension needs to be set up differently for Donnington, Silverstone, the A661 and the Manchester ring road go ahead. My experience with Koni Classics (Painted black instead of red with a funky 'Classics' transfer for your extra dosh) has not been a happy one. Fronts failed after 6,000 miles, rears after 18,000. And before anyone says they are guaranteed for 10 years, or whatever, replacing even the 'free' ones is not an enjoyable experience. I also found the character of the Koni's did not suit the E-Type's suspension on the road. I now have Spax non adjustable at the rear which are great and legacy Koni Classics on the front - but they will be dumped at the next available opportunity. | |
| | | | Car-Nut
Admin
Posts : 3004
Join date : 2009-11-16
Age : 57
Location : E. Lancashire : UK
| | Subject: Re: Baselining - 369 HBF - 860871 - Before the Upgrades Wed Dec 02, 2009 4:24 am | |
| P19
Sep 06, 2009
Brakes, Brakes & More Brakes Last Saturday tackled the other rear brake nipple  My hands seemed to be smaller today and I managed to get the pipe on the nipple after 15 minutes fumbling and so I got that side bled. Swapped out the bottle and pipe and filled up the fluid. Next jobs were swap out front drop links I had already drifted the new bushes in to save time. Then I wanted to change the ARB bushes and holders bleed front brakes through, put the Goodridge Baided hoses on at the front replace bottle, put filter in. I got the old Drop links off no probs and new on, no probs.  Perished drop link bushes 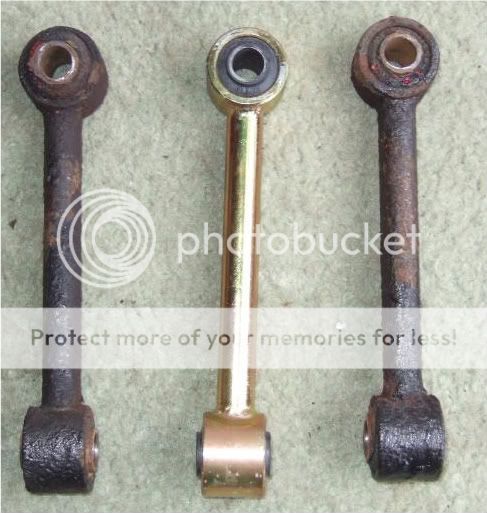 The old brake hoses were rusted on very badly got them off finally, the second was the worst it must of none I was trying to finish for 4pm Got the new bottle on spiggot in and sorted out pipe. 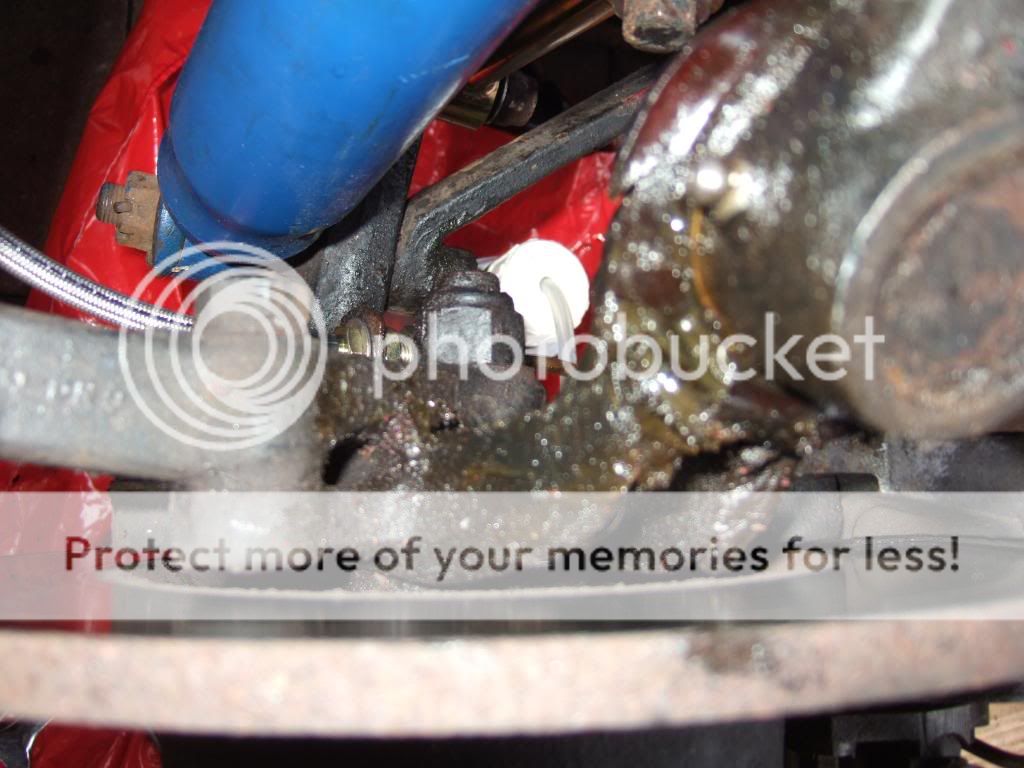 For some reason all the ARB nuts and bolts were painted I will get new N & B then change the bushes, job back on the list Exhaust Bracket Question When I dropped the rear end of the car the other week I ruin my exhaust bracket 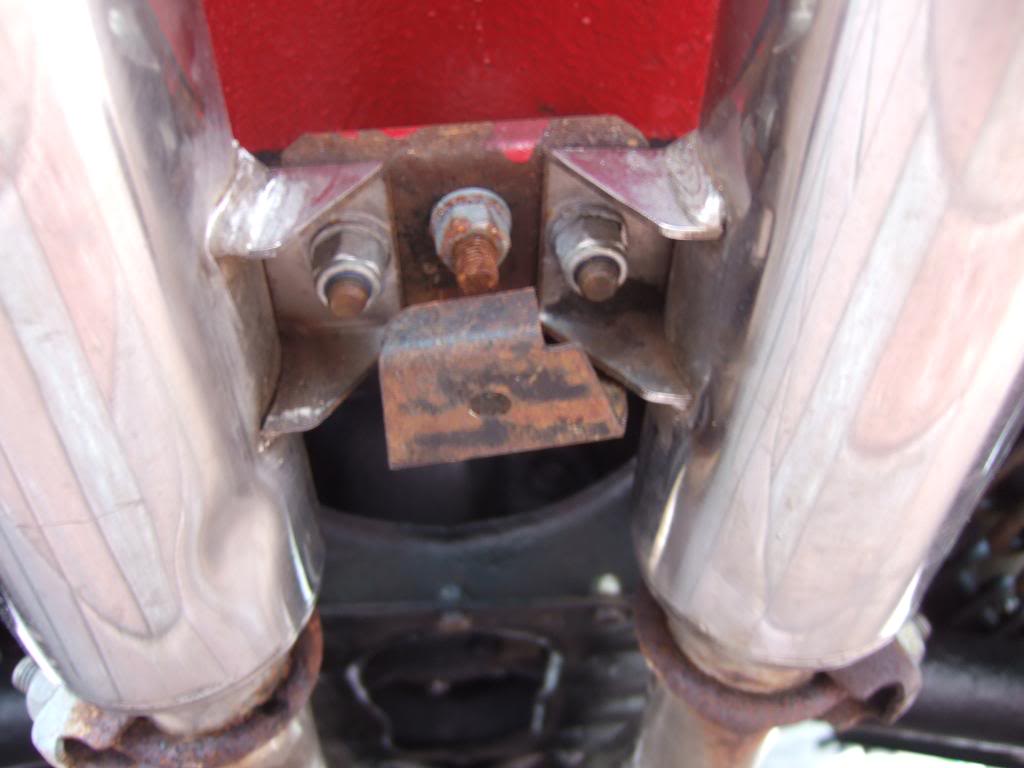 I have taken it off taken it apart, straightened the metal sections, rubbed it down primmed it and sprayed it black but the chunk of rubber seems to be split in 3 places within the chunk of rubber, do you buy the rubber seperate or as a hole piece Sep 08, 2009
Cleaning Seats & Hardura ReplacementI had done the passenger side a few weeks back but not got round to the side The difference is clearly visable  The seat base was ground in but Liquid Leather Cleaner sorted it out 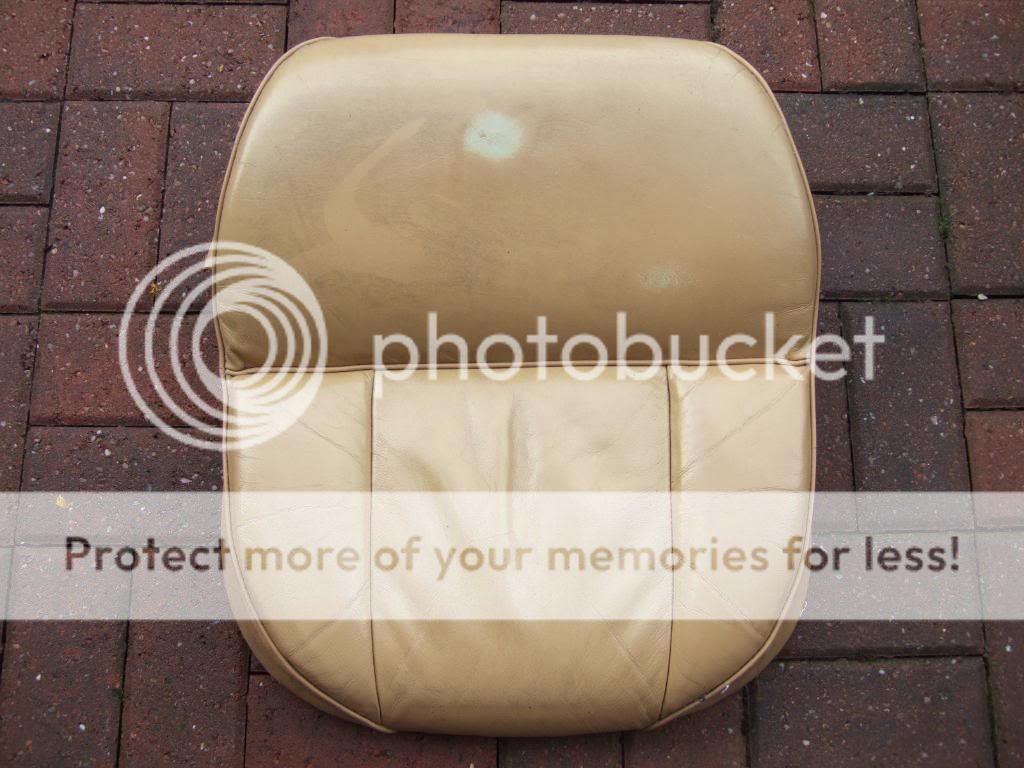 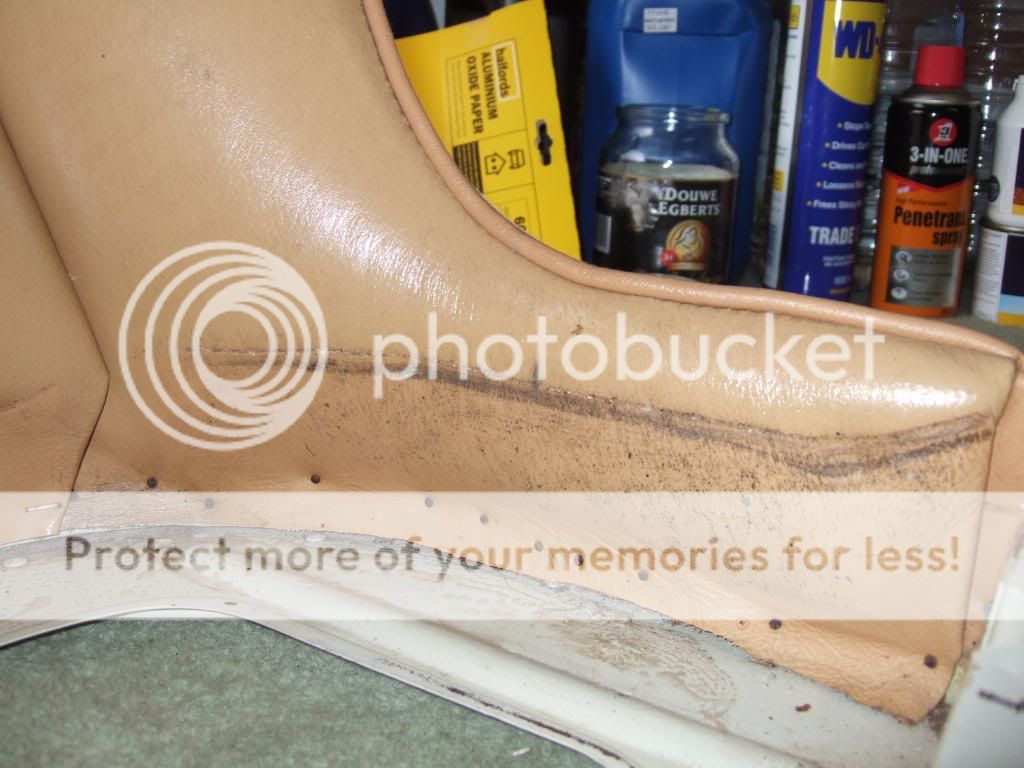 I think when the car was being stored or used very little it was being used as a nest not sure where the critters got in though  Underneath the seat base there were multiply washers and a nut to raise the seat height I did away with the nut and saved about cm. there which was good as I needed more knee room After cleaning the carpet with Meguairs and the Vynal with Poorboys APC the Hardura was fitted 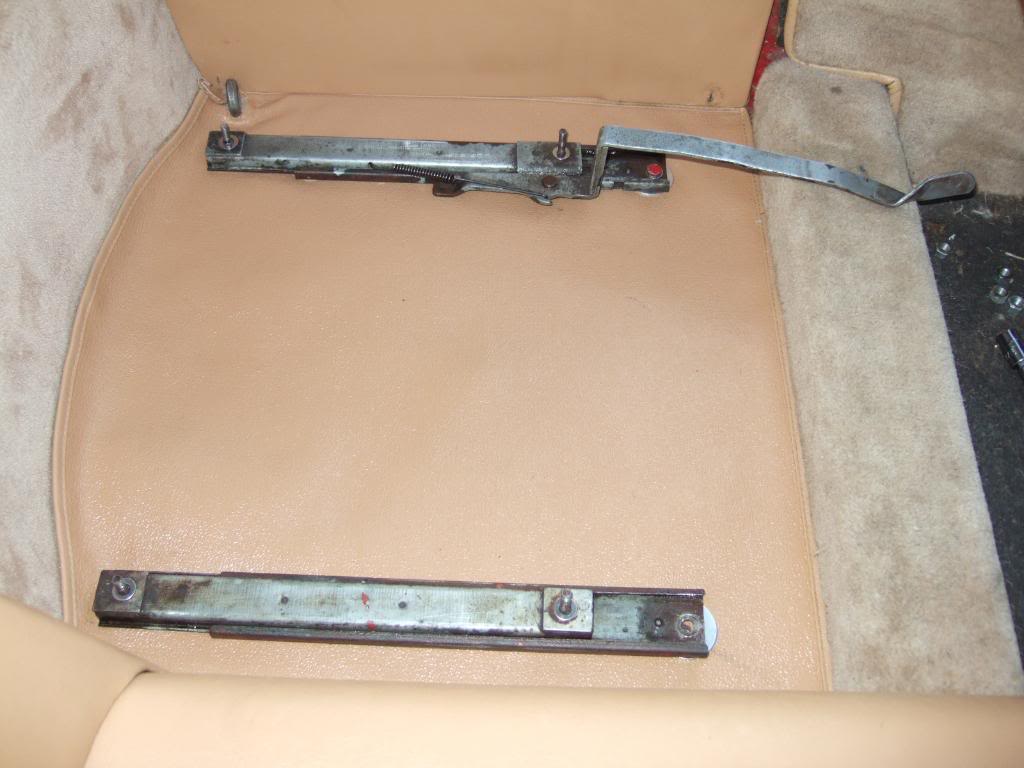 With the seat belt harnesses back in and the seat secured back in.  Interior nearly sorted just need to swap out my steering wheel, and clean roof lining Now off for my 
Comments & Tips Armrests weren't fitted until mid '63
The arm rests were originally from a Bedford truck (grey plastic base, vinyl top - I am not making this up) and require two inordinately long slot head bolts to affix to the door. Unfortunately the retaining nuts are welded to the door frame and are at an angle IIRC so fitting needs careful consideration in an early 3.8 i.e. not a DIY job!
Paul Skilleter records that the electrically heated backlight\window was introduced as an option in April 1962 ('The Jaguar E-Type' p.122)Sep 09, 2009
SupplierAfter E communication with Chris R. I now have another supplier which Im yet to use but when I get into the suspension over winter I will be using them Namrick Limited Nut & Bolt Store 124 Portland Road Hove Sussex BN3 5QL United Kingdom Mail order supplies: (+44) 01273 779864 Trade & Retail Sales: (+44) 01273 736963 One other, advised by someone else:- Bernie the BoltComprehensive nut/bolt/screw supplier Unit 3 Meltham Mills Industrial Estate Huddersfield HD7 3DS UK Tel: 01484 851585 Fax: 01484 852399 | |
| | | | Car-Nut
Admin
Posts : 3004
Join date : 2009-11-16
Age : 57
Location : E. Lancashire : UK
| | Subject: Re: Baselining - 369 HBF - 860871 - Before the Upgrades Wed Dec 02, 2009 8:07 am | |
| P20
Sep 09, 2009
Nutty QuestionI await my Namrick catalogue to find out what all these stand for U.N.F
B.S.F.
WHITWORTH
B.A.
U.N.C. Plus which the E uses -anyone Exhaust BracketAfter the car dropped on its ar53 the other day the exhaust was out of line So I took the rusty old bracket off. 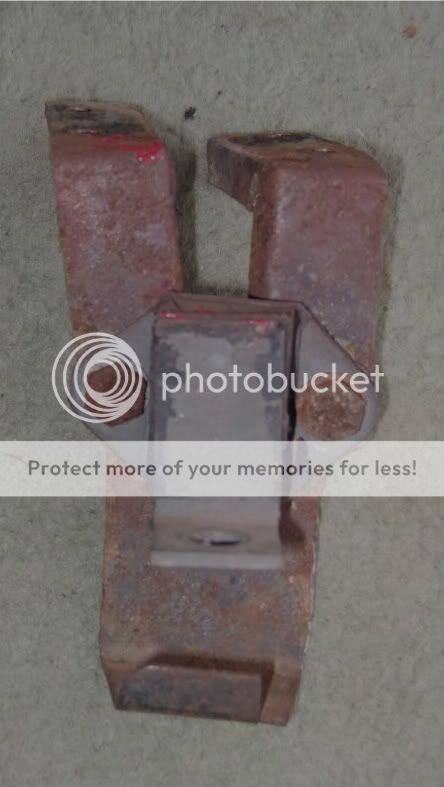 After dismatling I see the rubber is goosed so I bought a new one, it came on the metal as a complete item £1.50  After a good few hits with the hammer straightening  I did a bit of spraying -primer 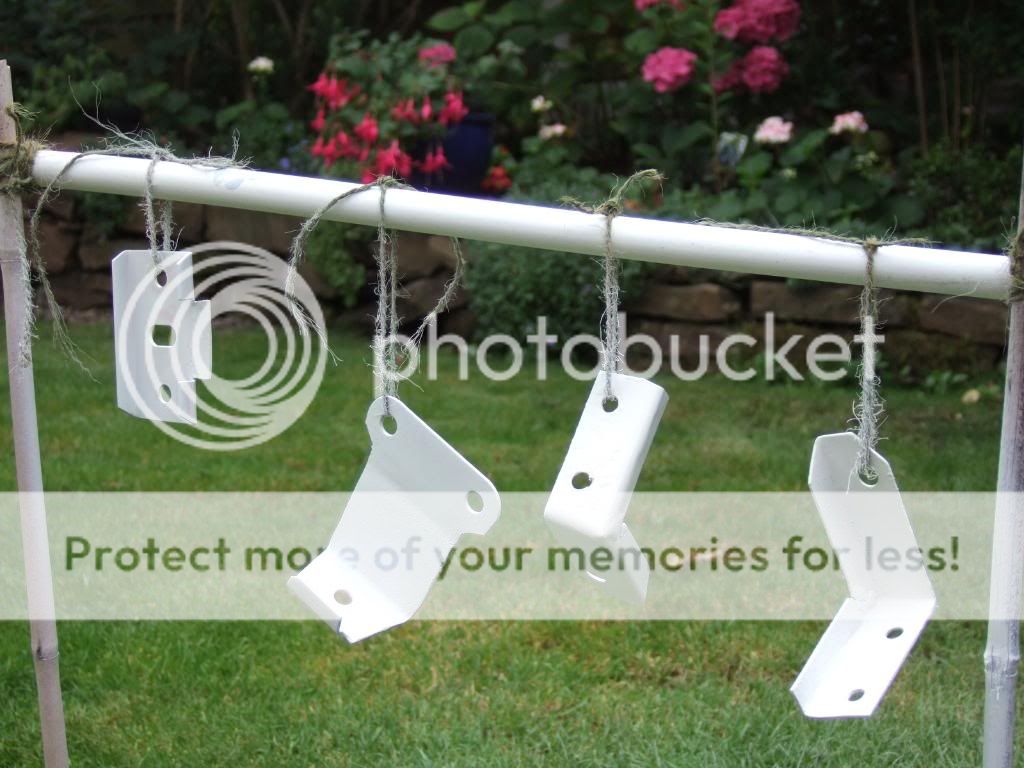 Then top coat and lacquer and back on the car with all new bolts  Hmmm.. That picture looks familiar Looks much better in my opinion Nuts, Bolts & WashersNo, this is not about sad events in a laundry UNF = Unified Fine, used on about 95% of all fixings on an E , with the spanners required being A/F ( Across the Flats) sizes. Don't confuse the bolt shank size with the spanner ( head) size. Thus eg UNF 1/4" requires 7/16" AF
UNC = Unified Coarse, also using AF spanners, but used where the thread goes into alloy, eg manifold studs etc. Note that many studs have UNC to plug into the alloy, and UNF to take the nut
BSF = British Standard Fine - I cannot think of an application on Es although there may be some carb fittings
Whitworth = Whitworth Thread , uses same shank sizes as UNF/UNC but a different head size and with a thread pattern different from either but generally on the coarse side. The carb fixings in some cases are Whit, and one particular application is the nut which locks the cam chain tensioner plate
BA = British Association - used on many electrical connections and, IIRC, on the screws for the arm rests. Generally for small size nuts and bolts eg 1/8 inch and smaller | |
| | | | Car-Nut
Admin
Posts : 3004
Join date : 2009-11-16
Age : 57
Location : E. Lancashire : UK
| | Subject: Re: Baselining - 369 HBF - 860871 - Before the Upgrades Wed Dec 02, 2009 8:35 am | |
| P21
Sep 12, 2009The first time in the car for my good Mrs tomorrow off out to lunch meet our friends who have a Porker, he doesnt know I have it  cant wait to see his face Sep 13, 2009Intermittent Mis-Fire BeginsMet my friend for Sunday lunch, I arrived first and got the best parking space, he arrived next and parked next to me. All the attention seemed to go my from everyone walking past and its about 1\3 of the price of his porker Did my round trip to Lancaster and back first time with the Mrs in the car, car played up on a couple off occasions when pulling off from a roundabout and overtaking a few cars it decided to stutter and back fire as if it was starved of fuel It also did it when driving onto a roundabout coming back Not done this before, and I haven't checked the manual yet any tips though welcome On having a quick look at the manual and a glance at my engine I see the rubber seal on the airbox drum has slipped partly in I am going to secure with perhaps a couple small dabs of glue and test drive... Keep you posted AdviceThe airbox seal is very unlikely to have anything to do with a misfire. I do get this occasionally with my S2 OTS, but never with my FHC. On the OTS , a fairly G laden Left hand bend will cause a hiccough. I suspect it's caused by the float level being lower than it should be on one or more carbs---- Check your carburetter float levels. Fuel surging through turns is not uncommon if the levels are too low. This is also a good time to fit Grose jets to the float bowls if this has not already been done.---- Have you:
1. Cleaned out the fuel tank (sump) filter?
2. Replaced the bowl filter?
3. Checked each of the SU gauze filters?
After standing around for so long I would expect the first. If the car has been left with less than a full tank of fuel it is likely to rust. Filling it up washes the rust flakes down into the sump and movement (cornering) can disturb the silt. You will need to run the tank until almost empty to check the filter. Bowl filter is cheap so replace anyway or install a Filter King.---- Forget about re-jetting your carbs as you have enough jobs on your plate! Clean those filters and see where it gets you. Not sure Grosse jets are available in the UK and as far as I know none of the specialists here recommend or fit them. | |
| | | | Car-Nut
Admin
Posts : 3004
Join date : 2009-11-16
Age : 57
Location : E. Lancashire : UK
| | Subject: Re: Baselining - 369 HBF - 860871 - Before the Upgrades Wed Dec 02, 2009 8:52 am | |
| P22Intermittent Backfire
AdviceCheck out the SU fuel pump it also has a filter inside,if its the original points version they are unreliable and it will definitely give you bother with fuel delivery and regular breakdowns.the best option is to swap for the electronic version SU or a red top Facet pump.
Also do you have a contact points distributor or electronic? if its contact points,fit new points and condensor and check the vacuum advance is working [ take off the distributor cap then suck the thin pipe to the vac advance,the distributor backplate should rotate with vacuum] again the best option is to swap for electronic ie 123
----
Being a 3.8, remove the pump but any debris will remain so the sump plug needs to come out - a job that needs doing every three years or so anyway. Also worth remembering to brim the tank if you are storing the car over winter to prevent rust.---- Sep 15, 2009Well just had a bit of time to work on the car to analyse the problem. Firstly I loosened off the 3 Banjo bolts and then took the minute filters out the one nearest the nose had a few grains of sand, the next was clean and the one nearest the bulkhead was in between the 2 so I gave them all a clean individually in a petrol bath and put them back in the correct order and tightened the banjo's. Secondly after finally getting the retaining strap off the glass fuel filter bowl I swapped out the seal, filter and spring the filter was light brown not yellow - Definitely past its "Sell buy" date Before putting the new I wiped out the bowl as you could see 1\4 teaspoon of sand at the bottom Took it for a drive and on acceleration it happened again, so you can make it happen or not depending on how you are driving. On the way I was looking at the rev counter\ speedo to see when the splutter\misfire occurred and it seems to be at about 2-2200rpm and 50ish mph while under acceleration when driving normal through this range its fine I know I need to check the fuel pump filter yet and someone some said the distributor I haven’t got electronic yet but this could be where my arm is twisted to upgrade. Obviously I'll check all the cheaper options first..... My list of jobs for this week seems to have got longer Yes its an in tank pump, like working with bomb All doors open as well so you dont gas yourelf when removing I remember when removing my E30's one. Thinking back on how little my has car been used since rebuild and the last 3 yrs harly used at all and when I got it, it was empty the tank it was due to happen sooner or later with muck from the tank being washed through... AdviceBefore you spend out on aftermarket bits and pieces, get the tank sump off. If this has a lot of rust scale in the bottom, it could well point to your problem. I’ve had the same situation you have on a couple of cars, which both turned out to be a large lump of scale being drawn into the pick-up in the tank, or covering the opening to the pickup. It would usually happen when there was a big demand for fuel, and effectively cut off supply. Most times, it would go back to normal when the revs were reduced, or the engine switched off for a couple of minutes.
Remember that you may have the cleanest filters, but still have this problem.
If the tank is rusty (you can peer in via the sender unit orifice) you can either get it cleaned and sealed or replace it. For the cost of a tank, it’s really not worth the hassle of trying to fix up the old one. When you do sort the tank, remember to blow out all fuel lines in the reverse direction to flow…there could still be some crud stuck in them.Sep 15, 2009So this is obviously a job for when the tank is empty or nearly empty and take the tank out remove the sump off the bottom (looking at the diagram Haynes P77) Then clean it out no doubt it will be full of rust scale which has recently been swilled around and now settled to the bottom after being filled up sunday . Advice - Petrol TankTo take the sump off the tank you should not need to remove the tank, which is the performance to end all performances. The sump is made of brass, and should have a hexagonal built in "nut " shape on its bottom end. If, as is often the case, this is chewed, use a stillson on the body of the sump itself. It is a normal right hand thread.BTW, when I took my tank out the stuff I got out resembled a bird's nest
I also must disagree with the above. There is nothing unreliable about the points type SU pumps at all. I have , on 4 different cars, pumps which have been working for 180 years! On the other hand , I can show you an electronic pump of an S3 where the plastic melted after 3 years. Not quite what you want with petrol in close proximity | |
| | | | Car-Nut
Admin
Posts : 3004
Join date : 2009-11-16
Age : 57
Location : E. Lancashire : UK
| | Subject: Re: Baselining - 369 HBF - 860871 - Before the Upgrades Wed Dec 02, 2009 9:55 am | |
| P23
Sep 15, 2009
Fuel Tank Sump Assembly RemovalGuys, taking a step back P20 photo 7 to the left side of the exhausts, the cylinder coming down with the nut \bolt at the bottom. I take it thats the Fuel Tank Sump assembley I have to remove AdviceThat is the fuel-tank sump. It is often a real b*tch to remove, and you'll be surprised at how much petrol remains in an "almost empty" tank. You'll also be surprised at the amount of crap that settles to the bottom of that sump.
Needless to say, all the usual rules apply here, e.g., disconnected battery, no nearby ignition sources, etc.POR 15 Petrol Tank Sealant 1st : with your tank out of the car, you use the cleaning solution with hot water to remove the gunk and rusty deposit, then let it dry .
2nd : When totally dry ,you plug all orifices except one indeed ! Pour the sealer in the reservoir and tumble it for a while for the sealer to coat all areas of the tank. Drain the excess. Let dry for a day or two.
Trust POR 15 when they say that you cannot remove overflow or drops of sealant, unless you act immediatly !!
I did my new header tank as well at the same time, and I still have plenty of product left.
Just follow the instructions---- POR 15 is wonderful stuff. Unlike many other sloshing compounds, I believe its chemistry is compatible with petrols having alcohol added (big problem over here).
I had never thought of treating a radiator header tank. I just figured buying a new one every three years was part of the E-Type experience ---- I am going to use it in my coolant header tank which has a certain amount of surface rust but no holesSep 20, 2009
Petrol Filler CapOld 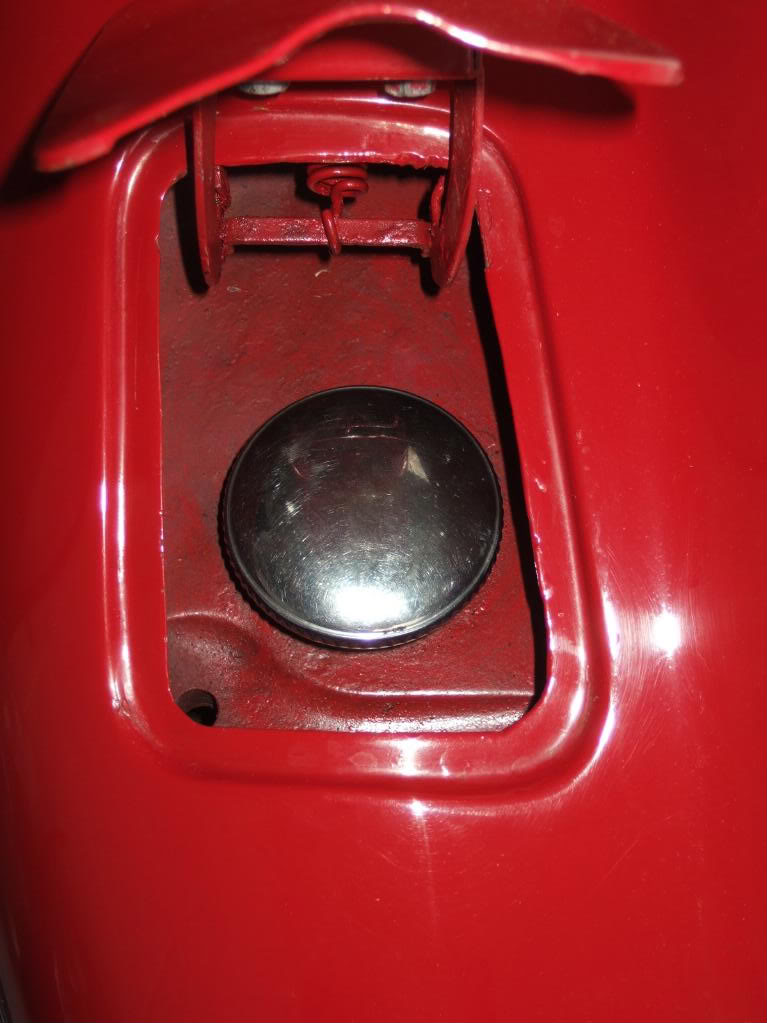 New  AdviceThe round one does not appear to have a vent hole whereas the other one does. There has been a great deal of talk in another place about fuel starvation caused by fitting a non-vented cap in place a vented. I may be totally up the wrong tree here but may be worth considering; your recent engine cut outs came to mind. Sep 20, 2009 AdviceThe round one does not appear to have a vent hole whereas the other one does. There has been a great deal of talk in another place about fuel starvation caused by fitting a non-vented cap in place a vented. I may be totally up the wrong tree here but may be worth considering; your recent engine cut outs came to mind. Sep 20, 2009
Air Filter Seal Issue Ok, so a few pages back when the stutter began I thought it was due to the AFS dropping into the AF box. Even though the stutter seems to be due to in the fuel sump sump and I cant sort that till the fuel tank is empty, so I thought Id sort this seal out. The reason why this AFS drops is the Air Filter box is it's to far over to the edge of the car and needed centralising a bit. 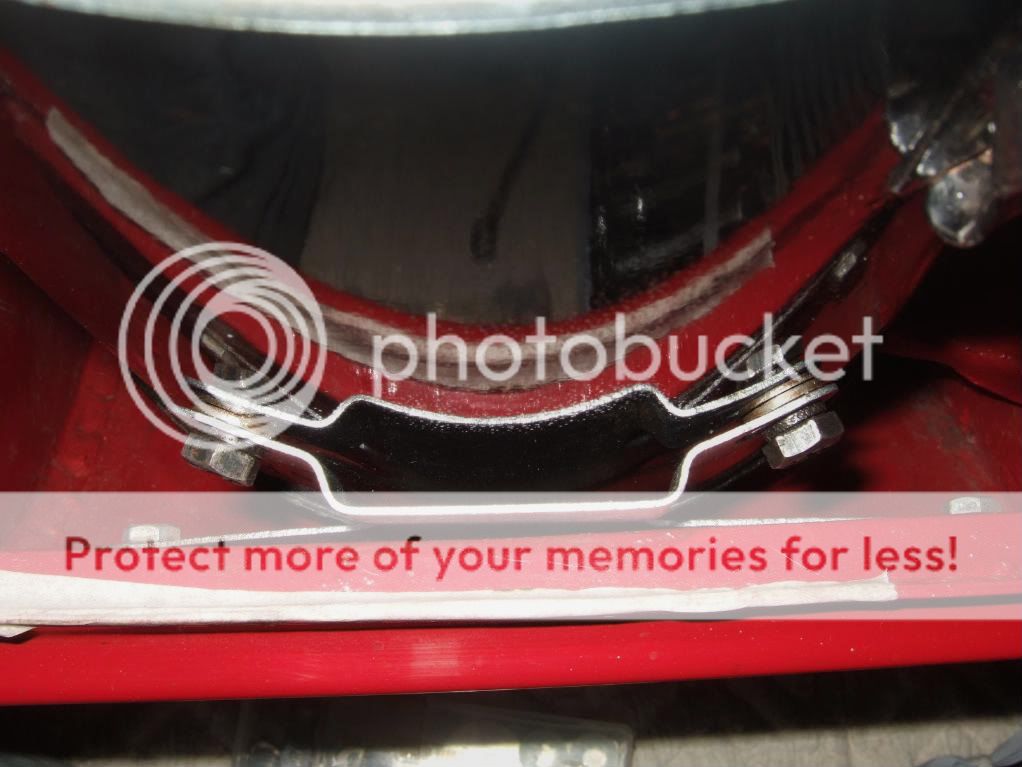 My solution was space the mounting bracket out so it was a bit more near the central line of othe car  With the bracket moved across by the washers the AFS doesnt slip down | |
| | | | Car-Nut
Admin
Posts : 3004
Join date : 2009-11-16
Age : 57
Location : E. Lancashire : UK
| | Subject: Re: Baselining - 369 HBF - 860871 - Before the Upgrades Thu Dec 03, 2009 3:59 am | |
| P24
Sep 20, 2009
Engine DetailingWell thoughtI'd do a bit of polishing this arvo as had a spare 1\2 hr. Id polished one suction chamber and thought I'd best quickly do a before photo  After polishing the 3 suction chambers, part of the cam cover and the other metal work near by I put my new dampers in. After a bit of polishing...  Sep 28, 2009 Sep 28, 2009
Changing Steering WheelGuys (I think Im still safe saying that on here) I couldnt get the E out last week due to some very messy workman doing our cavity wall insulation. Anyway, saturday morning got the old girl out to give her a blast headed out towards Harrogate had up to the 3 figures mark (1st time) no problems. Strangely enough the stutter had almost gone but on the two occassions it occured it was at a higher speed, 70 ish Anyway when the petrol gones Ill clean out the sump and check the fuel filter,filter as you (my cyber mechanics,  ) have advised Now after the run I swapped out my steering wheel. But after taking the horn button out and the horn push rod, I notice my Horn Insulating Bush is broken  Could this be the reason my horn doesnt work (More on the Horn later) Back to:- The Steering Wheel swap out.. Original Steering wheel in situ pre ownership  With the boss removed, nut undone, heres the wheel carefully held in the vice to drill the rivets out of the wheel  Carefully drilled out, rivets very soft 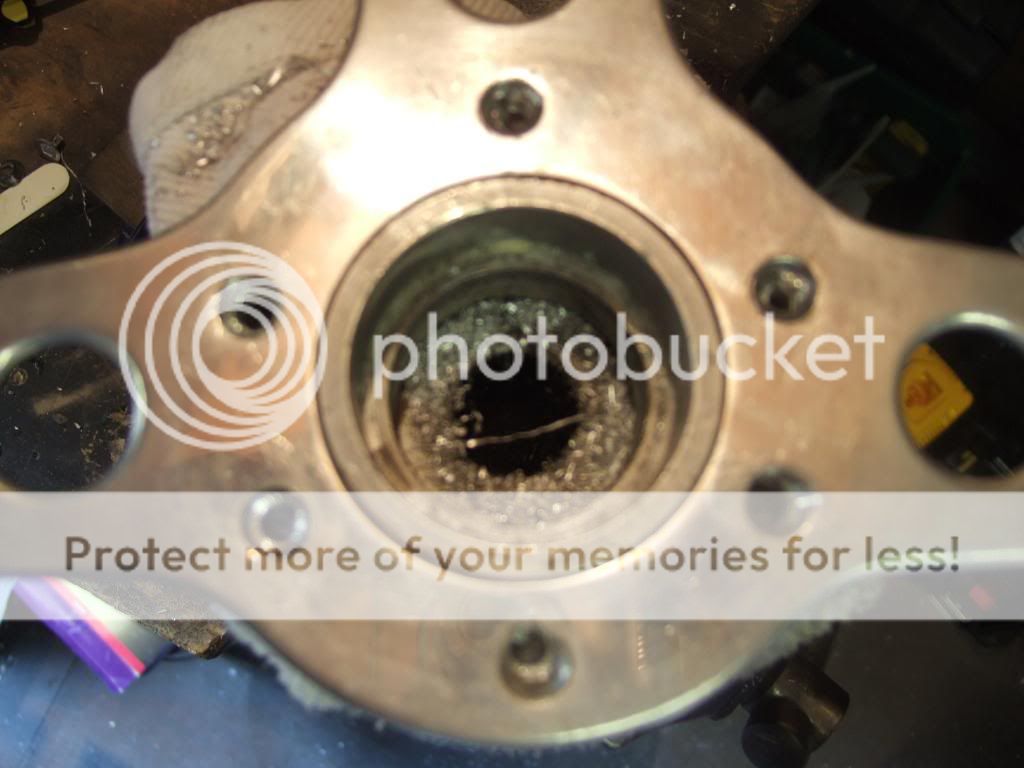 Ready to polish 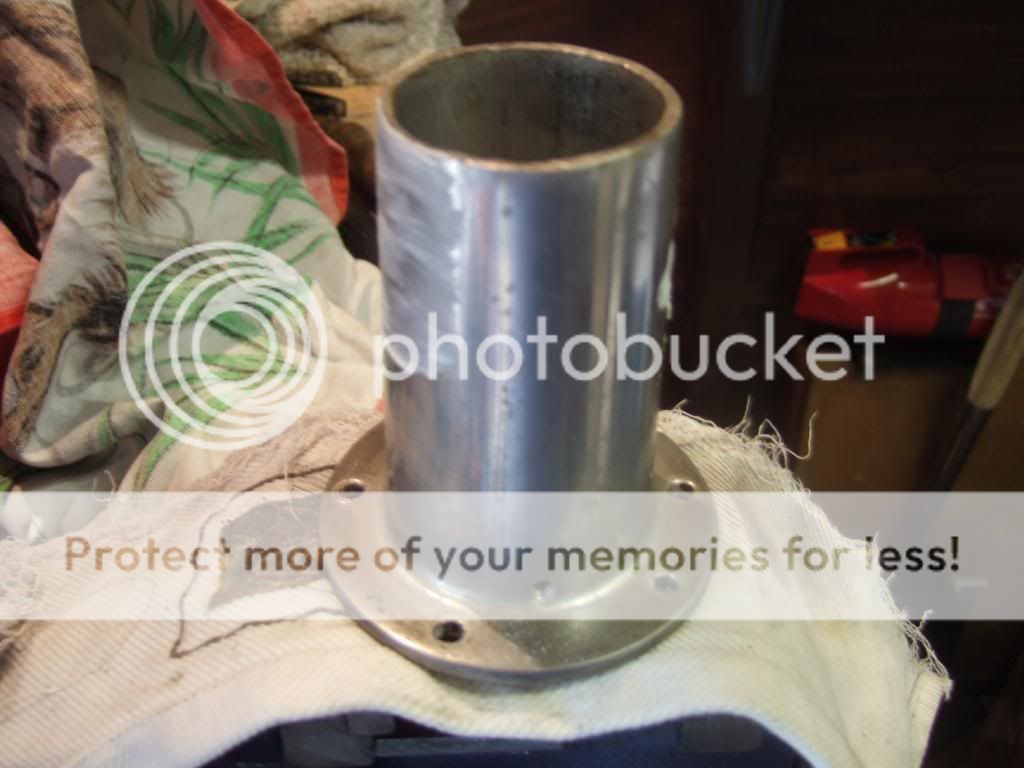 Polished....  Then the new(second hand) wheel was attached 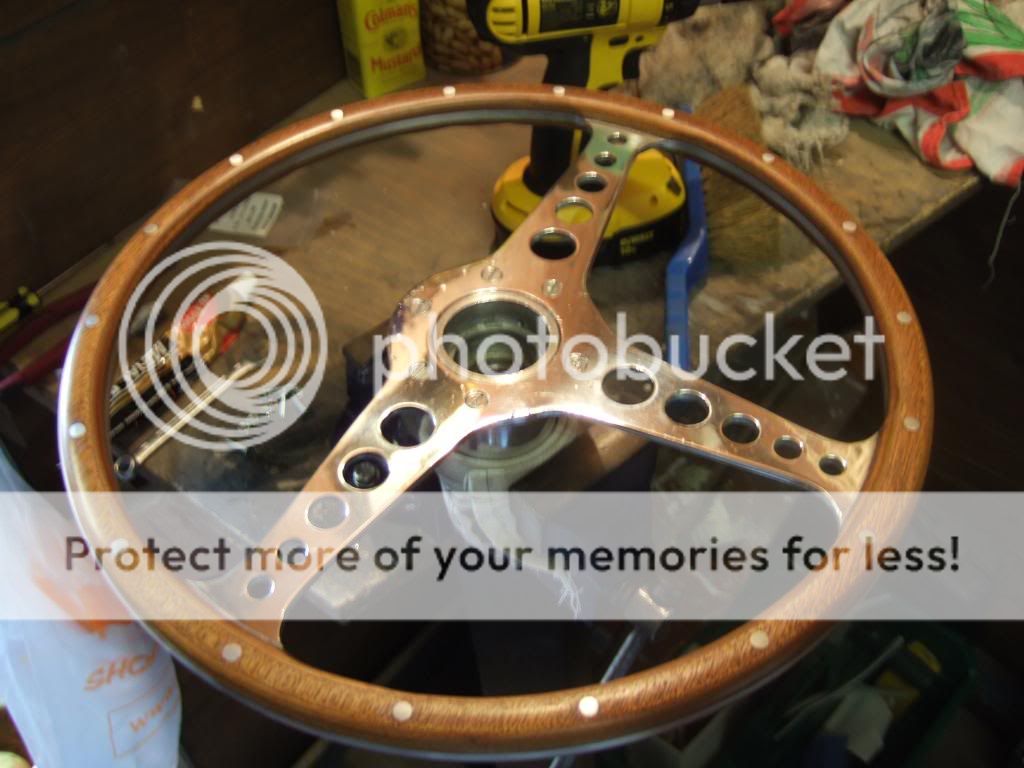 Attached with countersunk 5x20mm zinc nuts and bolts but when I do a Namricks order these will be replaced for SS shorter ones. Then attached and in the car, I must say I am so suprised how difference 1\2 inch on the radius has made it is now a lot easier to get in, yep you guessed it  So my car now has a nicely refurbed 15" Moto Lita in place of the 16" Oct 01, 2009
Horn IssuesSo this afternoon I wanted to try and fix my horn as its been bugging me since day 1 I removed the column switch cover to see what I could see, hmmm a dangling wire.....   I chased the wire in to the fuse area but it ran along the back in the fuse area and out into the engine bay, then it was connected to the horn relay. Looking at my relay there seems to be an additional connection below the brown wire compared to the relay diagram I have  Now at this point I hadnt disconnected the battery and if I touched this loose wire on the metal steering column outer casing the horn beeped when the car was turned on (not good practice) Least that proved the horn works though My question is where does the brown wire connect to I couldnt really see where it had come from, though to be honest I didnt really know where I should be looking AdviceThe brown wire connects to a contact in the steering wheel column - just above where it is dangling actually. If you drop the column (remove the height adjustment bolt) you may be able to see it. There should be a bullet connector on the end of the brown wire which goes into the copper connector strip which, in turn, presses on the central part of the column. Basically when you press the horn button it earths that central connector (long thin steel rod) which activates the feeble 'beeb' - hence you got it to sound when you touched it to earth.Suggest you try and retrieve the old one - I guarantee it will still be in the contact. If not any modern size bullet will work as you can tighten the contact hole, it is just a bit of bent brass: 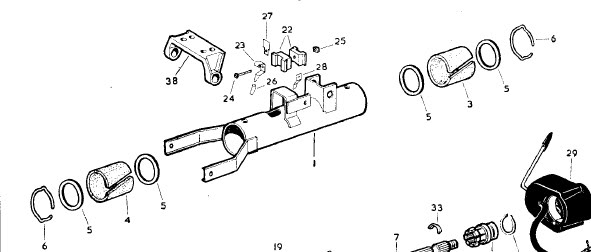 The bullet and associated brown wire go into part 23. The bullet and associated brown wire go into part 23. | |
| | | | Car-Nut
Admin
Posts : 3004
Join date : 2009-11-16
Age : 57
Location : E. Lancashire : UK
| | Subject: Re: Baselining - 369 HBF - 860871 - Before the Upgrades Fri Dec 04, 2009 5:13 am | |
| P25
Cont. Horn IssuesAdviceBest type are the 4.7mm brass solder-on ones. Failing that you could go with the insulated crimp connectors beloved by Halfords. You can buy bullet and other connectors on line here: http://www.vehicle-wiring-products.eu/VWP-onlinestore/terminalsnonins/noninsbullets.php A good site for all things electrical: http://www.vehicle-wiring-products.eu/VWP-onlinestore/home/homepage.php Oct 02, 2009After shinning my torch higher up into the wires I saw 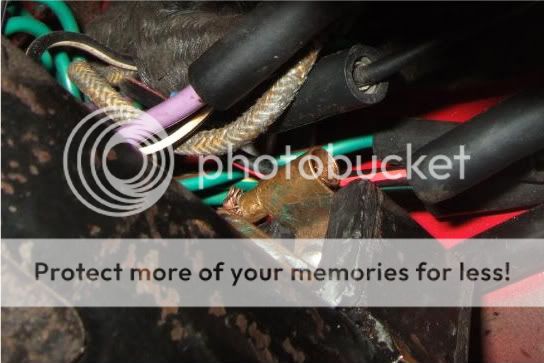 The little chap is still in there  As this seems difficult to replace quickly as people dont know what they are, or you have to get them off the net I drilled it out and re used it Needs must.. Anyway I got it back in its connecter tried the horn and it didnt work I took another look under and 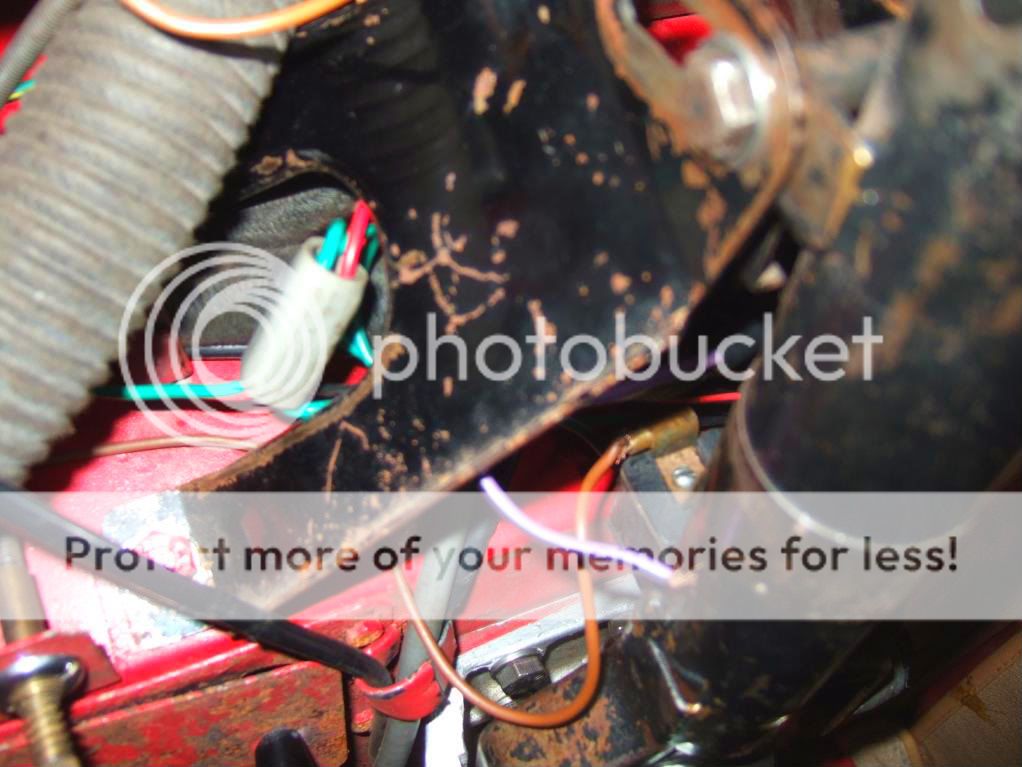 Now a loose purple wire with a black stripe seems to have dropped down Ive had a good look but cant see another bullet where it could be from Looking at last nights pic I uploaded of the Horn relay, this has a wire the same colour top left hope that helps someone to advise me where it goes. I have RTFM but no joy As usual advice appreciated Im off for a couple of pre dinner  look forward to your replies Advice Just checked another wiring diagram and the lead going to the horn contact should be purple/black. Try swapping it for the brown one and see what happens. You could of course have a fault in the horn button circuit so ideally you should check it with a continuity meter first. That leaves us with the problem of where the brown wire should go ---- You need one of these (second one down is ideal): http://www.vehicle-wiring-products.eu/VWP-onlinestore/testmeters/meters.php Set to 'ohms' or 'continuity' and connect one probe to earth, other to contact. Press horn button and it should buzz if circuit is correct. Great for checking bulbs and all other electrical jobs.Oct 03, 2009I've now tested with MM with one probe on the copper bullet connecter area and one on the top of the horn press rod will horn pushed in an key turned but car not started my MM gave a beeping noise.The horn didnt though AdviceStep 1: connect probe to copper connector
Step 2: connect other probe to any earth point (bit of unpainted metal or bolt)
Step 3: Press horn button - MM should beep - if not go to step 6
Step 4: Connect brown lead to earth, horn should work
Step 5: Connect brown lead to connector, press horn button and should sound OK
Step 6: Dismantle steering column and check parts are correct and functioning.
If touching the brown lead to earth causes the horn to sound then the fault must be in the column as it is only a switch that connects brown to earth when the horn button is pressed. | |
| | | | Sponsored content
| | Subject: Re: Baselining - 369 HBF - 860871 - Before the Upgrades | |
| |
| | | | | | Baselining - 369 HBF - 860871 - Before the Upgrades | |
|
Similar topics |  |
|
| | Permissions in this forum: | You cannot reply to topics in this forum
| |
| |
| |

