| | Baselining - 369 HBF - 860871 - Before the Upgrades |  |
|
|
|
| Author | Message |
|---|
Car-Nut
Admin

Posts : 3004
Join date : 2009-11-16
Age : 57
Location : E. Lancashire : UK
 |  Subject: Re: Baselining - 369 HBF - 860871 - Before the Upgrades Subject: Re: Baselining - 369 HBF - 860871 - Before the Upgrades  Thu Mar 04, 2010 8:42 am Thu Mar 04, 2010 8:42 am | |
| Looking back a few days on the report you can see the the timing chain plate was covered in grease and grim Ive given this a good clean 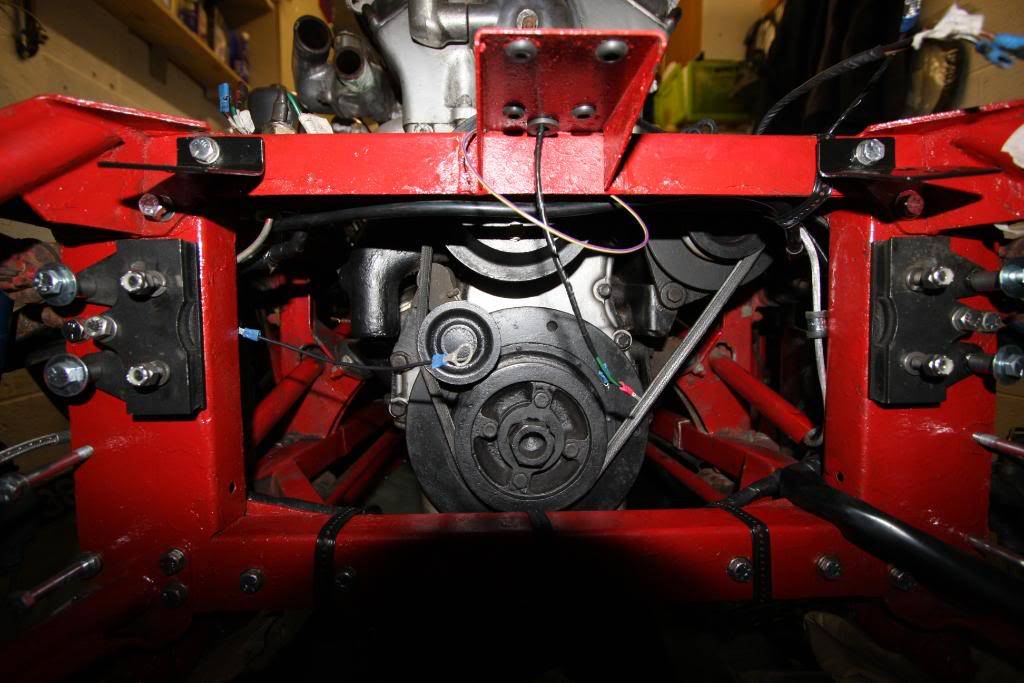 Since doing this Ive re-routed the the loom, and more of less fitted the refurbed rack and pinion and LSC and refurbed the Front ARB check out the guide section  This was the engine bay yesterday before the rack and pinion went on today. 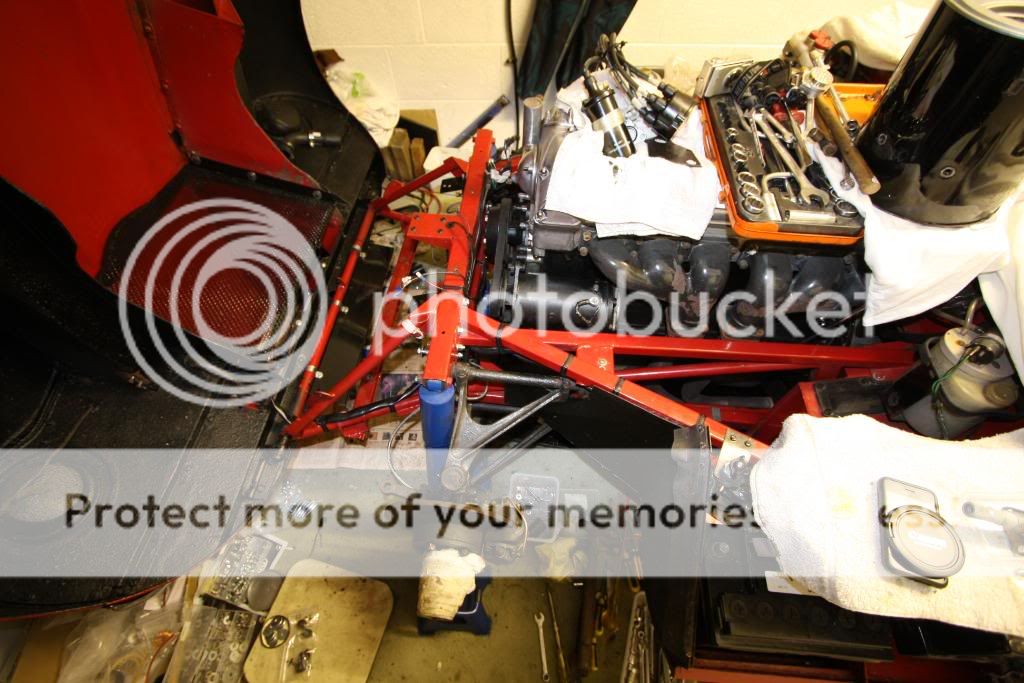 | |
|
| | |
Car-Nut
Admin
Posts : 3004
Join date : 2009-11-16
Age : 57
Location : E. Lancashire : UK
| | Subject: Re: Baselining - 369 HBF - 860871 - Before the Upgrades Fri Mar 12, 2010 5:22 am | |
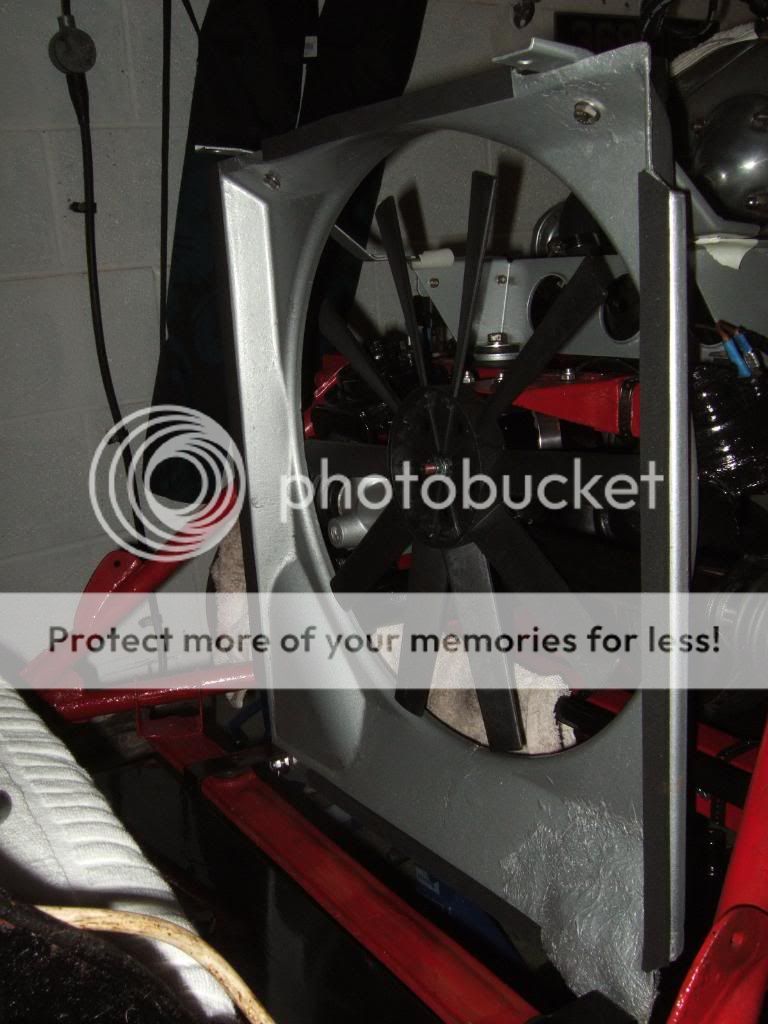
| Putting it back togetherAfter the removal  refurb refit of the LSC and Rack and Pinion (See DIY Guide section) I refited the parts back in the car:- LSC connected to the USC in the cabin 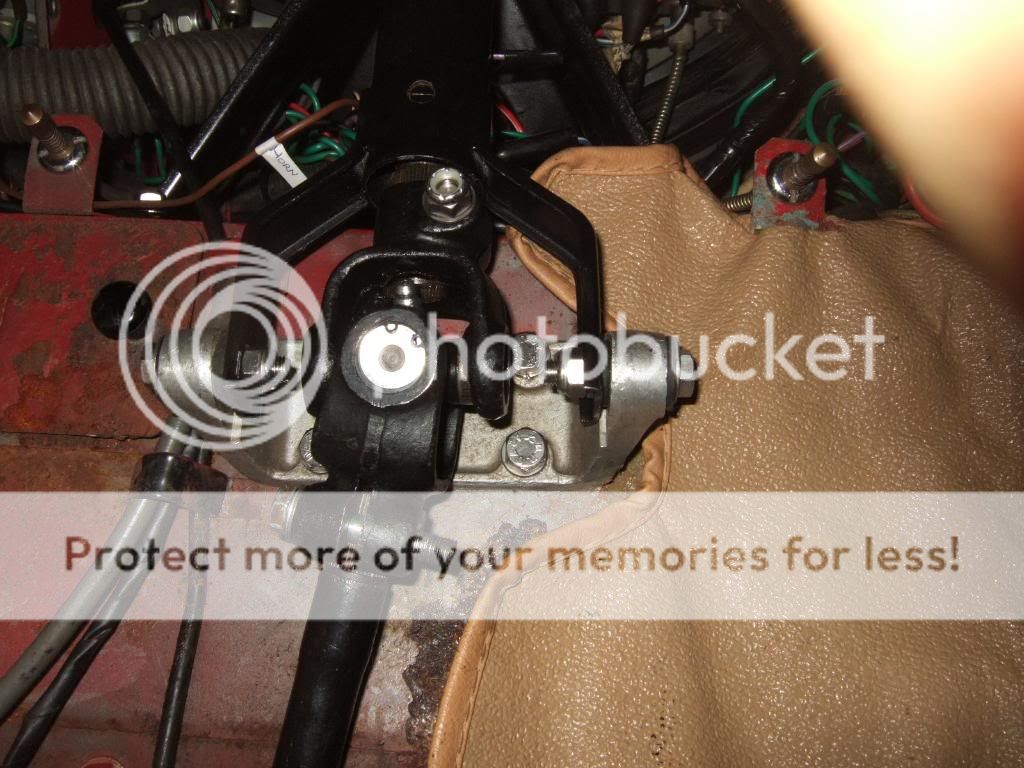 Once connected I held it in place with a couple of blocks 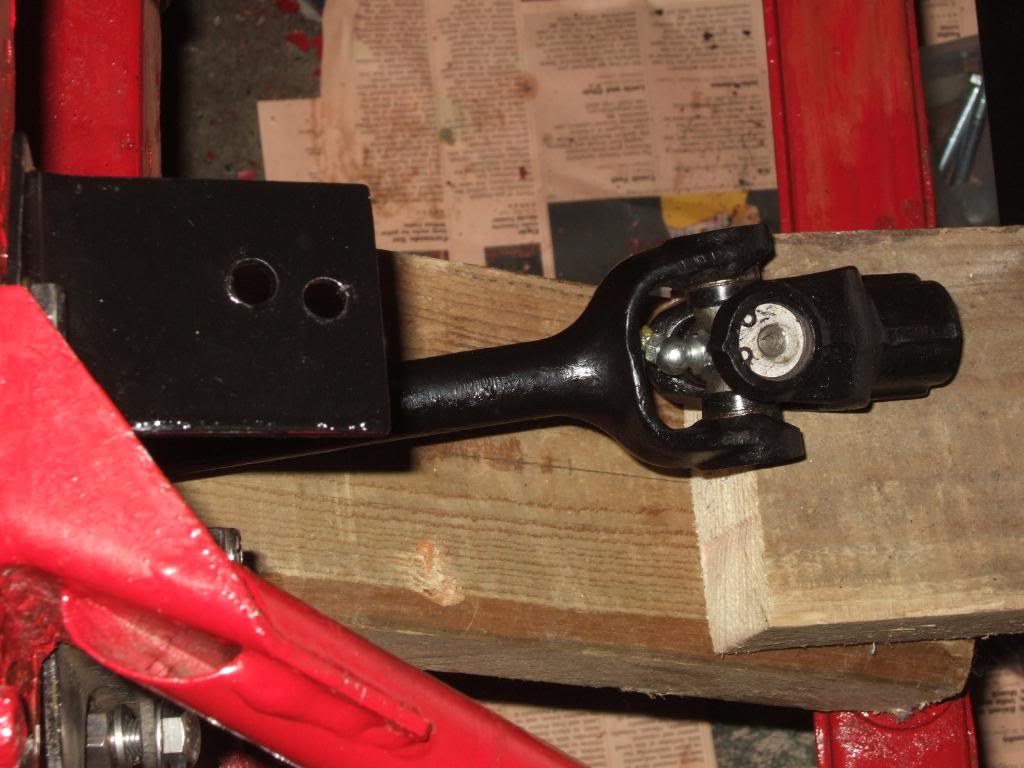 Remember to put the earth wire on before fitting to the car  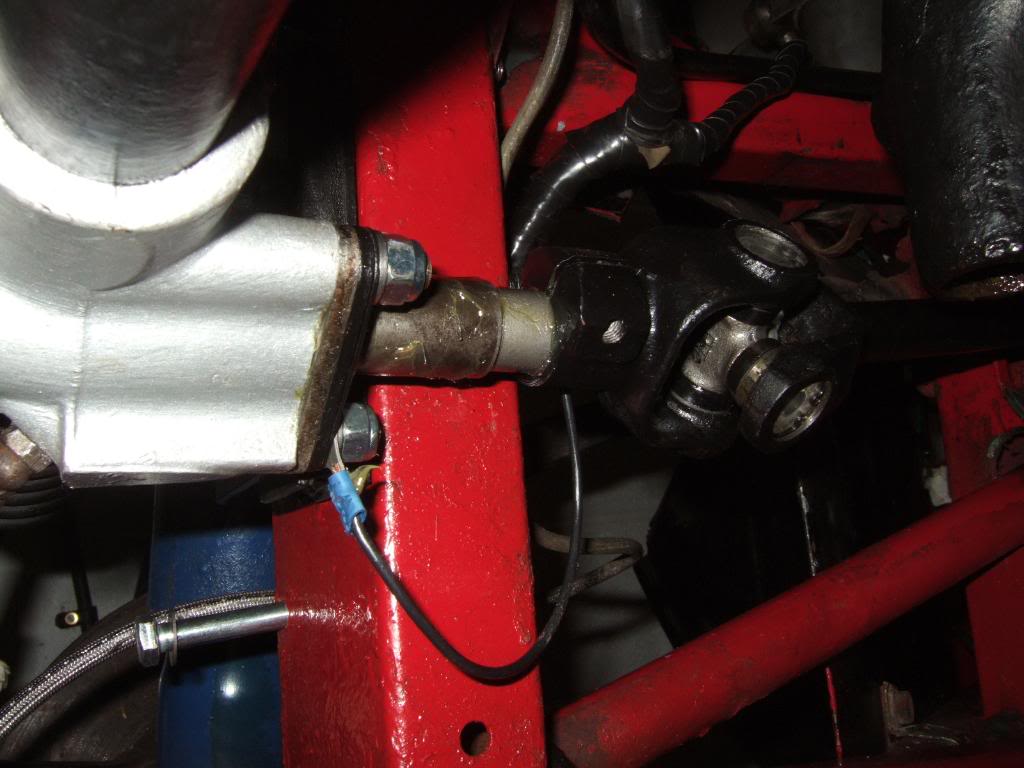 Then connect the plates to the mounting brackets.  After this I fitted the ARB back in Again Refurb guide in DIY Guide section. Next I put the Horn mounting brackets on and fitted the Horns.  Then in with my new Upgraded Fan and fan Moter form Coolcat in USA   Next I put in the RHT mounting bracket, Horn Relay bracket and relay, I'm leaving the RHT off at the minute as I need the space for engine work I have planned.  Then the Radiator Cowl went in secure all the bolts everywhere and making sure it is in the correct order by the U Bracket which goes uder the rad.  Only do up one side as the other is used to attach the RHT as well | |
|
| | |
Car-Nut
Admin
Posts : 3004
Join date : 2009-11-16
Age : 57
Location : E. Lancashire : UK
| |
| | |
Car-Nut
Admin
Posts : 3004
Join date : 2009-11-16
Age : 57
Location : E. Lancashire : UK
| | Subject: Re: Baselining - 369 HBF - 860871 - Before the Upgrades Mon Mar 15, 2010 9:46 am | |
| Connecting the Water Pump to the RadiatorWell, this is a nice tricky job   Before you put the rad etc back in connect the following to the Water Pump 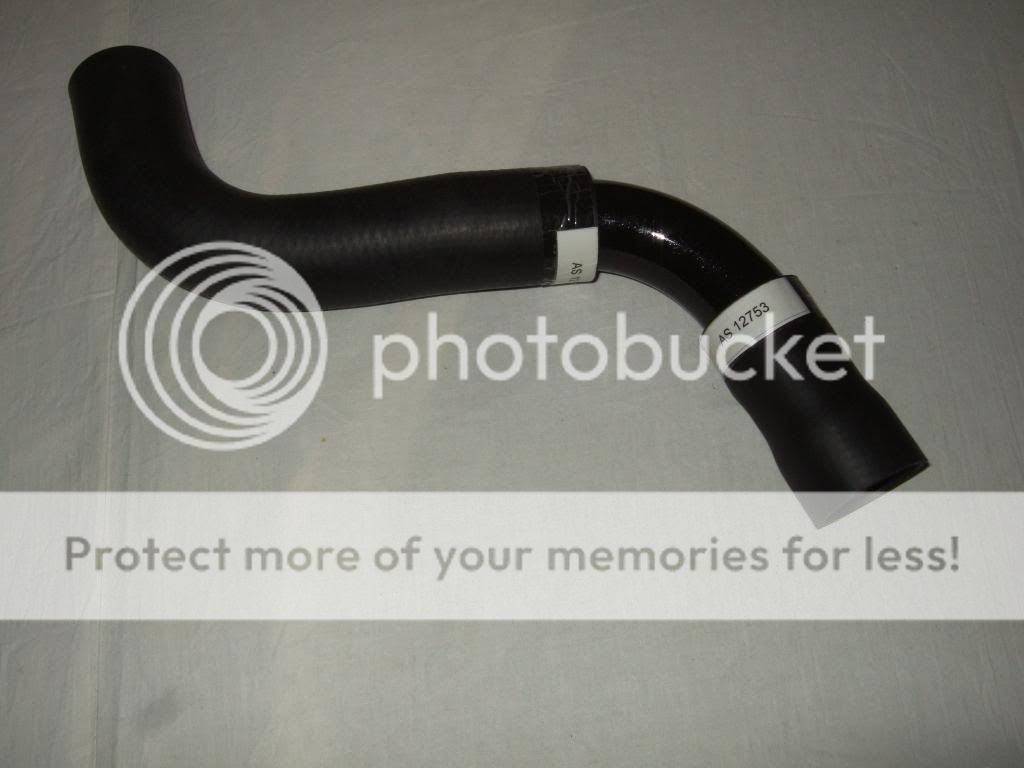 Secure the Jubilee clip  Next I put the other end on the Radiator, before tightening it onto the rad tighten the other end on the elbow. Then tighten the end onto the rad. I tucked my brake hose out the way for the sake of the  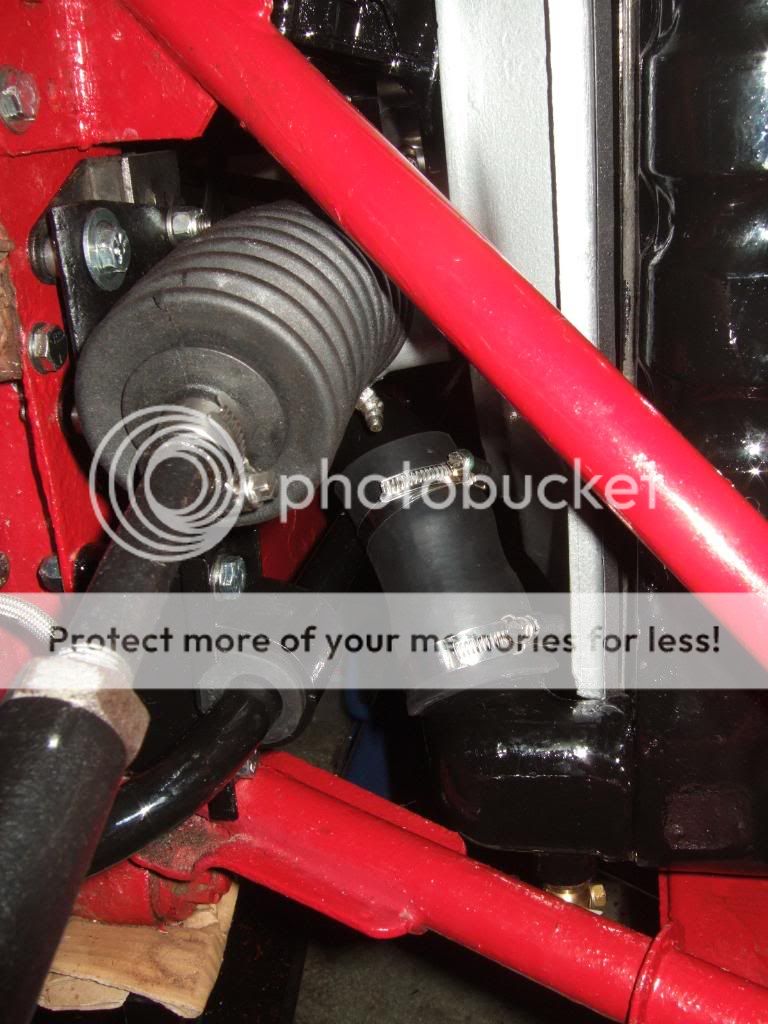 Lastly tighten the other end of the S pipe onto the other end of the elbow  Leave this one till last as you have to bend the pipe a lot to get it on the rad, also as you can see I have had to trim the supplied pipe. | |
|
| | |
Car-Nut
Admin
Posts : 3004
Join date : 2009-11-16
Age : 57
Location : E. Lancashire : UK
| | Subject: Re: Baselining - 369 HBF - 860871 - Before the Upgrades Tue Mar 16, 2010 5:53 am | |
| | |
|
| | |
Car-Nut
Admin
Posts : 3004
Join date : 2009-11-16
Age : 57
Location : E. Lancashire : UK
| | Subject: Re: Baselining - 369 HBF - 860871 - Before the Upgrades Wed Mar 17, 2010 5:59 am | |
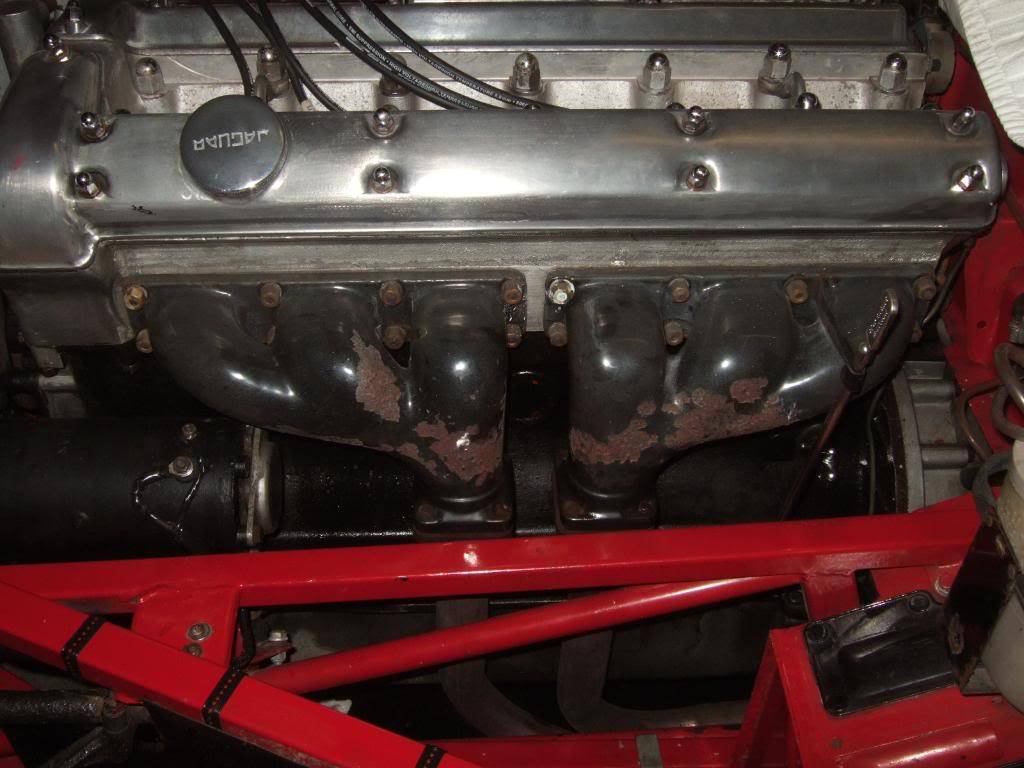
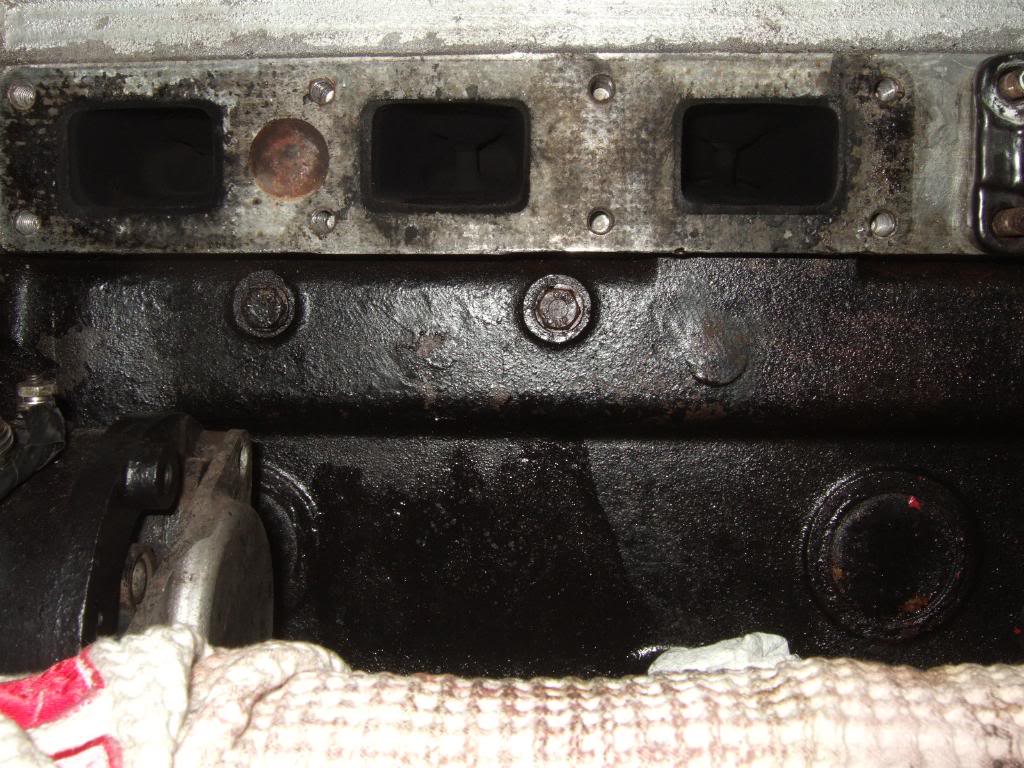
| Engine DetailingStarted with a bland engine  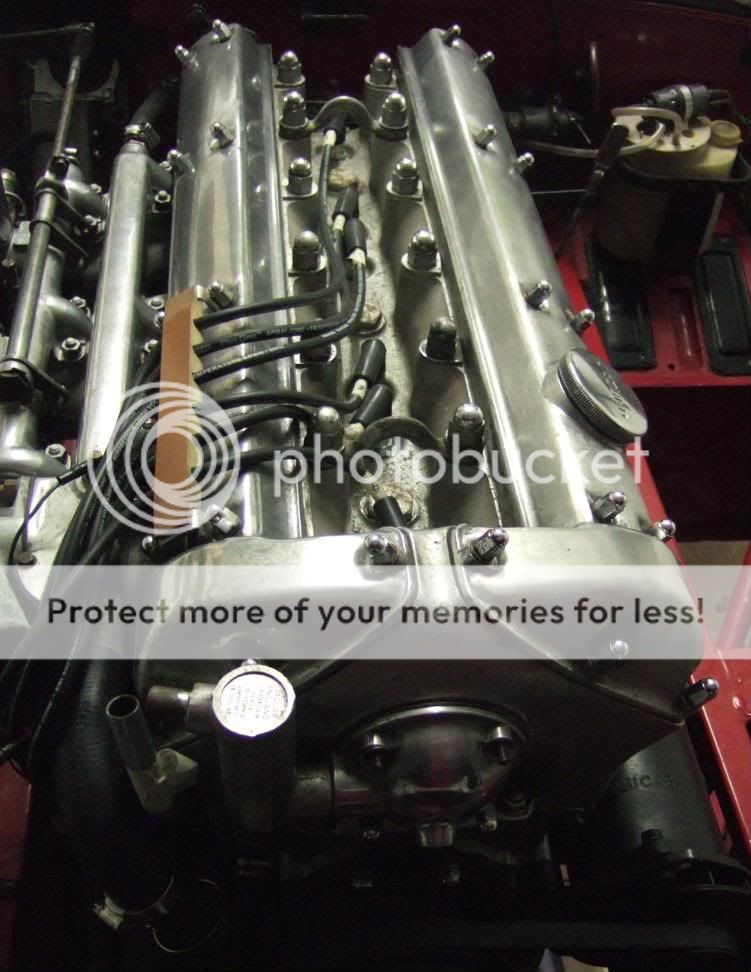 I set to work, with the manifolds off I taped up and did the side and the gulley  I haven't done up the sides off the gulley yet as the head studs arent off yet. 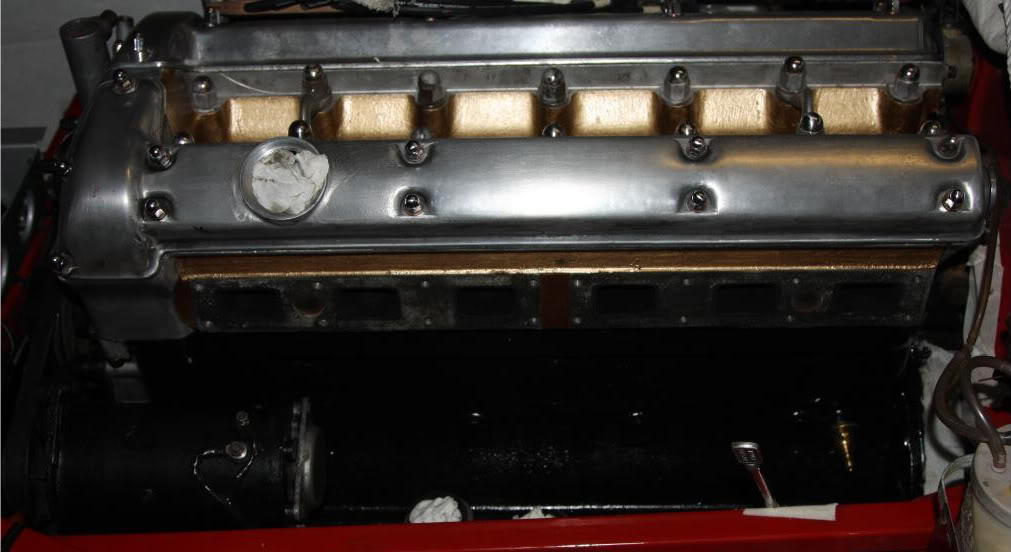 Block has had a fresh coat of black, and also a proper Brass drain tap fitted  Looking better already  | |
|
| | |
Car-Nut
Admin
Posts : 3004
Join date : 2009-11-16
Age : 57
Location : E. Lancashire : UK
| | Subject: Re: Baselining - 369 HBF - 860871 - Before the Upgrades Sun Mar 21, 2010 10:57 pm | |
| Engine Detailing and Sump Removal (Well I tried) Well its been a few days since the last  I've polished up the breather and fitted that back on - just need the stud that goes in at 45 degrees then the coil can be fitted 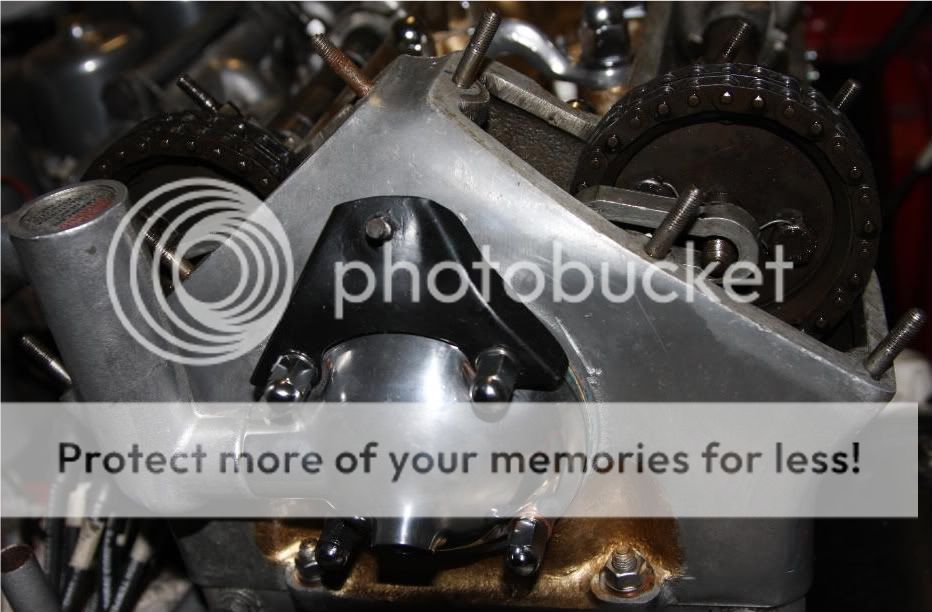 I tried to remove the inlet manifolds so I could do the detailing on the head but the there were plenty of parts coming from the carbs in the way so I just got the nuts off and pulled the manifolds back so I could tape them and do the gold detailing. I also took the breather pipe (more about that in the next update) off and cleaned up the inlet manifolds. As they had been sprayed silver nuts and all  Next I have taken both Cam Covers off spent about 3hrs polishing each but they still looked dull  Im looking Into getting them proffesionally polished  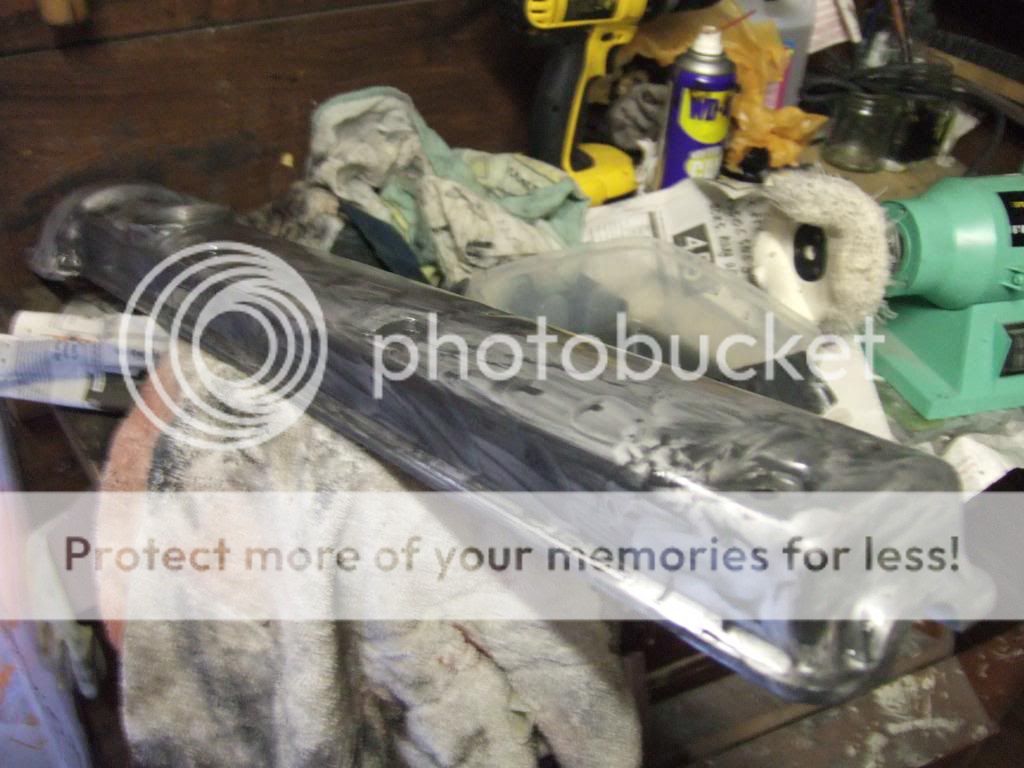 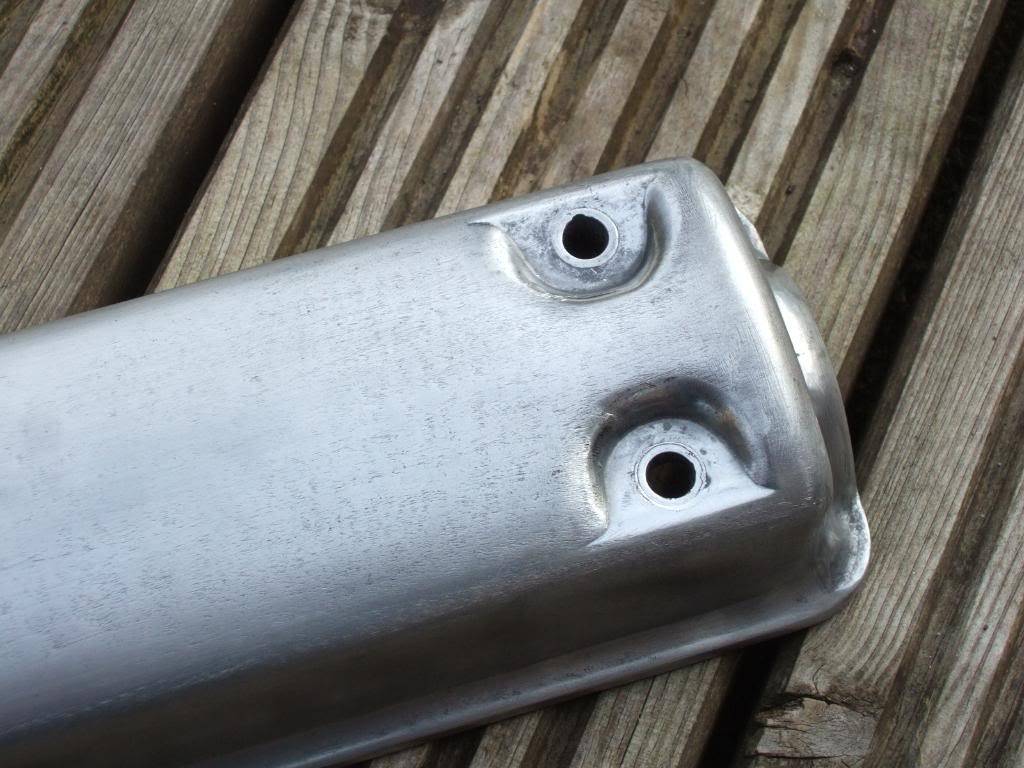 Seeing the dark oil in the camshaft gullies I decided to drop the oil as this was a job for the winter anyway. Once this was out the filter, oil hose (both to be changed) came off as well, as did the filter head with the oil pressure transmitter attached. 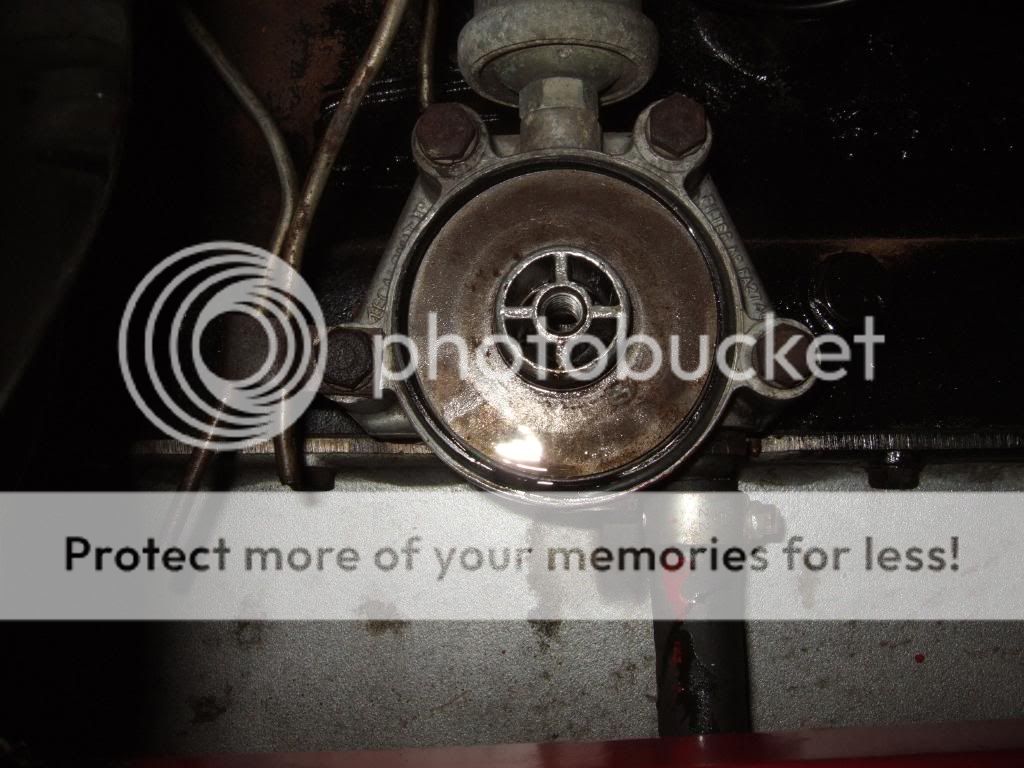 As I am going to paint the block this side as well. With the oil being burnt and remember the crud which was behind the breather gauze at the top of the engine I thought it would be a good time to drop the sump after unding the 26 bolts going into the block and undoing the 4 nuts holding it to the timing plate at the front. It decided it didnt want to come off. 1. The plate at the back wasnt letting it down at the rear. This holds the 2 torsion bars apart. 2. The the Damper wheel was in the way. Again a lot of work to remove this. So yesterday afternoon I was all afternoon on my back cleaning the sum with POR 15 Marine Clean it has come up cleaner but I cant access the whole sump so only 95% cleaned  The next fun bit is going to change the gaskets with Hylomar applied whilst in situ.  Manifolds are ready to go back on when the gaskets are fitted to the sump, all new studs fitted to the head and manifolds and new gaskets all present and correct.  New doomed nuts are now on all tightened and torqued in the correct order on the head.  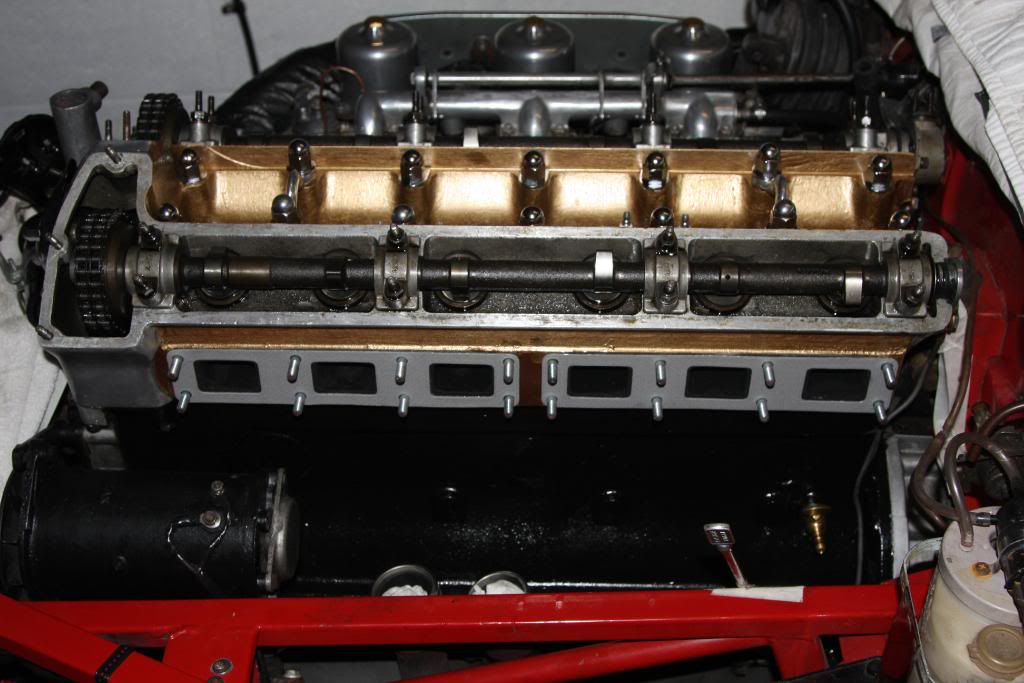 The other side of the engine at the moment 
Last edited by Car-Nut on Wed May 11, 2011 7:19 am; edited 1 time in total | |
|
| | |
Car-Nut
Admin
Posts : 3004
Join date : 2009-11-16
Age : 57
Location : E. Lancashire : UK
| | Subject: Re: Baselining - 369 HBF - 860871 - Before the Upgrades Tue Mar 23, 2010 10:10 am | |
| RHT Re-FitThe RHT had been sat on towels on top of the sheet over my car for a while now so this evening. I fitted it to the RHT Bracket and connected up the Otter switch and the overflow pipe..  | |
|
| | |
Car-Nut
Admin
Posts : 3004
Join date : 2009-11-16
Age : 57
Location : E. Lancashire : UK
| | Subject: Re: Baselining - 369 HBF - 860871 - Before the Upgrades Thu Mar 25, 2010 5:54 am | |
| Refitting Manifolds & ExhaustsAfter all the problems with the sump when trying to remove it, which is more or less impossible in situ, I gave it a good external clean new gaskets and plenty of Hylomar and refitted it. I also changed the old sump plug for a magneetic one and painted the oil return pipe and sealed the gasket there again with Hylomar.  I then cleaned the bulkhead up removed the windscreen washer bottle currently plastic needs relacing with a glass one but at £165 its gonna have to wait other things are taking priority on the car at the moment. Anyway I removed the bracket sanded it down repainted it and new foam and refitted. I then Fitted the new hose to the left of it and refitted the manifolds on the new studs with nice new shinney  brass nuts. With those fitted I connected up the down pipes. For some reason at first the rear one wouldnt connect it was like it had grown an inch After a bit of persussion it was on  
Last edited by Car-Nut on Sat Mar 27, 2010 10:06 am; edited 1 time in total | |
|
| | |
Car-Nut
Admin
Posts : 3004
Join date : 2009-11-16
Age : 57
Location : E. Lancashire : UK
| | Subject: Re: Baselining - 369 HBF - 860871 - Before the Upgrades Sat Mar 27, 2010 9:42 am | |
| Fitting Water Pump Return Pipe (WPRP) & Breather HoseThe first WPRP I received was 3\4 " short so now my new one has been made and has arrived I got it fitted. 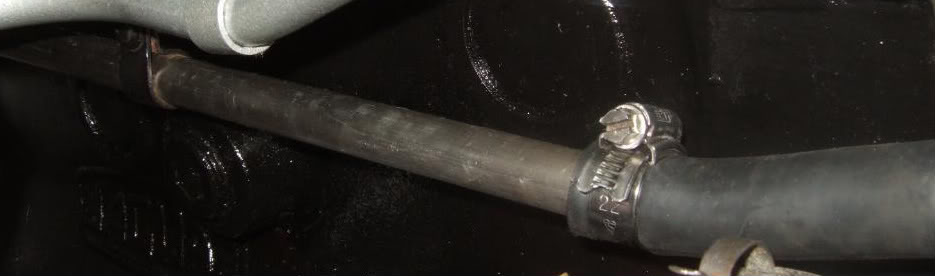 After this was done I tightened up all the inlet nuts replacing with new S/S nuts unfortuantely I couldnt remove them to change the gaskets. Looking better with the gold detail behind them  As Im waiting for the water pipe back back from the machine shop, two of the bolts broke off in the blanking plate I decided to take the intake trumpets off as they had been sprayed badly before, these have just had the first coat. 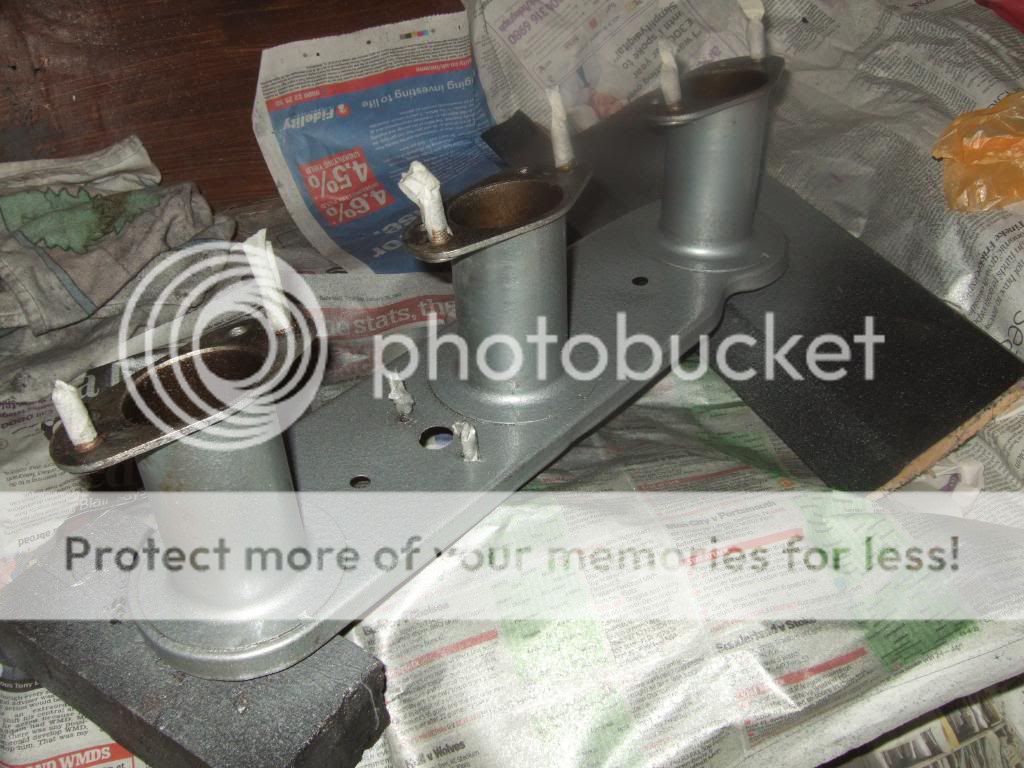 Also I've now got the breather hose on.  | |
|
| | |
Car-Nut
Admin
Posts : 3004
Join date : 2009-11-16
Age : 57
Location : E. Lancashire : UK
| | Subject: Re: Baselining - 369 HBF - 860871 - Before the Upgrades Sat Mar 27, 2010 9:58 am | |
| Re-Torquing the Camshaft CoversAfter spending 3hrs on each cam cover and there was no difference, I made a phone call to some local polishers £20 the pair, it didnt seem worth my while doing it myself I dropped them off Tuesday and collected them today with the dash pts and the elbow the thermostat goes in £30 the lot all 6 pieces First of all I cleaned the surface with POR 15 Marine Clean to remove any oil and grease. 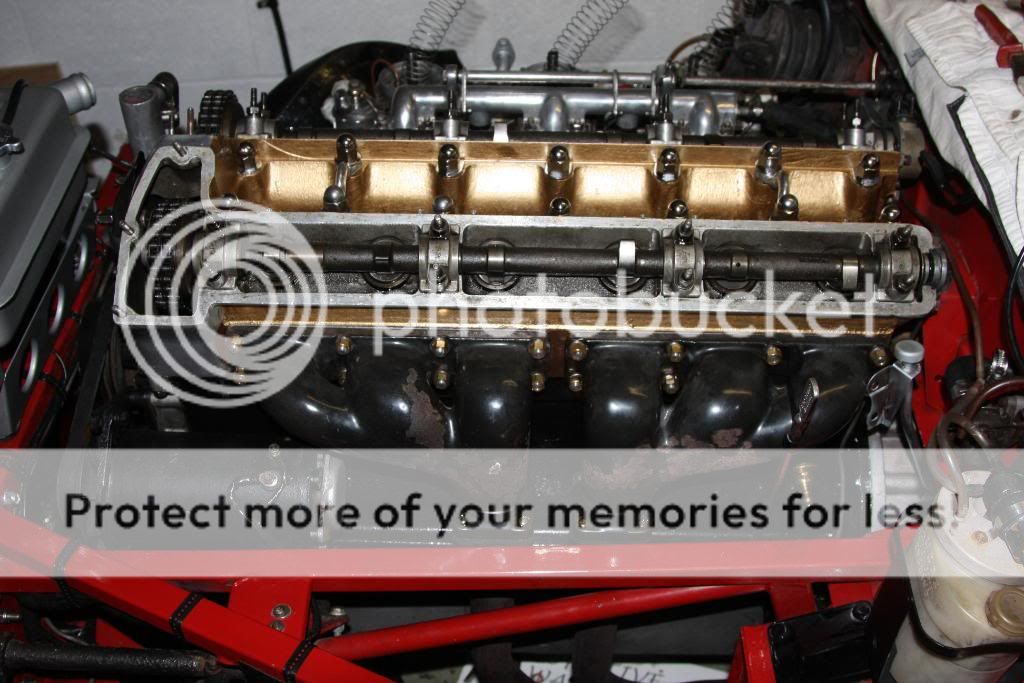 Then I applied a layer of Gasket Sealer (Hylomar) spread it out a bit, placed the gasket on it and then put another layer of Hylomar on.  Let the alcohol evaporate then push the cam cover down. 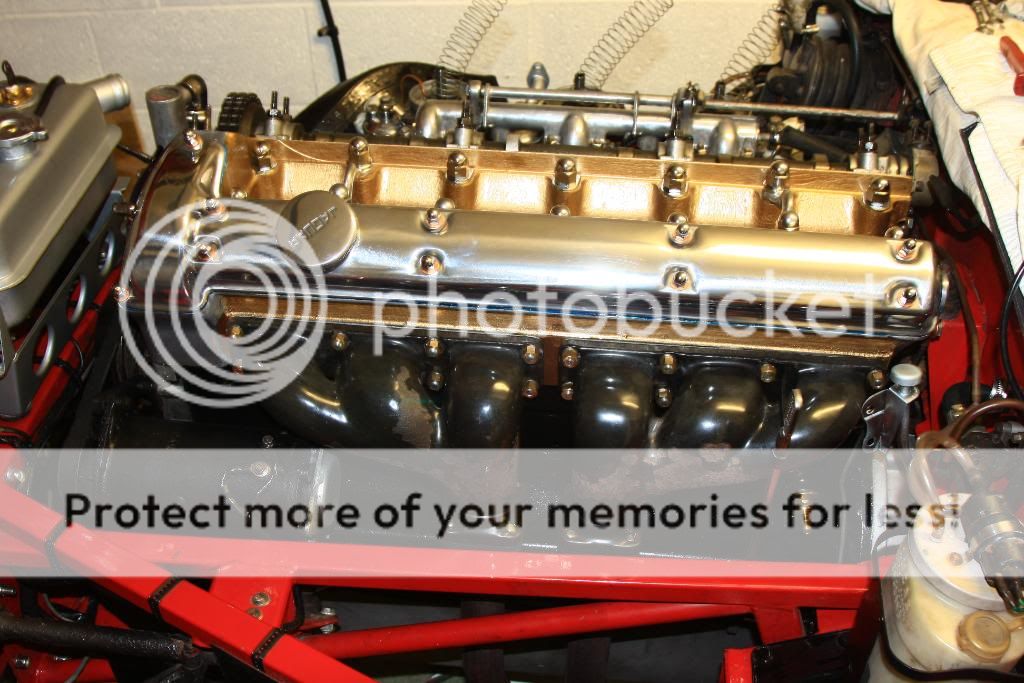 Put the brass wahers on and those shiney new nuts on did them up finger tight, leave it a while, wipe off any excess sealant, then torque down to the correct tightness. Quick polish with a nice dry cloth to get the finger prints off Repeat for the other side 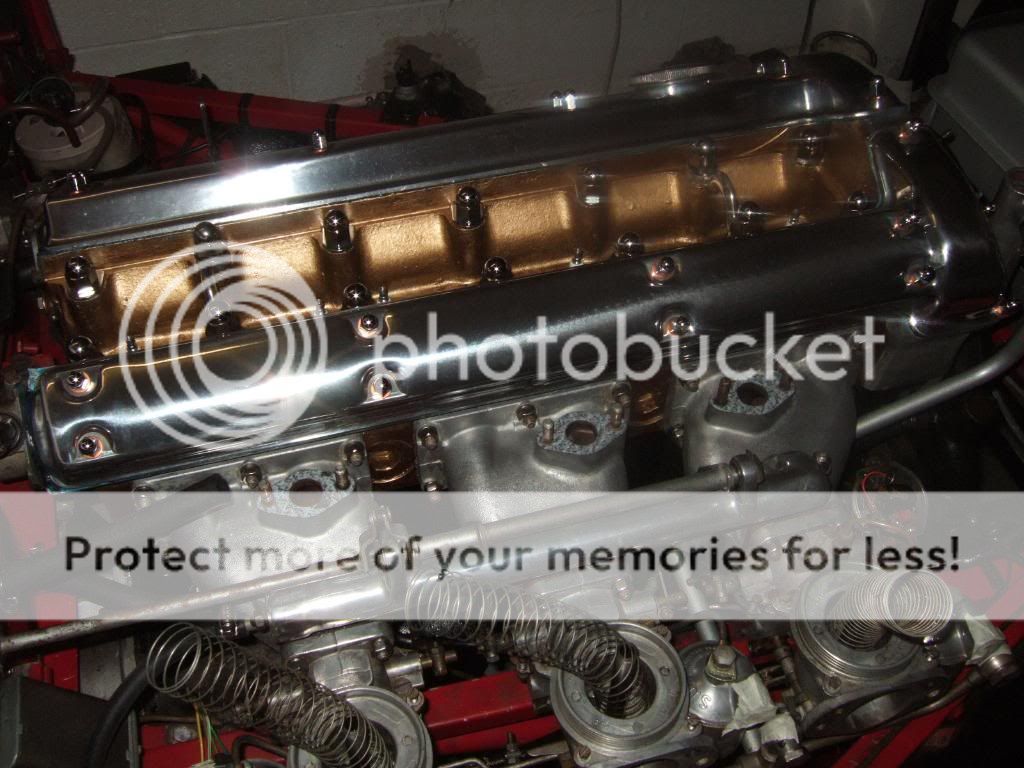  | |
|
| | |
Car-Nut
Admin
Posts : 3004
Join date : 2009-11-16
Age : 57
Location : E. Lancashire : UK
| | Subject: Re: Baselining - 369 HBF - 860871 - Before the Upgrades Wed Mar 31, 2010 8:30 am | |
| Swapping out DampersThis is quite a straight forward job, just a case of undoing 2 nuts really. 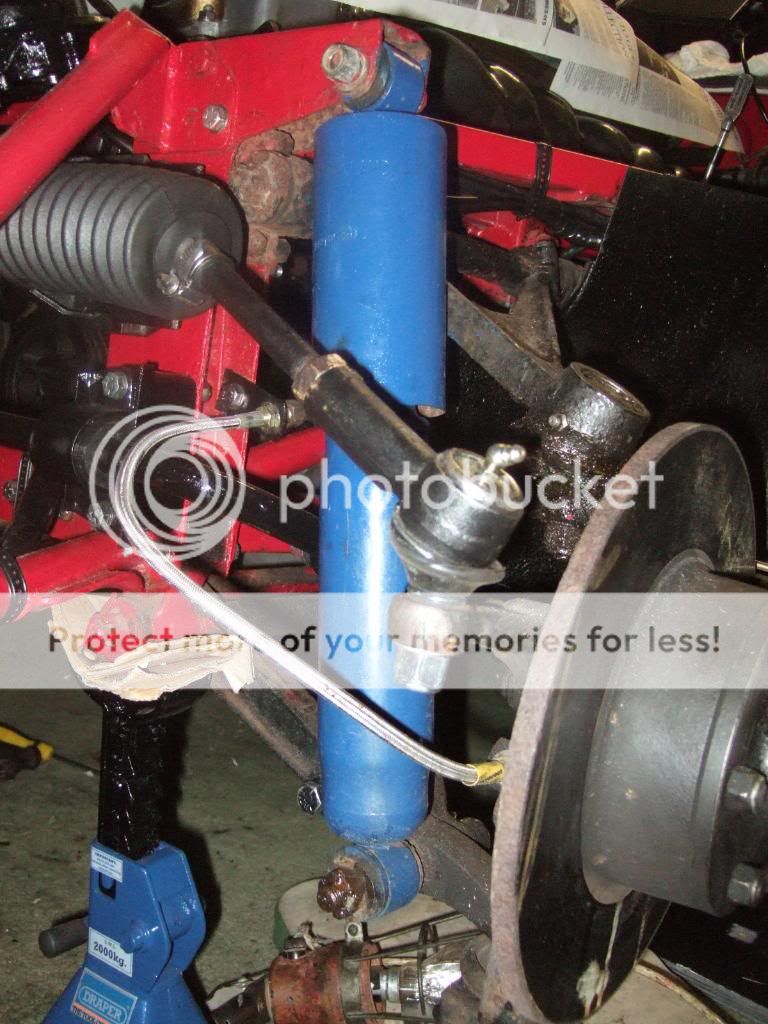 Theres a castle nut on the lower wishbone bolt held in place with a split pin, and on the picture frame at the top at the top a large bolt going through the Picture frame these can moved while the car is jacked up or standing onits wheels With the damper removed I cleaned up the bolt with the sleeve still on the bolt.  Put the new damper in place, and tighten up the bolts. Not fully though do that when the full load is on the car. 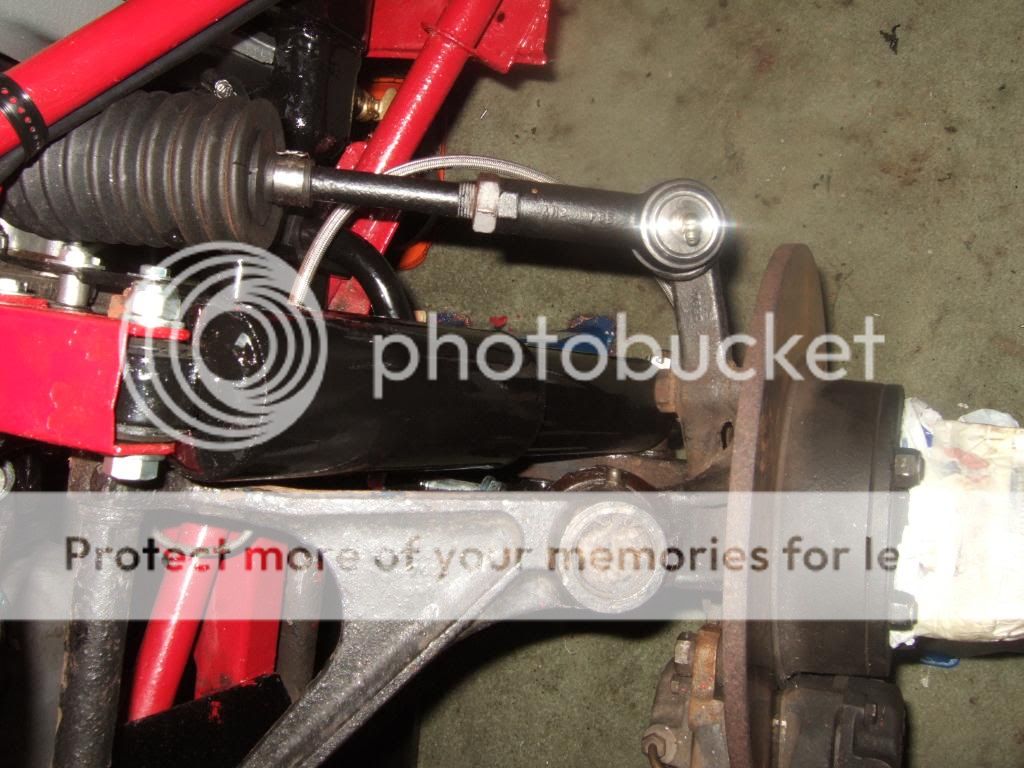 The IFS is now starting to look better with the Front ARB, Dampers, TRE done unfortunately we ran out of winter so the the full IFS overhaul will now go top of the list for next wnter  | |
|
| | |
Car-Nut
Admin
Posts : 3004
Join date : 2009-11-16
Age : 57
Location : E. Lancashire : UK
| | Subject: Re: Baselining - 369 HBF - 860871 - Before the Upgrades Wed Mar 31, 2010 8:37 am | |
| Refitting the Bonnet Tensioner SpringsI took these off back in January so I could have the bonnet fully open, but to be honest once they were off I knew they weren't going back on without being cleaned up Before: 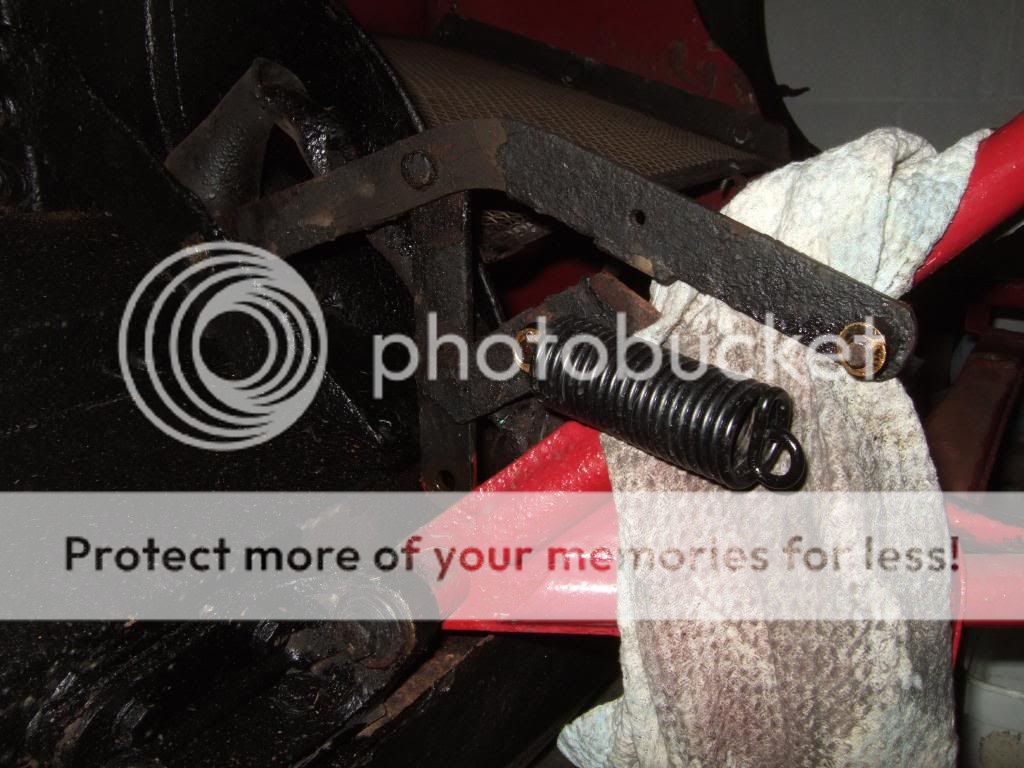 After: 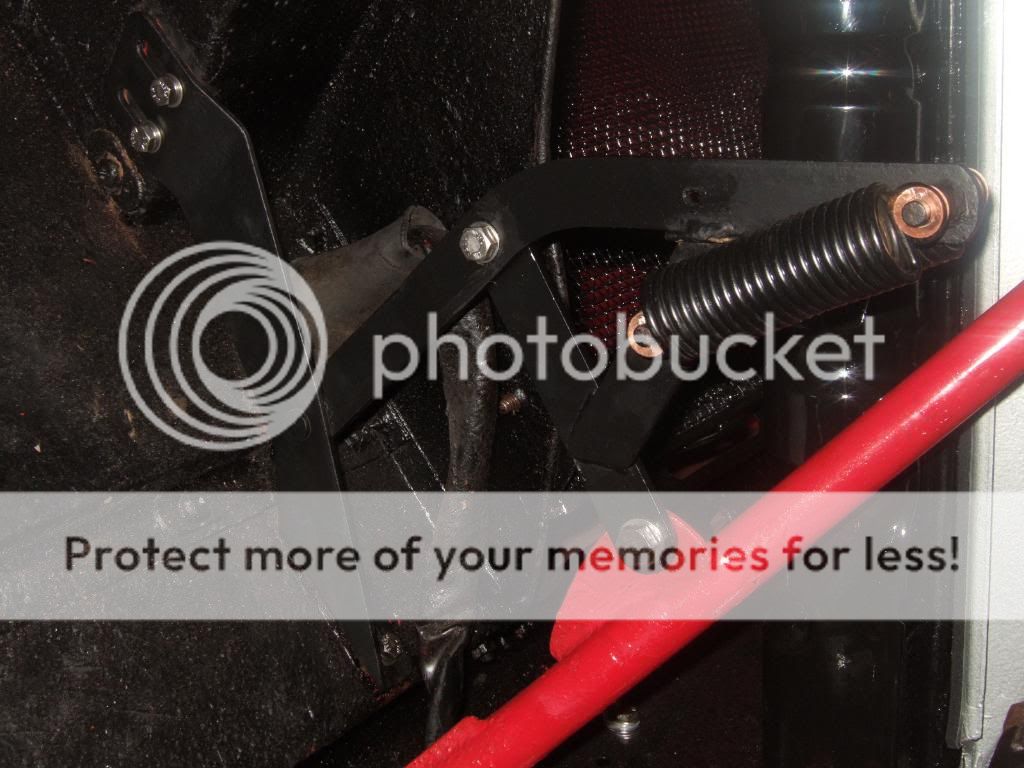 I think they needed a wipe really before the was taken as the black looks two tone where they have been handled with my greasy gloves | |
|
| | |
Car-Nut
Admin
Posts : 3004
Join date : 2009-11-16
Age : 57
Location : E. Lancashire : UK
| | Subject: Re: Baselining - 369 HBF - 860871 - Before the Upgrades Wed Mar 31, 2010 8:46 am | |
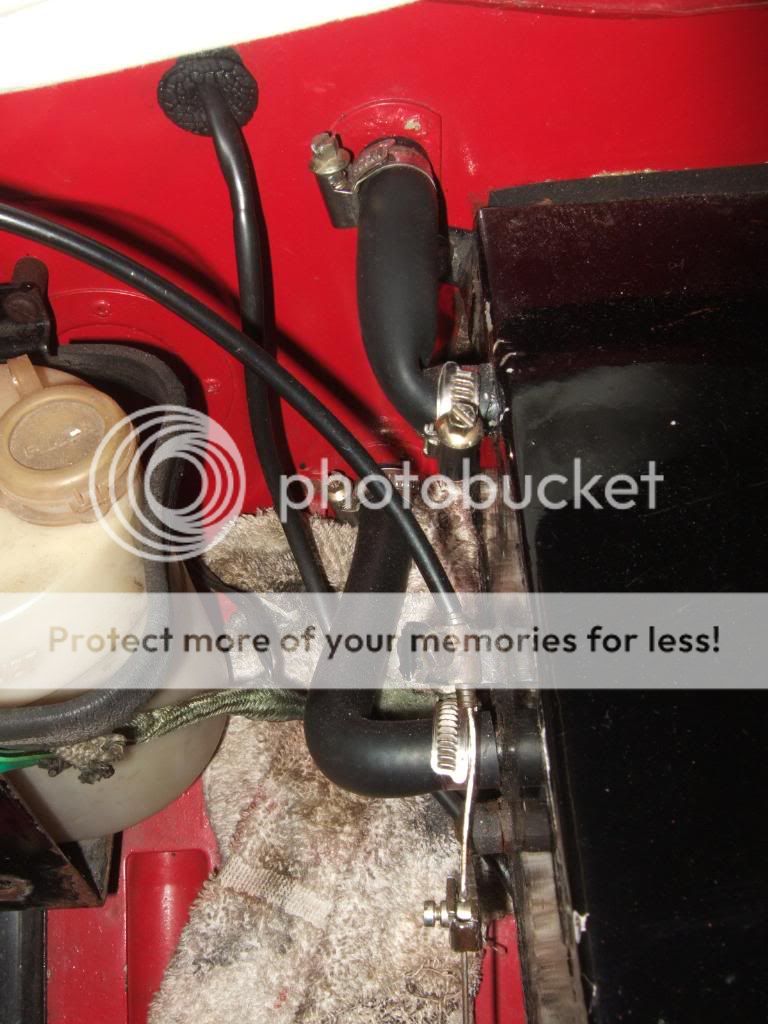
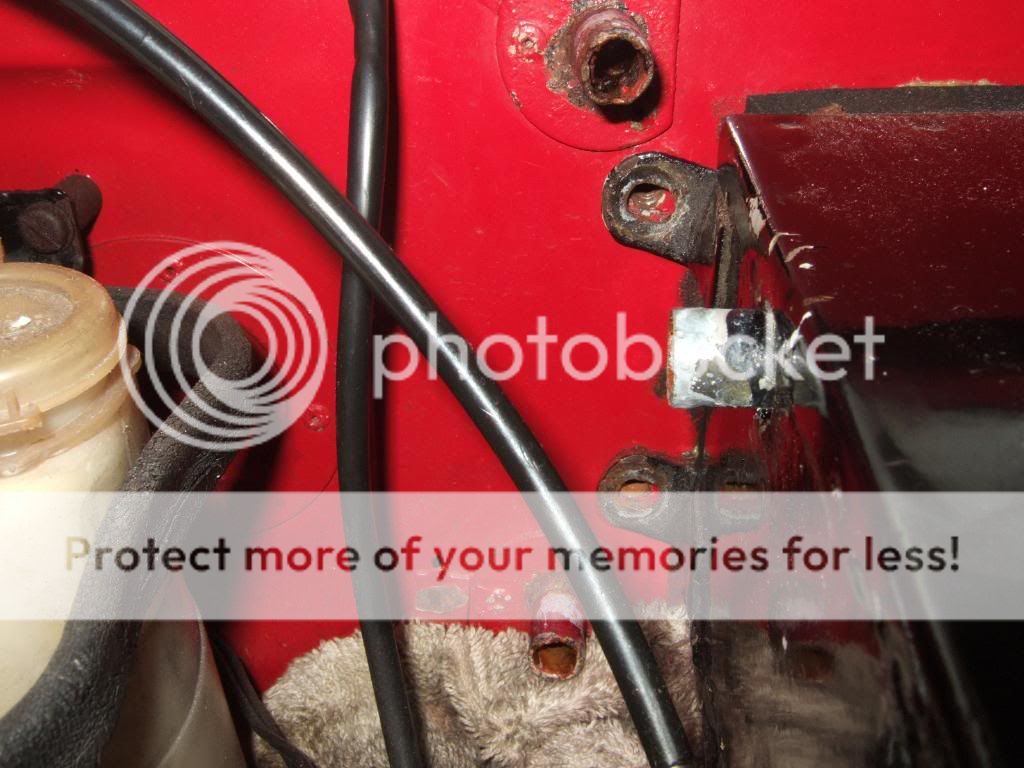
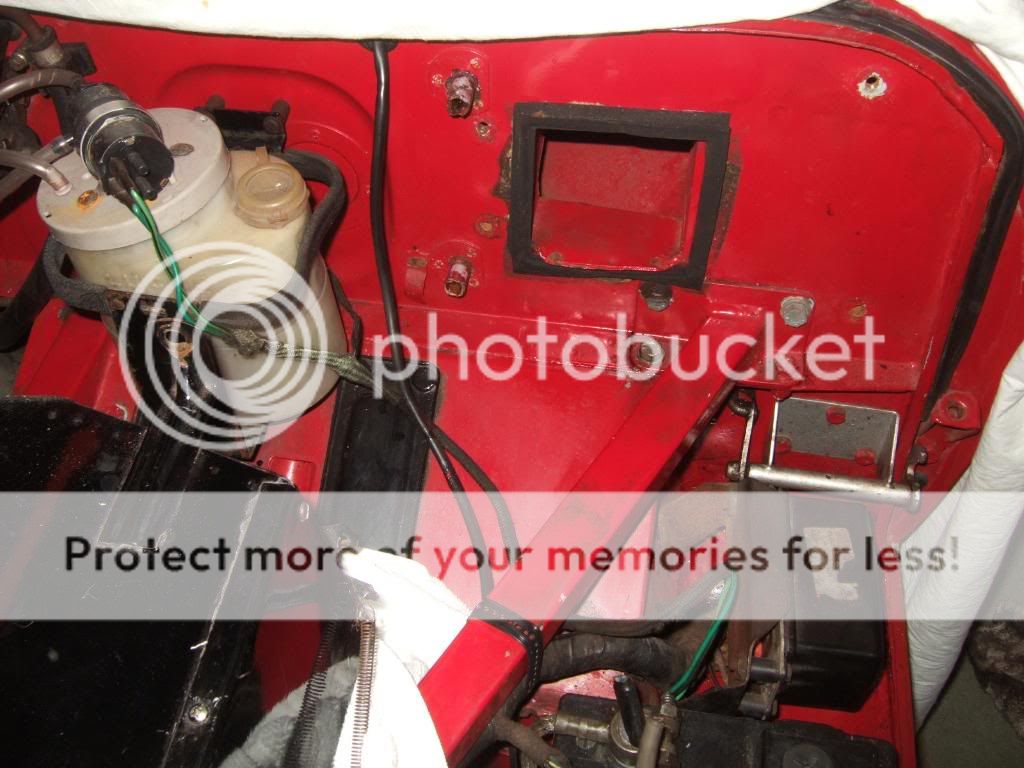
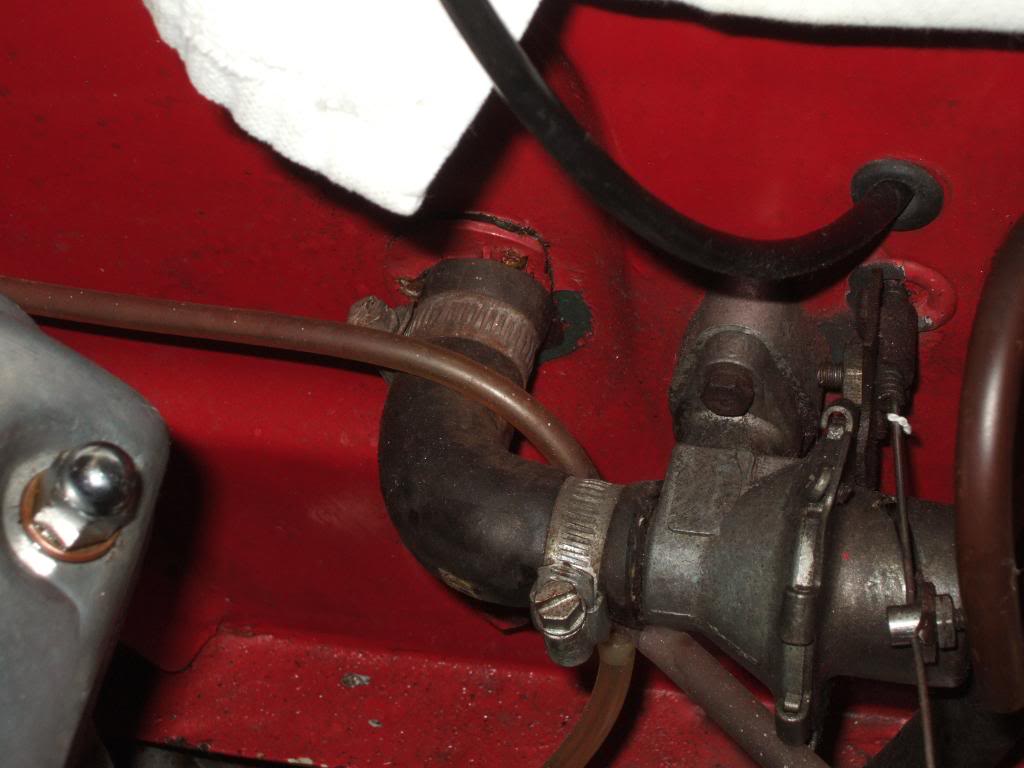
| Refitting the Heater Box & HosesAfter putting the (charged) battery back in, in a new tray with overflow pipe as it didnt have one before. I then bolted the Heater Box to the bulkhead 4 bolts nice and simlple Then the new hoses the lower: elbow hose between heater radiator outlet and rear return pipe. Then the upper: elbow hose between L. H. feed pipe and radiator inlet 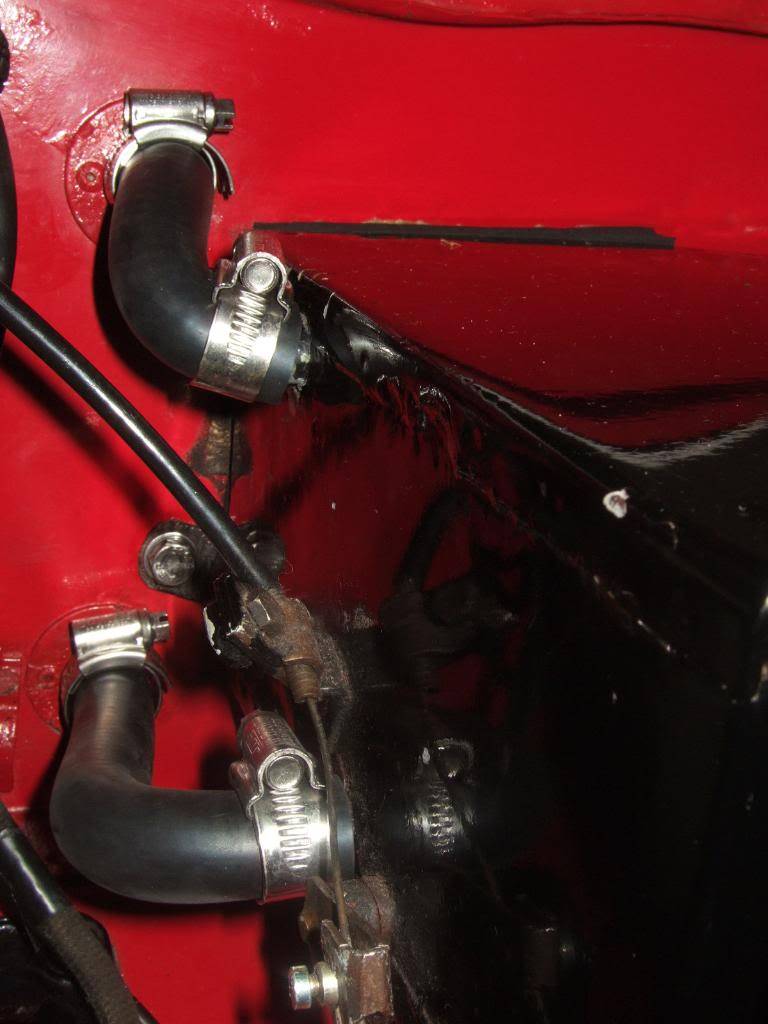 The short hose: elbow hose between R. H. feed pipe and water control valve  | |
|
| | |
Car-Nut
Admin
Posts : 3004
Join date : 2009-11-16
Age : 57
Location : E. Lancashire : UK
| | Subject: Re: Baselining - 369 HBF - 860871 - Before the Upgrades Thu Apr 08, 2010 6:23 am | |
| Ready for the road, nearly! I have my final check list done and am doing the last few things before it hits the road   After getting the polished parts back I next had to fit the dash pots with air intake truumpets refurbed and all S/S nuts replaced. 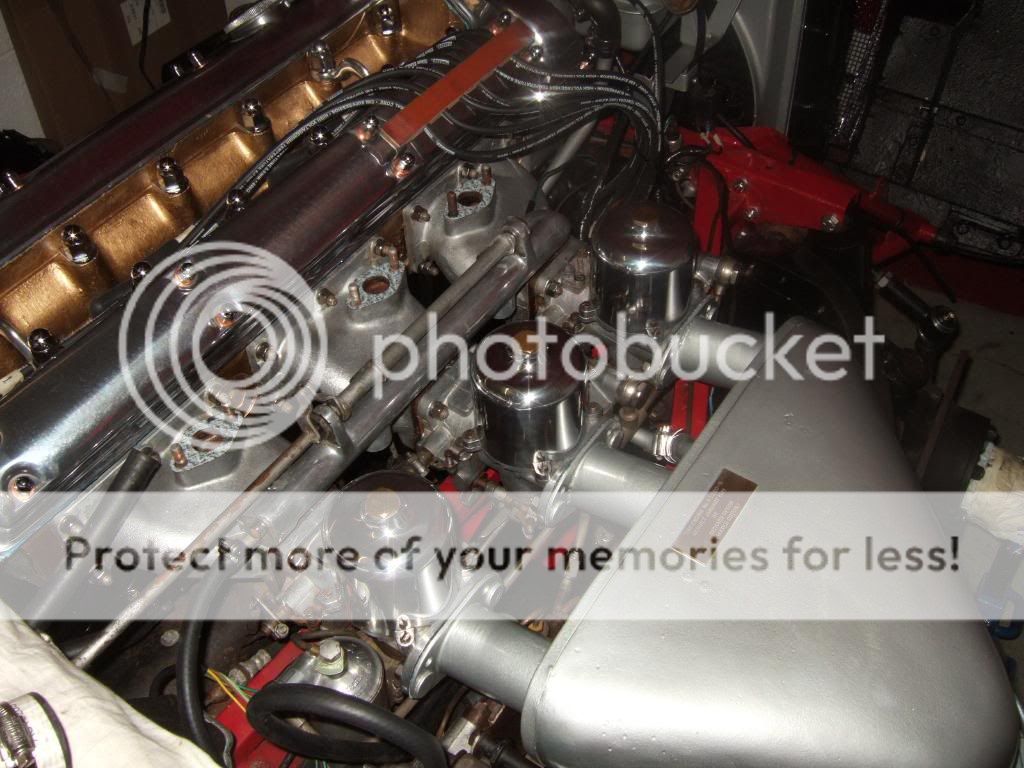 So with those fitted and topped up I put the front wheels back on and dropped it down. When the car had taken all the weight I tightened all the suspension parts I'd touched: Front ARB Drop Links Front Dampers  | |
|
| | |
Car-Nut
Admin
Posts : 3004
Join date : 2009-11-16
Age : 57
Location : E. Lancashire : UK
| | Subject: Re: Baselining - 369 HBF - 860871 - Before the Upgrades Thu Apr 08, 2010 6:39 am | |
| Breather PipeAbout 2 weeks ago I took off the breather pipe to take to the polishers but when taking the 48yr old blanking plate off, 2 of the 3 bolts that was holding the blanking plate to the pipe sheared off After consulting Andy at Hutsons he advised me to send it to it to him and he would drill it out and re-tap it. With Stoneleigh that wkd the job got put back to the beginning of the following week then when it got sent out the courrier delivered it a day late so I couldnt get it to the polishers till easter friday after my wife collecting it yesterday it got fitted last night   New gaskets on top of the inlet manifold, when fitted the hose was connected up again. I also fitted the elbow with new gasket and S/S nuts With the blanking plate fitted with new bolts and cork gasket it looked tatty... 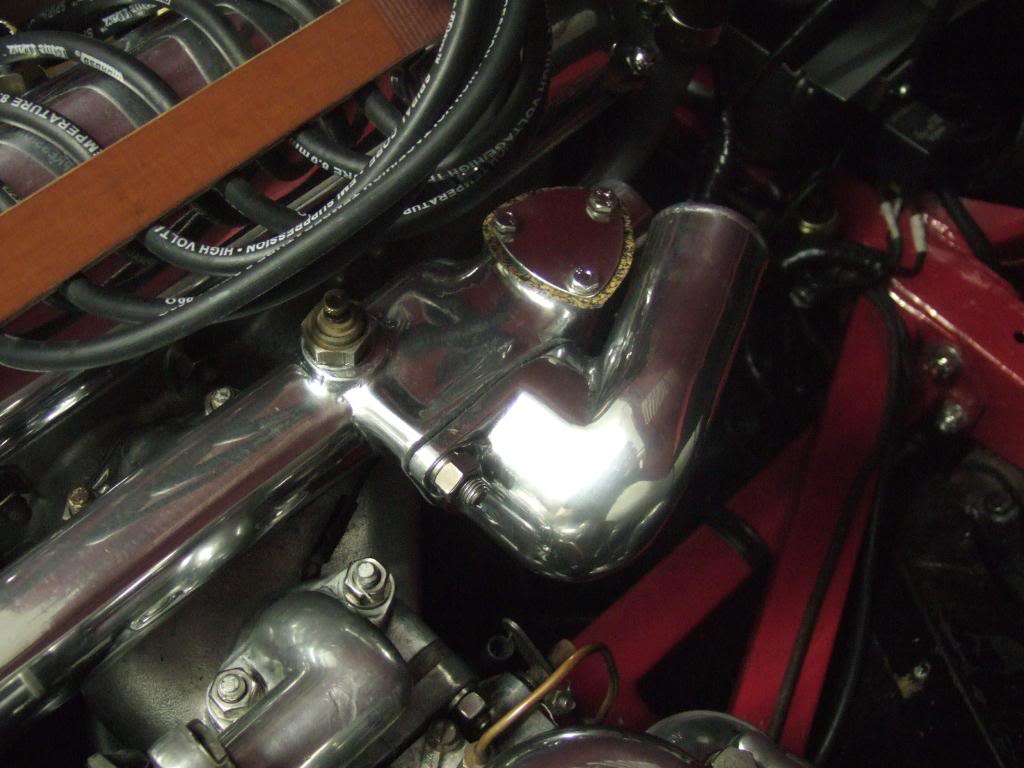 After the sealant had set I trimmed up the cork 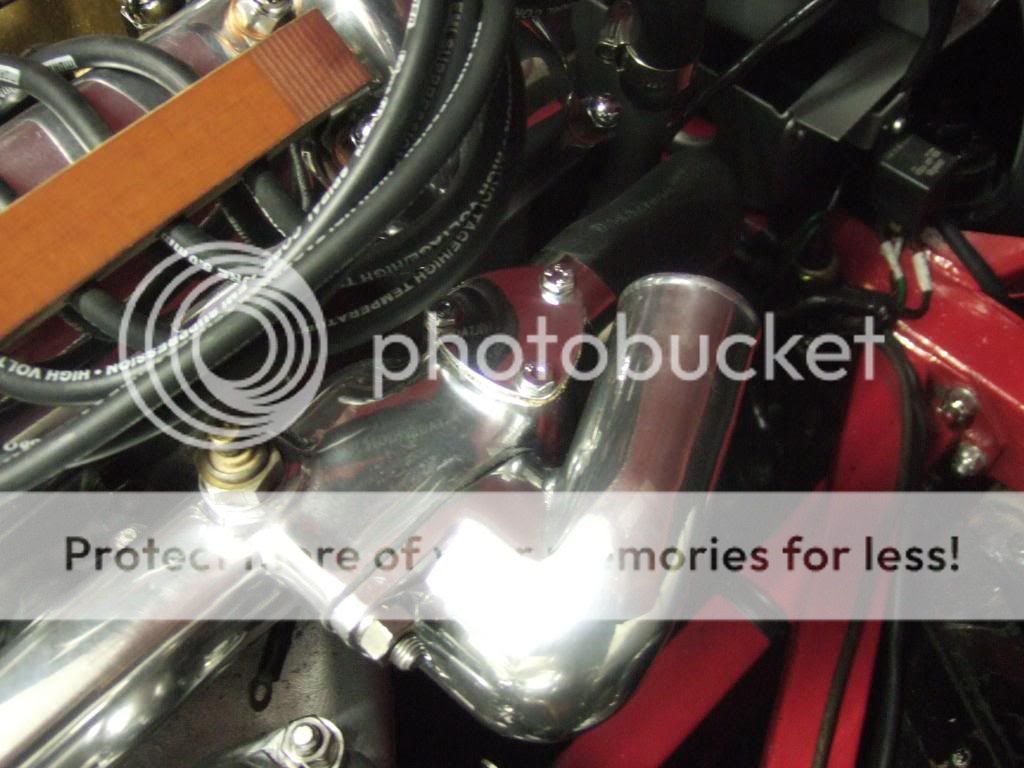 | |
|
| | |
Car-Nut
Admin
Posts : 3004
Join date : 2009-11-16
Age : 57
Location : E. Lancashire : UK
| | Subject: Re: Baselining - 369 HBF - 860871 - Before the Upgrades Tue Apr 13, 2010 7:37 am | |
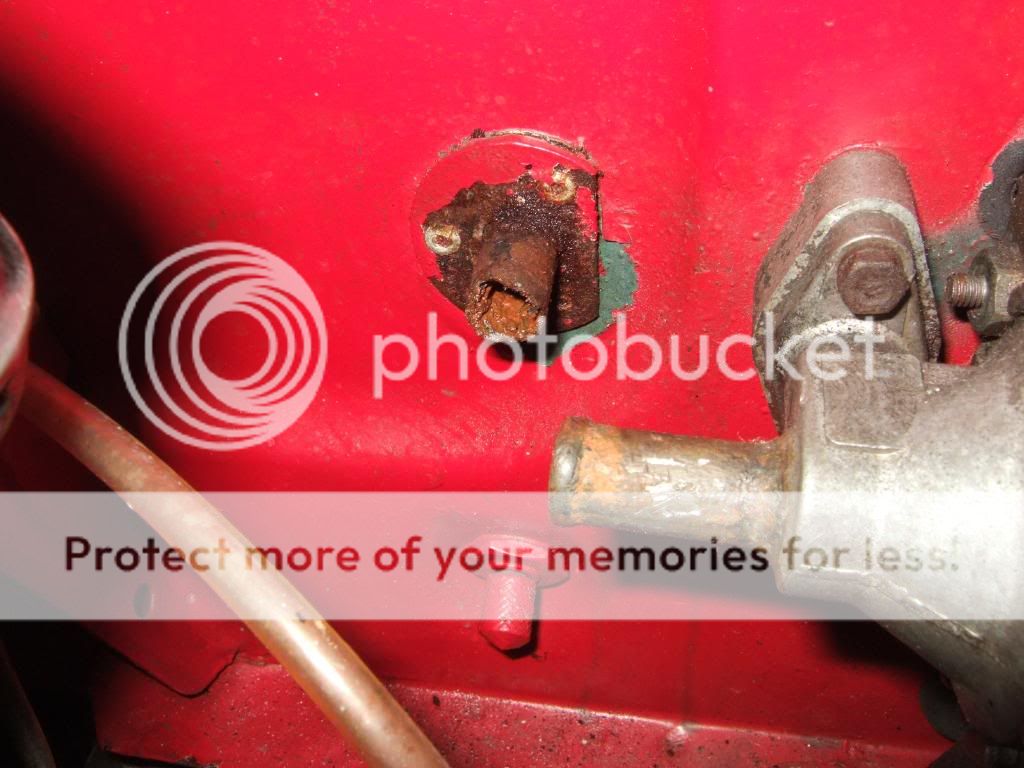
| Getting the final Tweeks doneWell I thought Id best update everyone from the week-end So on getting the car finally finnished for the test drive this afternoon  Good News it fired up first time but there were a few water leaks from the little pipes near the bulkhead that go on to the heater easily sorted. One strange issue I did have before start up was the HT leads wouldnt reach when going over the elbow to clip the dissy cap on no matter what I did I couldnt get the dissy cap on with all leads plugged in after sorting out no 5, no 4 was still and issue :? In the the end I threaded them through underneath as a temporary measure so I could test drive. As I have polished had the cam covers polished I would now like to run them between them the top of the cam covers and over the top. They are currently in the wooden brace over the cam, Ive tried removing the ends so the leads can be pulled out. But no joy if you know what the process is to get one of the the ends off the HT lead please advise  (PM me) Did a test run and all was fine, got home and as advised by a friend the overflow pipe overflowed  On checking round under the bonnet I noticed two things: 1) The fan hadnt kicked in  2) There was a splutter of oil on the breather pipe. I didnt take to much notice and walked up to my garage to get a socket, on returning I noticed what I thought was hair on the cam cover round the domed nut I went to wipe it off. But:!: Yep you guessed it a crack . See pic below.  Not happy after a winter of HARD work, but these things happen, part of the learning process 
Last edited by Car-Nut on Tue Apr 13, 2010 8:17 am; edited 1 time in total | |
|
| | |
Car-Nut
Admin
Posts : 3004
Join date : 2009-11-16
Age : 57
Location : E. Lancashire : UK
| | Subject: Re: Baselining - 369 HBF - 860871 - Before the Upgrades Tue Apr 13, 2010 7:50 am | |
| The OutcomeAfter bouncing my problem off some very knowledgeable E-Type guys I had a few options: 1) Silicone Sealer put a smudge over the crack and let it go off for 24hrs 2) Ali Welding, get this done underneath. 3) Repair from the underneath and silicon sealer. Well after looking at the engine this morning there was no oil on the underneath of the bonnet and only a little on the side of the sump which I presummed had run down also there was like a little spit on the breather pipe. My shinny pipe Im thinking when the car stopped completely and there was no cold air coming in the engine the fracture happened  With the nut off this is the extent of the damage from the top....  With a newly polished cam cover I didnt want a smudge of Blue Hylomar there it would shout at me everytime I opened the bonnet. So I have decided to pull the cover fix it from and underneath and re seal the cover. Strangely enough three cam cover gaskets came in my gasket set... Spookey Underneath  Hard & Fast nearly set  Head and cam cover cleaned, new washers sorted all ready to go back together tomorrow..... Conclusion: Ive now been advised I or the previous owner over torqued the cover and cracked it and when the cam cover got hot it expanded and..... well the rest is History The first time I fitted this the cam cover was perfect no leaks I hope this time its the same Just the fan to sort Im not very elecrical and know who man who is, who has kindley offered to come over Wednesday to help me | |
|
| | |
Car-Nut
Admin
Posts : 3004
Join date : 2009-11-16
Age : 57
Location : E. Lancashire : UK
| | Subject: Re: Baselining - 369 HBF - 860871 - Before the Upgrades Tue Apr 13, 2010 7:53 am | |
| Cam Cover GuideFixing and re sitting the Fractured Air Intake Cam Cover Im doing a DIY Guide on this so please go to the: DIY & Servicing Guides Forum Guide to Fix a Fractured Cam Cover 
Last edited by Car-Nut on Mon May 03, 2010 10:19 pm; edited 1 time in total | |
|
| | |
Car-Nut
Admin
Posts : 3004
Join date : 2009-11-16
Age : 57
Location : E. Lancashire : UK
| | Subject: Re: Baselining - 369 HBF - 860871 - Before the Upgrades Thu Apr 22, 2010 6:21 am | |
| Overheating issuesNot to much to report on the car at the moment plus my time for working on it has reduced as I now have a new job Took the car to the petrol station the other day and checked the tyres for air on returning home my water gauge was on 90.c and the fan hadnt kicked in After one of my E-Type friends came over to analyse the problem who is a bit of an electrical whizz he diagnosed the problem to be the new relay as 12v wasnt running through it.... So at the moment the old is in situ but I will wiring up a lucas 6ra relay with w1, w2, c1, c2, c3 Also its developed a blow between the exhaust manifold and down pipe on the right this will be stripped down at the week-end I sent my HT leads back to Rob Beere as they were to short he has sent me back some longer ones so the list is growing for Saturday Will do after the week-end If you have any comments on my project please feel free to add to this thread  | |
|
| | |
Car-Nut
Admin
Posts : 3004
Join date : 2009-11-16
Age : 57
Location : E. Lancashire : UK
| | Subject: Re: Baselining - 369 HBF - 860871 - Before the Upgrades Fri Apr 30, 2010 5:49 am | |
| Cleaned up the area yesterday and had a fumble (excuse the expression) around the manifold area to find the two back nuts had gone and the two front were loose hence my new blow. On putting both sides back together I put some loctite on the nuts so hopefully it wont be happening again just need two new nuts to replace the fronts which are now old nuts, which look out of place against all my other shinny ones | |
|
| | |
Car-Nut
Admin
Posts : 3004
Join date : 2009-11-16
Age : 57
Location : E. Lancashire : UK
| | Subject: Re: Baselining - 369 HBF - 860871 - Before the Upgrades Mon May 03, 2010 10:10 pm | |
| New HT LeadsAfter returning my HT leads back to Rob Beere Racing and recieving my new ones. I fitted them yesterday, routing them correctly:  They now look much tidier and showing off my polished Ali | |
|
| | |
Car-Nut
Admin
Posts : 3004
Join date : 2009-11-16
Age : 57
Location : E. Lancashire : UK
| | Subject: Re: Baselining - 369 HBF - 860871 - Before the Upgrades Mon May 10, 2010 1:44 am | |
| Cam Cover WeepAfter a bit of driving locally in the old girl last weekend when I got home there was a weep from the cam cover near the fracture, nothing major but enough to annoy me and need attention.  With the cover off it looks like theres been a reaction as the Hylomar has split :?  I was expecting it to of come off as there was a leak again. The Hylomar had just split in pieces  and the putty was so easy to remove I just put a stanley knife blade under it and flicked it off in pieces. I think it had cracked with the expansion and contraction of the cam cover. The head is now cleaned up of the old gasket as is the cam cover and I have now sourced an Aluminium Welder less than a mile from me so I will take it down this week Hopefully that will sort it once and for all.. The covers not been off in 30yrs now twice in just over a month
Last edited by Car-Nut on Tue Jul 27, 2010 1:06 am; edited 1 time in total | |
|
| | |
Car-Nut
Admin
Posts : 3004
Join date : 2009-11-16
Age : 57
Location : E. Lancashire : UK
| | Subject: Re: Baselining - 369 HBF - 860871 - Before the Upgrades Fri May 14, 2010 5:34 am | |
| Cylinder Head Stud ChangeWhile the cover was off again Ive decided to change my damaged stud on the cam cover as its off, Ive ordered one from Hutsons  Put two nuts on the top thread didnt tightened the top one right down gave it a good few whacks, WD40, then tightened the top nut down. VOILA  The offending item   | |
|
| | |
Car-Nut
Admin
Posts : 3004
Join date : 2009-11-16
Age : 57
Location : E. Lancashire : UK
| | Subject: Re: Baselining - 369 HBF - 860871 - Before the Upgrades Tue May 18, 2010 6:22 am | |
| Fitting the StudThe new supplied was lightly longer than what I think is the original I'm sure the engine oil will soon colour it 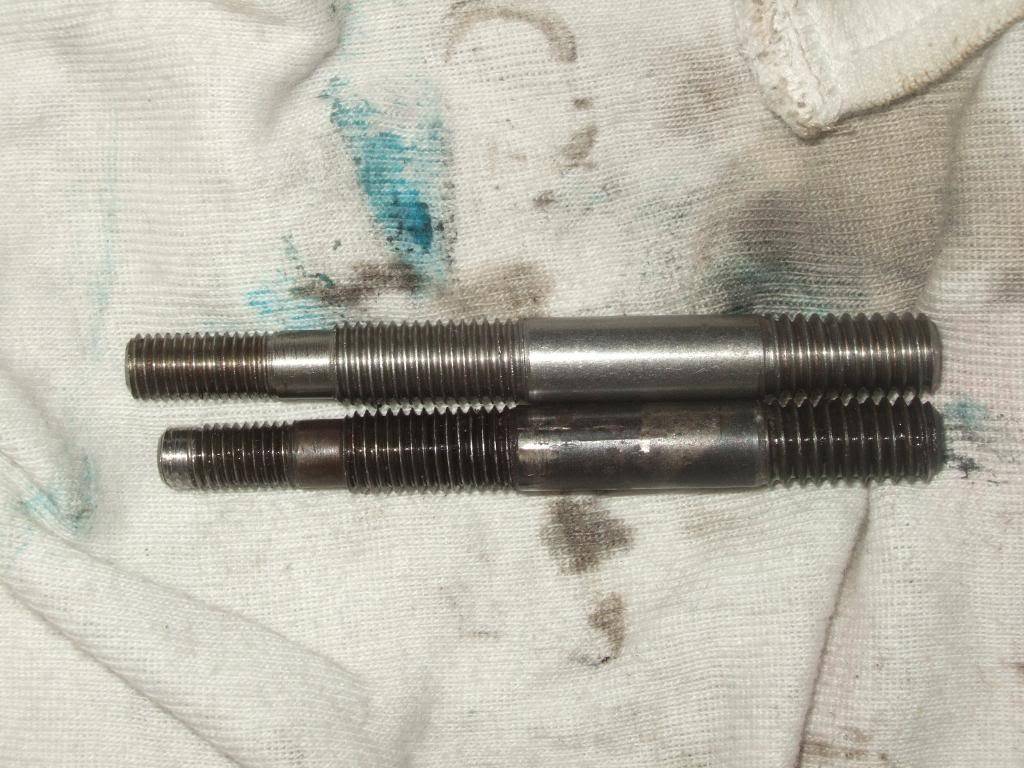 Anyway with a bit of loctite on the bottom thread I screwed it in and tightened it up. 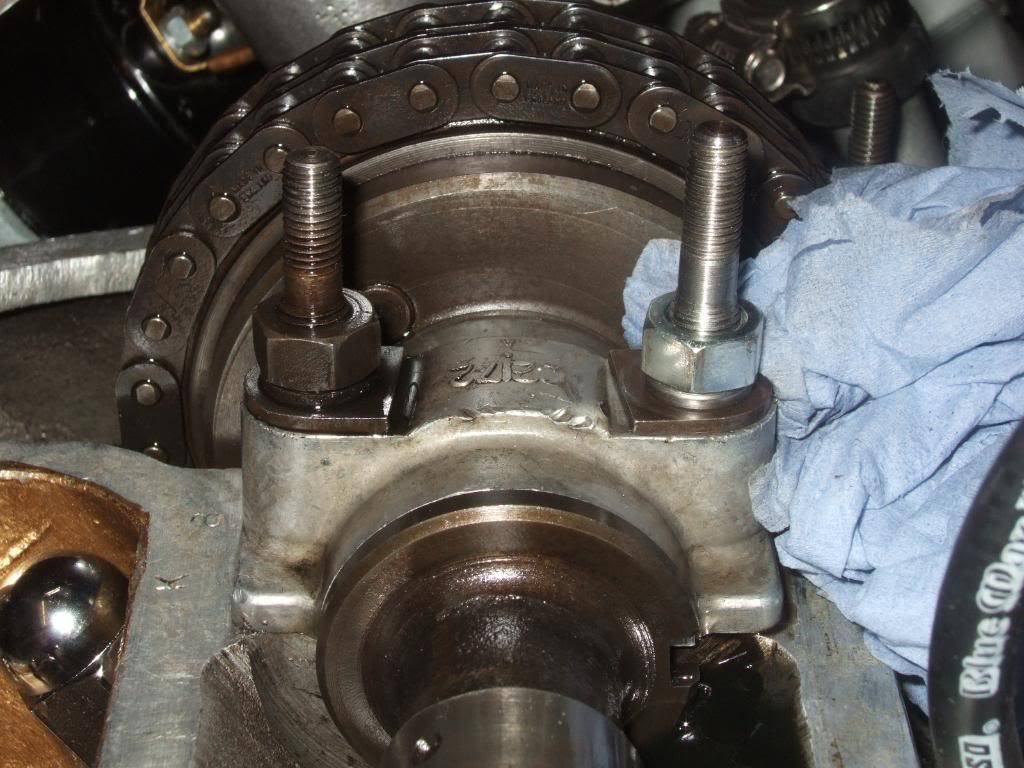 Job done My cam cover should be in the wifes boot as she collected it on the way to clinic tonight so when shes home from work I'll check out the workmanship from the welders | |
|
| | |
Sponsored content
| | Subject: Re: Baselining - 369 HBF - 860871 - Before the Upgrades | |
| |
|
| | |
| | Baselining - 369 HBF - 860871 - Before the Upgrades | |
|